

 800+ IT
News
als RSS Feed abonnieren
800+ IT
News
als RSS Feed abonnieren📚 Remotely Accessing Secure Kali Pi
💡 Newskategorie: Tools
🔗 Quelle: kali.org
In Secure Kali Pi (2022), the first blog post in the Raspberry Pi series, we set up a Raspberry Pi 4 with full disk encryption. We mentioned that we can leave it somewhere as a drop box. This brought up the question, “If it is not on my local network how do I connect to it to unlock it?” So we will now answer this by showing a few different ways to connect to our secure Kali Pi drop box. This includes:
- Wireless 802.11:
- As a client on an existing network(s) (only if we know any details ahead of time to pre-configure)
- Create an access point, to become a new network (that we can access if we are in physical distance to the device)
- Wired ethernet:
- Using static network settings (if we know the details ahead of time to pre-configure it)
- DHCP to automatically discover network values (which creates noise)
After getting internet access, we will use a Virtual Private Network to remotely connect back to a server of our choosing, which we can also join from anywhere online, thus getting around the requirements of having to port forward on any firewalls.
Ingredients
- Drop box - Raspberry Pi 4
- Pre-configured as of our Secure Kali Pi blog post
- Wi-Fi - We will be using the on-board wireless adapter (to make the device as compact as possible for our drop box)
- However if the performance is not sufficient for your needs, an external compatible wireless adapter may give greater range
- External server - A pre-created & harden OpenVPN service
- Creating this is out-of-scope for this blog post
Pre-Config Wireless 802.11
Overview
While wired networking in the initramfs does not require a lot of extras, wireless has a few more moving parts. To enable wireless support, we need to find:
- The kernel Wi-Fi modules that need to be in the initramfs (Depends on hardware)
- The Wi-Fi firmware files that need to be in the initramfs (Depends on hardware)
- The Wireless interface name (Kali defaults to:
wlan0) - Additional packages to increase functionally. Either:
- wpa_supplicant to connect as a client to a wireless network
- hostapd to create an access point for a new wireless network
Additionally, knowing the hostname of your Raspberry Pi can help find it, as well as blend in, in your target environment.
Interface Name
First, we need to know what our wireless interface is called.
In Kali we disable predictable interface names by default, so the first wireless device will be wlan0.
As long as there is no other hardware plugged into the Raspberry Pi at this stage, it should stand out:
kali@kalipi:~$ ip a
: lo: <LOOPBACK,UP,LOWER_UP> mtu 65536 qdisc noqueue state UNKNOWN group default qlen 1000
link/loopback 00:00:00:00:00:00 brd 00:00:00:00:00:00
inet 127.0.0.1/8 scope host lo
valid_lft forever preferred_lft forever
inet6 ::1/128 scope host
valid_lft forever preferred_lft forever
2: eth0: <BROADCAST,MULTICAST,UP,LOWER_UP> mtu 1500 qdisc mq state UP group default qlen 1000
link/ether dc:a6:32:b0:07:ca brd ff:ff:ff:ff:ff:ff
inet 192.168.42.19/24 brd 192.168.42.255 scope global dynamic eth0
valid_lft 63997sec preferred_lft 63997sec
inet6 fe80::dea6:32ff:feb0:7ca/64 scope link
valid_lft forever preferred_lft forever
3: wlan0: <NO-CARRIER,BROADCAST,MULTICAST,UP> mtu 1500 qdisc pfifo_fast state DOWN group default qlen 1000
link/ether 2a:54:d3:ee:62:95 brd ff:ff:ff:ff:ff:ff permaddr dc:a6:32:b0:07:cb
Wi-Fi Modules
We are now going to discover what modules are needed in order for our wireless device to come up.
On most ARM systems, the wireless device is typically connected via SDIO, and unfortunately we do not have a command like lspci to list any devices on the SDIO bus, but we can use dmesg and grep to look:
kali@kalipi:~$ dmesg | grep wlan
kali@kalipi:~$
Since we were returned directly to the prompt, this means that “wlan” is not found in the dmesg output. As we mention in the Kali Raspberry Pi 4 documentation we use the nexmon firmware for the Raspberry Pi devices, so lets try searching for that instead:
kali@kalipi:~$ dmesg | grep nexmon
[ 5.070542] brcmfmac: brcmf_c_preinit_dcmds: Firmware: BCM4345/6 wl0: Oct 3 2021 18:14:30 version 7.45.206 (nexmon.org: 2.2.2-343-ge3c8-dirty-5) FWID 01-88ee44ea
As we can see in the output above, brcmfmac is the driver that is giving us the message. There is a handy command that comes from the kmod package, called modinfo which will give us information about any module that the kernel has.
Now we know that the wireless card on the Raspberry Pi uses the brcmfmac driver. So lets run modinfo brcmfmac and see what information it gives us:
kali@kalipi:~$ modinfo brcmfmac
filename: /lib/modules/5.15.44-Re4son-v8l+/kernel/drivers/net/wireless/broadcom/brcm80211/brcmfmac/brcmfmac.ko
license: Dual BSD/GPL
description: Broadcom 802.11 wireless LAN fullmac driver.
author: Broadcom Corporation
firmware: brcm/brcmfmac*-sdio.*.bin
firmware: brcm/brcmfmac*-sdio.*.txt
[...]
srcversion: 913634DB95F858E921F71C1
[...]
alias: sdio:c*v02D0dA887*
depends: brcmutil,cfg80211
intree: Y
name: brcmfmac
vermagic: 5.15.44-Re4son-v8l+ SMP preempt mod_unload modversions aarch64
parm: txglomsz:Maximum tx packet chain size [SDIO] (int)
parm: debug:Level of debug output (int)
parm: p2pon:Enable legacy p2p management functionality (int)
parm: feature_disable:Disable features (int)
parm: alternative_fw_path:Alternative firmware path (string)
parm: fcmode:Mode of firmware signalled flow control (int)
parm: roamoff:Do not use internal roaming engine (int)
parm: iapp:Enable partial support for the obsoleted Inter-Access Point Protocol (int)
parm: ignore_probe_fail:always succeed probe for debugging (int)
As you can see, there is quite a lot of information given there. A quick overview of it:
- Where the module file is (
filename) - The license
- The description
- The author
- The firmware files it can use
- Aliases used to figure out if this is the module to use when a device is found
- Any module dependencies (
depends) - Whether the module comes from in the kernel tree
- The name of the module
- The version magic
- Any parameters (
params)
For what we need, the dependencies section is the key.
When we read the man page for modinfo, we see that it offers the -F flag to limit the output to certain fields. Since we currently care about the dependencies, let’s re-run modinfo passing -F depends since that is what we want to know.
To make it easier to understand the output, we will not group multiple modules together:
kali@kalipi:~$ modinfo -F depends brcmfmac
brcmutil,cfg80211
So in our case, the brcmfmac module depends on both brcmutil, and cfg80211. So we run modinfo on both of those as well to see their dependencies, if any:
kali@kalipi:~$ modinfo -F depends brcmutil
kali@kalipi:~$
Notice that the line is empty. This means that brcmutil does not have any additional module dependencies.
Now we check cfg80211, the other dependency that was listed:
kali@kalipi:~$ modinfo -F depends cfg80211
rfkill
Here we see that cfg80211’s depends has an additional dependency on the rfkill module. So we run modinfo against it as well:
kali@kalipi:~$ modinfo -F depends rfkill
kali@kalipi:~$
Like brcmutil, rfkill does not have any output, so there are no dependencies. We now have our list of modules that we need to add to the initramfs:
brcmfmacbrcmutilcfg80211rfkill
Wi-Fi Firmware
We now need the firmware for the Wi-Fi card. As before, we use the modinfo command, but this time we will search for firmware to see what firmware the module can use:
kali@kalipi:~$ modinfo brcmfmac | grep firmware
firmware: brcm/brcmfmac*-sdio.*.bin
firmware: brcm/brcmfmac*-sdio.*.txt
[...]
On Linux systems, the default firmware search path is /lib/firmware/ so the full path to the above would be:
/lib/firmware/brcmfmac*-sdio.*.bin/lib/firmware/brcmfmac*-sdio.*.txt
Notice the wildcards (*) in the firmware names. This means that it will match any of those files, so we will simply include all of the firmware that is in /lib/firmware/brcm, and this would allow for using wireless on not just our current Raspberry Pi 4, but if we were to plug our secure Kali Pi SD Card into a Raspberry Pi 3, or maybe even the Raspberry Pi Zero 2 W, we would be able to get wireless on them as well.
Binaries
Lastly we need the the binaries that are used for connecting to wireless networks on Linux.
A typical Kali installation has NetworkManager installed, and that handles wireless networks for us in a graphical desktop environment. But since we are doing this long before the full Kali system is available we need the wpa_supplicant binary, from the wpasupplicant package.
Additionally, we will want to check we are online in our script using the wpa_cli command, which will include that as well.
Change The Hostname
By default, Kali images for our Raspberry Pi images are set to the hostname of kali-raspberry-pi. Keeping in mind that some environments have hostname policies, you might want to change the hostname to blend in with the target network better.
To change your hostname, you will want to run the command hostnamectl from the systemd package. Additionally, we will want to edit the /etc/hosts file, which the system uses for local name resolution.
As an example, if we were to be deploying in a Windows heavy environment, we might want to use a host name similar to what a Windows machine might use:
kali@kalipi:~$ sudo hostnamectl set-hostname DESKTOP-UL8M7HT
kali@kalipi:~$
kali@kalipi:~$ hostnamectl
Static hostname: DESKTOP-UL8M7HT
Icon name: computer
Machine ID: fb22604534b6499887f59dd16c7dfb7f
Boot ID: faa8f7e4d50e495faf34ab43a2cf86ba
Operating System: Kali GNU/Linux Rolling
Kernel: Linux 5.15.44-Re4son-v8+
Architecture: arm64
And then edit the /etc/hosts file as well, changing the line that has kali-raspberry-pi in it to be DESKTOP-UL8M7HT:
127.0.1.1 DESKTOP-UL8M7HT
127.0.0.1 localhost
::1 localhost ip6-localhost ip6-loopback
fe00::0 ip6-localnet
ff00::0 ip6-mcastprefix
ff02::1 ip6-allnodes
ff02::2 ip6-allrouters
You will need to reboot the system for the changes to take effect.
Wi-Fi Connection
Like we did with secure Kali Pi, we need to make changes to our system, using the information we gathered above, to boot the system, handle the Wi-Fi network, making the device accessible.
Client Mode
We already know what the wireless network(s) credentials are, and now we are going to join them.
First up is the initramfs hook for the Wi-Fi firmware.
We will create the file /etc/initramfs-tools/hooks/zz-brcm and add the following:
#!/bin/sh
set -e
PREREQ=""
prereqs()
{
echo "${PREREQ}"
}
case "${1}" in
prereqs)
prereqs
exit 0
;;
esac
. /usr/share/initramfs-tools/hook-functions
echo "Copying firmware files for brcm to initramfs"
cp -r /lib/firmware/brcm ${DESTDIR}/lib/firmware/
Next, we will do the hook for the modules and wpa_supplicant files we need.
We will use /etc/initramfs-tools/hooks/enable-wireless which contains:
#!/bin/sh
set -e
PREREQ=""
prereqs()
{
echo "${PREREQ}"
}
case "${1}" in
prereqs)
prereqs
exit 0
;;
esac
. /usr/share/initramfs-tools/hook-functions
# Add Wi-Fi drivers
WIFI_DRIVERS="brcmfmac brcmutil cfg80211 rfkill"
for x in ${WIFI_DRIVERS}; do
manual_add_modules ${x}
done
copy_exec /sbin/wpa_supplicant
copy_exec /sbin/wpa_cli
copy_file config /etc/initramfs-tools/wpa_supplicant.conf /etc/wpa_supplicant.conf
So now that we have our hooks that copy the Wi-Fi firmware, modules, and wpa_suppliant files, we need to write a script to use them in the initramfs.
One important thing to note about scripts in an initramfs, is that there is no guarantee on the order, so we create it with the name a_enable_wireless so that alphabetically it should be the first script that gets run.
The file /etc/initramfs-tools/scripts/init-premount/a_enable_wireless looks like:
#!/bin/sh
set -e
PREREQ=""
prereqs()
{
echo "${PREREQ}"
}
case "${1}" in
prereqs)
prereqs
exit 0
;;
esac
. /scripts/functions
WIFI_INTERFACE="wlan0"
alias WPACLI="/sbin/wpa_cli -p/tmp/wpa_supplicant -i${WIFI_INTERFACE}"
log_begin_msg "Sleeping for 5 seconds to allow WLAN interface to become ready"
sleep 5
log_end_msg
log_begin_msg "Starting WLAN connection"
/sbin/wpa_supplicant -i${WIFI_INTERFACE} -c/etc/wpa_supplicant.conf -P/run/initram-wpa_supplicant.pid -B -f /tmp/wpa_supplicant.log
# Wait for AUTH_LIMIT seconds, then check the status
AUTH_LIMIT=60
echo -n "Waiting for connection (max ${AUTH_LIMIT} seconds)"
while [ $AUTH_LIMIT -ge 0 -a $(WPACLI status | grep wpa_state) != "wpa_state=COMPLETED" ]
do
sleep 1
echo -n "."
AUTH_LIMIT=$(expr $AUTH_LIMIT - 1)
done
echo ""
if [ $(WPACLI status | grep wpa_state) != "wpa_state=COMPLETED" ]; then
ONLINE=0
log_failure_msg "WLAN offline after timeout"
echo
panic
else
ONLINE=1
log_success_msg "WLAN online"
echo
fi
configure_networking
Additionally, we need to kill the networking once we are booted, so that the actual system can use the device and connect properly.
This script /etc/initramfs-tools/scripts/local-bottom/kill_wireless is made up with:
#!/bin/sh
set -e
PREREQ=""
prereqs()
{
echo "${PREREQ}"
}
case "$1" in
prereqs)
prereqs
exit 0
;;
esac
echo "Killing wpa_supplicant so the system takes over later"
kill $(cat /run/initram-wpa_supplicant.pid)
As a reminder, scripts need to be executable if you want them to run.
Additionally, if a hook is not marked as executable, initramfs-tools will skip that hook when running update-initramfs:
kali@kalipi:~$ sudo chmod +x /etc/initramfs-tools/hooks/zz-brcm
kali@kalipi:~$ sudo chmod +x /etc/initramfs-tools/hooks/enable-wireless
kali@kalipi:~$ sudo chmod +x /etc/initramfs-tools/scripts/init-premount/a_enable_wireless
kali@kalipi:~$ sudo chmod +x /etc/initramfs-tools/scripts/local-bottom/kill_wireless
Now we use the information that we have gathered ahead of time to create our wpa_supplciant.conf file to include the SSID & PSK, and any other possible options that the Wi-Fi network connection might need. You can read more information about the file by running man wpa_supplicant.conf.
A shortcut to generating one is to simply run wpa_passphrase SSID PASSWORD where SSID is the name of the wireless network, and PASSWORD is the passphrase (aka PSK) for the network.
In this example, we are going to be connecting our Raspberry Pi to the network kali wireless with a passphrase of secure kali wireless.
If your wireless network name has spaces in it, do not forget to quote the SSID in the command!
One thing to note here, when you use wpa_passphrase to generate the PSK, it includes the passphrase in plain text. Because of this, we will strip that line out of the file, just in case if anyone else happens to come across the device and knows how to look inside an initramfs file, we do not want them seeing the plain text password to the network! And because we are using tee rather than > to write the file, we will see the file’s contents as its written:
kali@kalipi:~$ wpa_passphrase "kali wireless" "secure kali wireless" | grep -v \#psk | tee wpa_supplicant.conf
If you want to add multiple wireless networks to your wpa_supplicant.conf file, we can append the file rather than overwriting it:
kali@kalipi:~$ wpa_passphrase "kali wireless the second" "even more secure kali wireless" | grep -v \#psk | tee -a wpa_supplicant.conf
Now we copy the newly generated configuration into /etc/initramfs-tools/ as that is where our enable-wireless hook expects it to be:
kali@kalipi:~$ sudo cp -v wpa_supplicant.conf /etc/initramfs-tools/wpa_supplicant.conf
As a reminder, we covered which kernel version to use in our secure Kali Pi post, and since we used the Raspberry Pi 4, we will continue to do so here, so our kernel version is 5.15.44-Re4son-v8l+
Now that we have all the parts that we need, we simply run mkinitramfs -o /boot/initramfs.gz 5.15.44-Re4son-v8l+ to generate the initramfs file with our changes to add wireless networking.
We can also verify that our changes are in the initramfs by running lsinitramfs /boot/initramfs.gz and use grep to show the files we are looking for:
kali@kalipi:~$ mkinitramfs -o /boot/initramfs.gz 5.15.44-Re4son-v8l+
kali@kalipi:~$
kali@kalipi:~$ lsinitramfs /boot/initramfs.gz | grep -e wpa -e brcm
etc/wpa_supplicant.conf
usr/lib/firmware/brcm
usr/lib/firmware/brcm/BCM-0a5c-6410.hcd
usr/lib/firmware/brcm/BCM-0bb4-0306.hcd
usr/lib/firmware/brcm/BCM43430A1.hcd
usr/lib/firmware/brcm/BCM43430B0.hcd
usr/lib/firmware/brcm/BCM4345C0.hcd
usr/lib/firmware/brcm/BCM4345C5.hcd
usr/lib/firmware/brcm/brcmfmac43430-sdio.bin
usr/lib/firmware/brcm/brcmfmac43430-sdio.rpi.bin
usr/lib/firmware/brcm/brcmfmac43430-sdio.txt
usr/lib/firmware/brcm/brcmfmac43436-sdio.bin
usr/lib/firmware/brcm/brcmfmac43436-sdio.clm_blob
usr/lib/firmware/brcm/brcmfmac43436-sdio.txt
usr/lib/firmware/brcm/brcmfmac43436s-sdio.bin
usr/lib/firmware/brcm/brcmfmac43436s-sdio.txt
usr/lib/firmware/brcm/brcmfmac43455-sdio.bin
usr/lib/firmware/brcm/brcmfmac43455-sdio.clm_blob
usr/lib/firmware/brcm/brcmfmac43455-sdio.nexmon-7_45_154.bin
usr/lib/firmware/brcm/brcmfmac43455-sdio.nexmon-7_45_189.bin
usr/lib/firmware/brcm/brcmfmac43455-sdio.nexmon-7_45_206.bin
usr/lib/firmware/brcm/brcmfmac43455-sdio.rpi.bin
usr/lib/firmware/brcm/brcmfmac43455-sdio.txt
usr/lib/firmware/brcm/brcmfmac43456-sdio.bin
usr/lib/firmware/brcm/brcmfmac43456-sdio.clm_blob
usr/lib/firmware/brcm/brcmfmac43456-sdio.txt
usr/lib/modules/5.15.44-Re4son-v8l+/kernel/drivers/i2c/busses/i2c-brcmstb.ko
usr/lib/modules/5.15.44-Re4son-v8l+/kernel/drivers/net/wireless/broadcom/brcm80211
usr/lib/modules/5.15.44-Re4son-v8l+/kernel/drivers/net/wireless/broadcom/brcm80211/brcmfmac
usr/lib/modules/5.15.44-Re4son-v8l+/kernel/drivers/net/wireless/broadcom/brcm80211/brcmfmac/brcmfmac.ko
usr/lib/modules/5.15.44-Re4son-v8l+/kernel/drivers/net/wireless/broadcom/brcm80211/brcmutil
usr/lib/modules/5.15.44-Re4son-v8l+/kernel/drivers/net/wireless/broadcom/brcm80211/brcmutil/brcmutil.ko
usr/sbin/wpa_cli
usr/sbin/wpa_supplicant
As we can see from the output, our initramfs has our modules, firmware, and wpa_supplicant files for the Wi-Fi chip the Raspberry Pi 4 uses!
If you are only interested in using the Raspberry Pi as a Wi-Fi client, you can stop here, and unmount everything like we did in our secure Kali Pi blog post.
Static IP
If we want to connect to a wireless network and set a static IP, we need to do similar to above. Adding in the wpa_supplicant files, but now we set the IP manually in the /boot/cmdline.txt file, which is what the Raspberry Pi uses for the kernel command line arguments.
ip=<client-ip>:<server-ip>:<gw-ip>:<netmask>:<hostname>:<device>:<autoconf>:<dns0-ip>:<dns1-ip>:<ntp0-ip>
For more information, see the nfsroot kernel documentation.
The important thing is to set the options we need, and leave empty the ones we do not. The default cmdline.txt has the following in it:
kali@kalipi:~$ cat /boot/cmdline.txt
console=serial0,115200 console=tty1 root=PARTUUID=da77a68a-02 rootfstype=ext4 fsck.repair=yes rootwait net.ifnames=0
The cmdline.txt requires everything to be on one line, so if we want to set our IP address to 192.168.42.3, with a gateway of 192.168.42.1, our hostname to securekalipi, for the wlan0 device, our /boot/cmdline.txt file will look like:
console=serial0,115200 console=tty1 root=PARTUUID=da77a68a-02 rootfstype=ext4 fsck.repair=yes rootwait net.ifnames=0 ip=192.168.42.3::192.168.42.1:255.255.255.0:securekalipi:wlan0
As the documentation states, anything that is not specified uses the default settings, so we simply skip putting anything in between the : that we want to skip.
Access Point Mode
You should not use the wireless in both access point mode and client mode at the same time. It is possible, however the networks need to be on the same channels, and we do not cover this in order to keep the blog post simple. You should only use client mode, or access point mode, but not both from this blog post. We will talk about this again at the end of the blog post.
Similarly to how we set up connecting our Raspberry Pi to a wireless network as a client, if we want to set it up as an access point to connect to, we need to add into the initramfs. Like last time, our Wi-Fi drivers, the firmware just this time, its different software and configurations.
The package you would use on Linux to set up an access point is hostapd which does not come installed by default, so we will install it first.
As always, before we install software, we update what packages are available to ensure we are installing the newest version:
kali@kalipi:~$ sudo apt update
Hit:1 http://http.re4son-kernel.com/re4son kali-pi InRelease
Hit:2 http://kali.download/kali kali-rolling InRelease
Reading package lists... Done
Building dependency tree... Done
Reading state information... Done
All packages are up to date.
kali@kalipi:~$
kali@kalipi:~$ sudo apt install hostapd
Reading package lists... Done
Building dependency tree... Done
Reading state information... Done
The following NEW packages will be installed:
hostapd
0 upgraded, 1 newly installed, 0 to remove and 0 not upgraded.
[...]
Now we will set it up and test it, to make sure everything works, before we add it to our initramfs to use:
kali@kalipi:~$ sudo vim /etc/hostapd/hostapd.conf
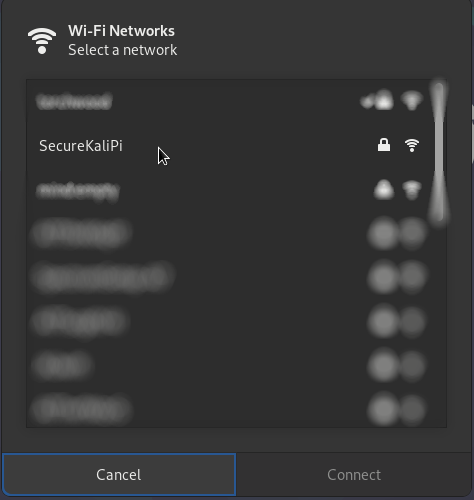
Our configuration will have us create a network on channel 7, with a network name of SecureKaliPi, and a password of SecureKaliPiWiFi.
To use WPA2 the passphrase should be between 8 and 64 characters in length.
country_code=US
interface=wlan0
ssid=SecureKaliPi
hw_mode=g
channel=7
macaddr_acl=0
auth_algs=1
ignore_broadcast_ssid=0
wpa=2
wpa_psk=16270ab793c4420e0c3dd6bf46ede4f10bd71ffbe6a79998dc70ccd8dea18680
wpa_key_mgmt=WPA-PSK
wpa_pairwise=TKIP
rsn_pairwise=CCMP
The PSK is a value derived from the SSID of the network and the password. The easiest way to get this is very similar to the way we created the wpa_supplicant.conf file above - we run wpa_passphrase SecureKaliPi SecureKaliPiWiFi and then we copy the psk line that is not the plaintext password:
kali@kali:~$ wpa_passphrase SecureKaliPi SecureKaliPiWiFi
network={
ssid="SecureKaliPi"
#psk="SecureKaliPiWiFi"
psk=16270ab793c4420e0c3dd6bf46ede4f10bd71ffbe6a79998dc70ccd8dea18680
}
You can, and should, change the configuration to match your needs. If you would like to set it up to use 5GHz, you would need to change hw_mode=g to hw_mode=a, but keep in mind that if you are using 5GHz you need to change the channel. Wikipedia has a list of allowed combinations for different countries.
One setting you may want to change as well, is the ignore_broadcast_ssid setting.
If we read the default configuration file, we can see that this option is what will allow us to hide our SSID from being broadcast:
# Send empty SSID in beacons and ignore probe request frames that do not
# specify full SSID, i.e., require stations to know SSID.
# default: disabled (0)
# 1 = send empty (length=0) SSID in beacon and ignore probe request for
# broadcast SSID
# 2 = clear SSID (ASCII 0), but keep the original length (this may be required
# with some clients that do not support empty SSID) and ignore probe
# requests for broadcast SSID
ignore_broadcast_ssid=0
Now that we have written our hostapd.conf we can quickly test if it works by running:
kali@kalipi:~$ sudo /usr/sbin/hostapd /etc/hostapd/hostapd.conf
wlan0: interface state UNINITIALIZED->COUNTRY_UPDATE
wlan0: interface state COUNTRY_UPDATE->ENABLED
wlan0: AP-ENABLED
If everything is set up correctly, you should see the above output. If you get any errors, you will need to correct those and re-run the command.
Now that hostapd is set up, and we have tested that it works, lets add it to our initramfs.
Because we need to add some binaries to the initramfs, we also need to include any dependencies that may be needed. So first we check which binary we need:
kali@kalipi:~$ dpkg -L hostapd | grep bin
/usr/sbin
/usr/sbin/hostapd
/usr/sbin/hostapd_cli
We need the hostapd binary, and to check its dependencies we will run ldd which tells us what libraries the binary depends on:
kali@kalipi:~$ ldd /usr/sbin/hostapd
linux-vdso.so.1 (0x0000007f89561000)
libnl-3.so.200 => /lib/aarch64-linux-gnu/libnl-3.so.200 (0x0000007f892e2000)
libnl-genl-3.so.200 => /lib/aarch64-linux-gnu/libnl-genl-3.so.200 (0x0000007f892c1000)
libnl-route-3.so.200 => /lib/aarch64-linux-gnu/libnl-route-3.so.200 (0x0000007f89219000)
libdl.so.2 => /lib/aarch64-linux-gnu/libdl.so.2 (0x0000007f891f8000)
libssl.so.3 => /lib/aarch64-linux-gnu/libssl.so.3 (0x0000007f89144000)
libcrypto.so.3 => /lib/aarch64-linux-gnu/libcrypto.so.3 (0x0000007f88cfe000)
libm.so.6 => /lib/aarch64-linux-gnu/libm.so.6 (0x0000007f88c5d000)
libc.so.6 => /lib/aarch64-linux-gnu/libc.so.6 (0x0000007f88aaf000)
/lib/ld-linux-aarch64.so.1 (0x0000007f89524000)
Because hostapd also uses iw to control its interfaces, we need to also include it. And like above, we want to check the dependencies it uses:
kali@kalipi:~$ ldd /usr/sbin/iw
linux-vdso.so.1 (0x0000007fba486000)
libnl-genl-3.so.200 => /lib/aarch64-linux-gnu/libnl-genl-3.so.200 (0x0000007fba3c0000)
libnl-3.so.200 => /lib/aarch64-linux-gnu/libnl-3.so.200 (0x0000007fba37f000)
libc.so.6 => /lib/aarch64-linux-gnu/libc.so.6 (0x0000007fba1d1000)
/lib/ld-linux-aarch64.so.1 (0x0000007fba449000)
As we can see, hostapd and iw rely on a number of libraries that will need to be in the initramfs.
So we create a hook to include hostapd with these additional libraries so the hostapd and iw binaries can run, /etc/initramfs-tools/hooks/hostapd:
#!/bin/sh
set -e
PREREQ=""
prereqs()
{
echo "${PREREQ}"
}
case "${1}" in
prereqs)
prereqs
exit 0
;;
esac
. /usr/share/initramfs-tools/hook-functions
copy_exec /usr/sbin/hostapd /sbin
copy_exec /usr/sbin/iw
# Find our library directory and copy files from there
LIBC_DIR=$(ldd /usr/sbin/hostapd | sed -nr 's#.* => (/lib.*)/libc\.so\.[0-9.-]+ \(0x[[:xdigit:]]+\)$#\1#p')
find -L "$LIBC_DIR" -maxdepth 1 -name 'libnss_files.*' -type f | while read so; do
copy_exec "$so"
done
# Copy in the libnl librares that hostapd and iw depend on
copy_exec "/lib/aarch64-linux-gnu/libnl-route-3.so.200"
copy_exec "/lib/aarch64-linux-gnu/libnl-genl-3.so.200"
copy_exec "/lib/aarch64-linux-gnu/libnl-3.so.200"
# Copy our hostapd.conf file
copy_file config /etc/hostapd/hostapd.conf /etc/hostapd
# Add Wi-Fi drivers
WIFI_DRIVERS="brcmfmac brcmutil cfg80211 rfkill"
for x in ${WIFI_DRIVERS}; do
manual_add_modules ${x}
done
# Add Wi-Fi firmware
echo "Copying firmware files for brcm to initramfs"
cp -r /lib/firmware/brcm ${DESTDIR}/lib/firmware/
Now we add our script, which sets our IP address (192.168.42.1/24) for the access point as well as makes hostapd, and DHCP server run, /etc/initramfs-tools/scripts/init-premount/hostapd. We will address the networking side after this script:
#!/bin/sh
set -e
PREQ="udev network"
prereqs() {
echo "$PREREQ"
}
case "$1" in
prereqs)
prereqs
exit 0
;;
esac
run_hostapd() {
ifconfig wlan0 up
ifconfig wlan0 192.168.42.1 netmask 255.255.255.0 broadcast 192.168.42.255
route add 192.168.42.0/24 dev wlan0
exec udhcpd /etc/udhcpd.conf
exec /sbin/hostapd /etc/hostapd/hostapd.conf
}
. /scripts/functions
sleep 10
run_hostapd &
echo $! >/run/hostapd.pid
Additionally, we want to start a DHCP server so that when we connect to the Raspberry Pi’s access point, we get an IP address. Normally, you would use a package like isc-dhcp-server to run a DHCP server, but since we have already got busybox which has a DHCP server applet enabled in the initramfs, we will just use that instead. We do not need a fully featured DHCP server just to unlock our Raspberry Pi and let it finish booting.
First we set up the configuration file for it /etc/udhcpd.conf with the following information:
start 192.168.42.2 # IP address range to give out
end 192.168.42.100 # Last IP address to give out
interface wlan0 # Device that the DHCP server listens on
remaining yes #
opt router 192.168.42.1 # The Raspberry Pi's IP address to use on wlan0
opt subnet 255.255.255.0 #
opt dns 8.8.8.8 4.2.2.2 # DNS servers to pass (not really required for our needs)
opt lease 600 # 10 minute DHCP lease
And we create our hook which copies in our DHCP config, /etc/initramfs-tools/hooks/udhcpd:
#!/bin/sh
set -e
PREREQ=""
prereqs()
{
echo "${PREREQ}"
}
case "${1}" in
prereqs)
prereqs
exit 0
;;
esac
. /usr/share/initramfs-tools/hook-functions
# Copy our hostapd.conf file
copy_file config /etc/udhcpd.conf /etc/udhcpd.conf
Like our previous hooks and scripts, we need to make sure the executable flag is set:
kali@kalipi:~$ sudo chmod +x /etc/initramfs-tools/hooks/hostapd
kali@kalipi:~$ sudo chmod +x /etc/initramfs-tools/hooks/udhcpd
kali@kalipi:~$ sudo chmod +x /etc/initramfs-tools/scripts/init-premount/hostapd
And now that everything is in place for hostapd support, we need to build the initramfs so that it has our changes in there:
kali@kalipi:~$ mkinitramfs -o /boot/initramfs.gz 5.15.44-Re4son-v8l+
kali@kalipi:~$
kali@kalipi:~$ lsinitramfs /boot/initramfs.gz | grep -e hostapd -e udhcpd
etc/hostapd
etc/udhcpd.conf
scripts/init-premount/hostapd
usr/sbin/hostapd
usr/sbin/udhcpd
Once we see all the parts are there, we are able to reboot the Raspberry Pi and we should see our Wi-Fi network from another machine.
Connect to it, and we should be able to unlock the device via SSH!
Wired Connection
By default, the wired connection on a Raspberry Pi will attempt to use DHCP to connect to a network when it is plugged in. You may want to set a static IP, we need to do similar to above, and set the IP manually in the /boot/cmdline.txt file, which is what the Raspberry Pi uses for the kernel command line arguments.
Static IP
The default /boot/cmdline.txt is set to:
kali@kalipi:~$ cat /boot/cmdline.txt
console=serial0,115200 console=tty1 root=PARTUUID=da77a68a-02 rootfstype=ext4 fsck.repair=yes rootwait net.ifnames=0
The format of /boot/cmdline.txt should look similar to:
ip=<client-ip>:<server-ip>:<gw-ip>:<netmask>:<hostname>:<device>:<autoconf>:<dns0-ip>:<dns1-ip>:<ntp0-ip>
/boot/cmdline.txt requires everything to be on one line, so if we want to set our IP address to 192.168.42.3, with a gateway of 192.168.42.1, our hostname to securekalipi, for the eth0 device, our /boot/cmdline.txt file will look like:
console=serial0,115200 console=tty1 root=PARTUUID=da77a68a-02 rootfstype=ext4 fsck.repair=yes rootwait net.ifnames=0 ip=192.168.42.3::192.168.42.1:255.255.255.0:securekalipi:eth0
As the documentation states, anything that is not specified uses the default settings, so we simply skip putting anything in between the : that we want to skip.
And we tell it to use the eth0 device, as that is the default device name for ethernet on the Raspberry Pi.
VPN Tunnel
Before we go over connecting to a VPN, it is important to note that the information will be stored in the initramfs file, unencrypted. This particular use case is NOT about securing the connection, but instead using the VPN to tunnel out of the network to bypass various firewall rules. As such, this connection should be treated as if the traffic is clear text.
After we have got our device connected to the network, great! We are now wanting to remotely connect to it. Due to firewalls on the network, being able to directly SSH into the device will be next to impossible (as we cannot do port forwarding). So we are needing the device to connect back to us (bind vs reverse)! You may opt for a SSH reverse connection, where the device continuously polls back home, however, we have opted to use a VPN. You may wish to use OpenVPN, WireGuard, or something else. We have opted for OpenVPN, however we are not going to cover how to set up and secure an OpenVPN server.
Regardless of the reverse service used, network traffic may be filtered by firewall rules which may limit what services can be used. For example SSH (22/TCP) or OpenVPN (1194/UDP) default ports may not be allowed out. As a result, think of what typical end-users may often use the network for. Commonly you see a lot of web traffic, so HTTPS (443/TCP) should hopefully give a higher chance of success, such as HTTPS (443/TCP)! We will talk about this again at the end of the blog post.
If you have created a new private network by starting an access point, there is not going to be an upstream gateway configured. As a result, the VPN tunnel will not be able to connect to the internet. You will need to find another way to get online, by either using another mode (Wi-Fi client), or another interface (wired ethernet, mobile hotspot etc).
As always, to use OpenVPN before the system is booted we need our hook to copy the OpenVPN software and our client configuration in to our initramfs.
First up is the hook. This copies the software, its dependencies, and our configuration file into the initramfs. We gathered this information the same way we did with hostapd above, so we will not go over that again.
The OpenVPN hook, /etc/initramfs-tools/hooks/openvpn:
#!/bin/sh
set -e
PREREQ=""
prereqs() {
echo "$PREREQ"
}
case "$1" in
prereqs)
prereqs
exit 0
;;
esac
. /usr/share/initramfs-tools/hook-functions
[ -r /etc/crypttab ] || exit 0
copy_exec /usr/sbin/openvpn /sbin
copy_exec "/lib/aarch64-linux-gnu/libzstd.so.1"
copy_exec "/lib/aarch64-linux-gnu/libnsl.so.1"
copy_exec "/lib/aarch64-linux-gnu/liblzo2.so.2"
copy_exec "/lib/aarch64-linux-gnu/libresolv.so.2"
copy_exec "/lib/aarch64-linux-gnu/libpkcs11-helper.so.1"
copy_exec "/lib/aarch64-linux-gnu/libm.so.6"
# Copy in our configuration file and username/password files
cp -p /etc/initramfs-tools/openvpn/client/* ${DESTDIR}/etc/openvpn/client/
And then we have to add our OpenVPN script to run in the initramfs, that uses our configuration file to connect to our OpenVPN server. Because this is running before there is any way to interact with the system, we also need to be able to pass the username and password somehow. A quick check of the openvpn man page shows us:
--auth-user-passAuthenticate with server using username/password.
Valid syntaxes:
auth-user-pass
auth-user-pass upIf up is present, it must be a file containing username/password on 2 lines. If the password line is missing, OpenVPN will prompt for > one.
If up is omitted, username/password will be prompted from the console.
The option we want is --auth-user-pass up. So we will create a file called up with our username (dropboxuser) on the first line, and password (pass123) on the second line:
kali@kalipi:~$ echo dropboxuser | sudo tee /etc/openvpn/client/up
[...]
kali@kalipi:~$ echo pass123 | sudo tee -a /etc/openvpn/client/up
If your VPN connection does not require a username/password, you can remove the --auth-user-pass /etc/openvpn/up in the vpnflags variable below.
The script, which starts OpenVPN, /etc/initramfs-tools/scripts/init-premount/openvpn:
#!/bin/sh
set -e
PREREQ="udev networking"
prereqs() {
echo "$PREREQ"
}
case "$1" in
prereqs)
prereqs
exit 0
;;
esac
[ -x /sbin/openvpn ] || exit 0
run_openvpn() {
local vpnflags="--suppress-timestamps --nobind --config /etc/openvpn/client/openvpn.conf --auth-user-pass /etc/openvpn/client/up"
log_begin_msg "Starting OpenVPN"
exec /sbin/openvpn $vpnflags
ifconfig -a
}
. /scripts/functions
sleep 40
run_openvpn &
echo $! >/run/openvpn.pid
And like with the others, we make sure our hooks and scripts are executable:
kali@kalipi:~$ sudo chmod +x /etc/initramfs-tools/hooks/openvpn
kali@kalipi:~$ sudo chmod +x /etc/initramfs-tools/scripts/init-premount/openvpn
And now that everything is in place for connecting to OpenVPN, we need to build the initramfs so that it has our changes in there:
kali@kalipi:~$ mkinitramfs -o /boot/initramfs.gz 5.15.44-Re4son-v8l+
kali@kalipi:~$
kali@kalipi:~$ lsinitramfs /boot/initramfs.gz | grep -e openvpn
etc/openvpn
etc/openvpn/client
etc/openvpn/client/up
scripts/init-premount/openvpn
usr/sbin/openvpn
Now that the initramfs is updated, and we see that our changes are in there, we are able to reboot the Raspberry Pi. Once it starts booting, and once the network connection is available, it should connect to our OpenVPN server.
You will want to test this in your home lab, before you deploy it anywhere, to make sure it’s working:
kali@kali:~$ ssh kali@172.16.20.2
The authenticity of host '172.16.20.2' can't be established.
Are you sure you want to continue connecting (yes/no/[fingerprint])? yes
Warning: Permanently added '172.16.20.2' (ECDSA) to the list of known hosts.
kali@172.16.20.2's password:
Linux kali-raspberry-pi 5.15.44-Re4son-v8+ #1 SMP PREEMPT Debian kali-pi (2022-07-03) aarch64
The programs included with the Kali GNU/Linux system are free software;
the exact distribution terms for each program are described in the
individual files in /usr/share/doc/*/copyright.
Kali GNU/Linux comes with ABSOLUTELY NO WARRANTY, to the extent
permitted by applicable law.
┌──(kali㉿kali-raspberry-pi)-[~]
└─$
Summary
In this blog post, we have covered gathering information about our device, in this case it was a Raspberry Pi, but the information gathering holds true for any device running Kali that you might want to unlock remotely.
We also covered setting a static IP for both wired and Wi-Fi networks, setting up an access point, and using an OpenVPN connection, these are not specific to the Raspberry Pi, aside from the firmware and module for the Wi-Fi device.
We hope you found this blog post helpful, and if you have any questions or comments, please check out the Kali Discord server.
Food for Thought
To expand on this future, some improvements which we came up with:
- Rather than tunneling over OpenVPN, use other tools (such as dnscat2), ICMP (such as ptunnel) or a mixture of all three!
- Encapsulate the OpenVPN traffic (such as stunnel), making it legit HTTPS data, rather than only using default port
- Using WireGuard rather than OpenVPN
- Mobile connectivity (using an external 3G/4G/LTE adapter)
- Adding fall back method(s) - If Wi-Fi client is not working, create then a Wi-Fi access point
- “WLAN Knocking” - The Raspberry Pi is monitoring for a certain SSID being broadcasted (maybe from a certain MAC address), when detected, only then perform an action
We are sure you can also think outside of the box, and come up with additional ideas too. Please tweet us your ideas, and progress with your drop box!
Additional Resources
Wi-Fi in initramfs:
- Cryptmypi Experimental WiFi initramfs hook
- Enable Wireless networks in Debian Initramfs
- Raspberry Pi Zero W with the root FS mounted over NFS
- Remote Unlock via WiFi
Setting up hostapd:
...