800+ IT
News
als RSS Feed abonnieren
800+ IT
News
als RSS Feed abonnieren📚 Creating a scheduling app: I wish somebody showed me this technique when I first started coding 🤔
💡 Newskategorie: Programmierung
🔗 Quelle: dev.to
What is this article about?
In this article, you'll learn how to build a scheduling application that allows you to set your availability and share your profile links to enable others to book an appointment with you. You will also be notified via email when someone schedules an appointment.

Novu - the first open-source notification infrastructure
Just a quick background about us. Novu is the first open-source notification infrastructure. We basically help to manage all the product notifications. It can be In-App (the bell icon like you have in Facebook - Websockets), Emails, SMSs and so on.
I would be super happy if you could give us a star! And let me also know in the comments ❤️
https://github.com/novuhq/novu
Project Setup
Here, I'll guide you through creating the project environment for the scheduling application.
Create the project folder for the scheduling application by running the code below:
mkdir scheduling-app
cd scheduling-app
mkdir client server
Setting up the Node.js server
Navigate into the server folder and create a package.json file.
cd server & npm init -y
Install Express, Nodemon, and the CORS library.
npm install express cors nodemon
ExpressJS is a fast, minimalist framework that provides several features for building web applications in Node.js, CORS is a Node.js package that allows communication between different domains, and Nodemon is a Node.js tool that automatically restarts the server after detecting file changes.
Create an index.js file - the entry point to the web server.
touch index.js
Set up a Node.js server using Express.js. The code snippet below returns a JSON object when you visit the http://localhost:4000/api in your browser.
//👇🏻index.js
const express = require("express");
const app = express();
const PORT = 4000;

app.use(express.urlencoded({ extended: true }));
app.use(express.json());

app.get("/api", (req, res) => {
    res.json({
        message: "Hello world",
    });
});

app.listen(PORT, () => {
    console.log(`Server listening on ${PORT}`);
});
We'll create the various API routes later in this tutorial. For now, let's design the user interface for the application.
Setting up the React application
Here, I'll guide you through creating the application's user interface with React.js.
Navigate into the client folder via your terminal and create a new React.js project.
cd client
npx create-react-app ./
Install React Router, React-Toastify, and the React Timezone Select.
npm install react-toastify react-router-dom react-timezone-select
React Router is a JavaScript library that enables us to navigate between pages in a React application, and React Toastify is used to display colourful notifications to the users. React Timezone Select is a simple library that provides various available timezones per location.
Delete the redundant files, such as the logo and the test files from the React app, and update the App.js file to display Hello World as below.
function App() {
    return (
        <div>
            <p>Hello World!</p>
        </div>
    );
}
export default App;
Copy the CSS file required for styling the project here into the src/index.css file.
Building the user interface
In this section, I'll walk you through creating the various components required to build the application.
Update the App.js file to render the following components below:
import React from "react";
import { BrowserRouter, Routes, Route } from "react-router-dom";
//👇🏻 component
import Dashboard from "./components/Dashboard";
import Login from "./components/Login";
import Signup from "./components/Signup";
import Profile from "./components/Profile";
import BookUser from "./components/BookUser";
//👇🏻 React-Toastify configuration
import { ToastContainer } from "react-toastify";
import "react-toastify/dist/ReactToastify.css";

const App = () => {
    return (
        <div>
            <BrowserRouter>
                <Routes>
                    <Route path='/' element={<Login />} />
                    <Route path='/register' element={<Signup />} />
                    <Route path='/dashboard' element={<Dashboard />} />
                    <Route path='/profile/:id' element={<Profile />} />
                    <Route path='/book/:user' element={<BookUser />} />
                </Routes>
            </BrowserRouter>
            <ToastContainer />
        </div>
    );
};

export default App;
From the code snippet above, I imported the Login, Signup, Dashboard, Profile, and BookUser components. Create a components folder containing the files as done below:
cd client
mkdir components
cd components
touch Login.js Signup.js Dashboard.js Profile.js BookUser.js
- The Login and Signup components are the authentication routes.
- The Dashboard component is the homepage displayed to authenticated users - where they can set their availability.
- The Profile component displays the availability to the user, and the BookUser component allows others to schedule an appointment with them.
The Authentication components - Login and Signup
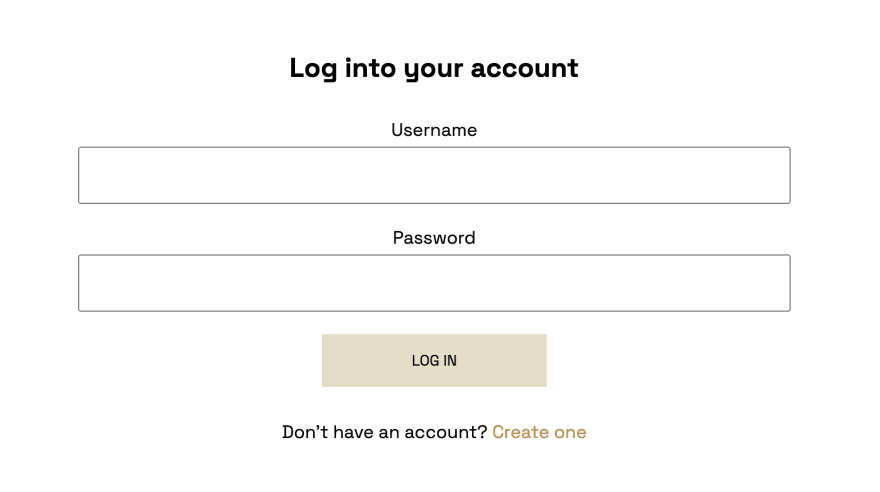
Copy the code below into the Login.js file to accept the user's username and password.
import React, { useState } from "react";
import { useNavigate, Link } from "react-router-dom";

const Login = () => {
    const [username, setUsername] = useState("");
    const [password, setPassword] = useState("");
    const navigate = useNavigate();

    const handleSubmit = (e) => {
        if (username.trim() && password.trim()) {
            e.preventDefault();
            console.log({ username, password });
            setPassword("");
            setUsername("");
        }
    };

    return (
        <main className='login'>
            <form className='login__form' onSubmit={handleSubmit}>
                <h2 className='login__title'>Log into your account</h2>
                <label htmlFor='username'>Username</label>
                <input
                    id='username'
                    name='username'
                    type='text'
                    value={username}
                    onChange={(e) => setUsername(e.target.value)}
                    className='username'
                />
                <label htmlFor='password'>Password</label>
                <input
                    id='password'
                    type='password'
                    name='password'
                    value={password}
                    onChange={(e) => setPassword(e.target.value)}
                    className='password'
                />
                <button className='loginButton'>LOG IN</button>
                <p style={{ textAlign: "center", marginTop: "30px" }}>
                    Don't have an account?{" "}
                    <Link className='link' to='/register'>
                        Create one
                    </Link>
                </p>
            </form>
        </main>
    );
};

export default Login;
Update the Signup.js component to allow users to create an account using their username, email, and password.
import React, { useState } from "react";
import { useNavigate, Link } from "react-router-dom";
import { handleRegister } from "../utils/resource";

const Signup = () => {
    const [username, setUsername] = useState("");
    const [password, setPassword] = useState("");
    const [email, setEmail] = useState("");
    const navigate = useNavigate();

    const handleSubmit = (e) => {
        e.preventDefault();
        if (username.trim() && password.trim() && email.trim()) {
            console.log(email, username, password);
            setPassword("");
            setUsername("");
            setEmail("");
        }
    };

    return (
        <main className='signup'>
            <form className='signup__form' onSubmit={handleSubmit}>
                <h2 className='signup__title'>Create an account</h2>
                <label htmlFor='email'>Email Address</label>
                <input
                    id='email'
                    name='email'
                    type='email'
                    required
                    value={email}
                    onChange={(e) => setEmail(e.target.value)}
                />
                <label htmlFor='username'>Username</label>
                <input
                    id='username'
                    name='username'
                    required
                    type='text'
                    value={username}
                    onChange={(e) => setUsername(e.target.value)}
                />
                <label htmlFor='password'>Password</label>
                <input
                    id='password'
                    type='password'
                    name='password'
                    required
                    value={password}
                    onChange={(e) => setPassword(e.target.value)}
                />
                <button className='signupButton'>REGISTER</button>
                <p style={{ textAlign: "center", marginTop: "30px" }}>
                    Already have an account?{" "}
                    <Link className='link' to='/'>
                        Sign in
                    </Link>
                </p>
            </form>
        </main>
    );
};

export default Signup;

The Dashboard component
Here, we'll create a user interface that allows users to set their availability according to their location or preferred timezone. React Timezone Select enables us to select from a list of time zones per location.
Update the Dashboard.js component as done below:
import React, { useState, useEffect } from "react";
import TimezoneSelect from "react-timezone-select";
import { useNavigate } from "react-router-dom";

const Dashboard = () => {
    const [selectedTimezone, setSelectedTimezone] = useState({});
    const navigate = useNavigate();

    //👇🏻 Runs when a user sign out
    const handleLogout = () => {
        localStorage.removeItem("_id");
        localStorage.removeItem("_myEmail");
        navigate("/");
    };

    return (
        <div>
            <nav className='dashboard__nav'>
                <h2>BookMe</h2>
                <button onClick={handleLogout} className='logout__btn'>
                    Log out
                </button>
            </nav>
            <main className='dashboard__main'>
                <h2 className='dashboard__heading'>Select your availability</h2>

                <div className='timezone__wrapper'>
                    <p>Pick your timezone</p>
                    <TimezoneSelect
                        value={selectedTimezone}
                        onChange={setSelectedTimezone}
                    />
                </div>
            </main>
        </div>
    );
};
The code snippet above displays the component, as shown in the image below. The handleLogout function logs a user out of the application by removing the email and id from the local storage.

Below the time zone selection field, we need to create a group of input fields that allow users to set their availability or working hours for each day.

To do this, create a state within the Dashboard component that holds the schedule for each day.
const [schedule, setSchedule] = useState([
    { day: "Sun", startTime: "", endTime: "" },
    { day: "Mon", startTime: "", endTime: "" },
    { day: "Tue", startTime: "", endTime: "" },
    { day: "Wed", startTime: "", endTime: "" },
    { day: "Thu", startTime: "", endTime: "" },
    { day: "Fri", startTime: "", endTime: "" },
    { day: "Sat", startTime: "", endTime: "" },
]);
Create a utils folder containing a resource.js file. The file will contain the asynchronous functions needed to make API requests to the server.
cd src
mkdir utils
cd utils
touch resource.js
Create a list of possible working hours from which users can select.
export const time = [
    { id: "null", t: "Select" },
    { id: "7", t: "7:00am" },
    { id: "8", t: "8:00am" },
    { id: "9", t: "9:00am" },
    { id: "10", t: "10:00am" },
    { id: "11", t: "11:00am" },
    { id: "12", t: "12:00pm" },
    { id: "13", t: "13:00pm" },
    { id: "14", t: "14:00pm" },
    { id: "15", t: "15:00pm" },
    { id: "16", t: "16:00pm" },
    { id: "17", t: "17:00pm" },
    { id: "18", t: "18:00pm" },
    { id: "19", t: "19:00pm" },
];
Update the Dashboard.js file to display the list of working hours for each day.
import { time } from "../utils/resource";
import { toast } from "react-toastify";

const Dashboard = () => {
    const [selectedTimezone, setSelectedTimezone] = useState({})
    //👇🏻 This updates the schedule array with the start and end time.
    const handleTimeChange = (e, id) => {
        const { name, value } = e.target;
        if (value === "Select") return;
        const list = [...schedule];
        list[id][name] = value;
        setSchedule(list);
    };
    //👇🏻 Logs the user's schedule to the console after setting the availability
    const handleSaveSchedules = () => {
        if (JSON.stringify(selectedTimezone) !== "{}") {
            console.log(schedule);
        } else {
            toast.error("Select your timezone");
        }
    };
    return (
        <div>
            <nav className='dashboard__nav'>
                <h2>BookMe</h2>
                <button onClick={handleLogout} className='logout__btn'>
                    Log out
                </button>
            </nav>
            <main className='dashboard__main'>
                <h2 className='dashboard__heading'>Select your availability</h2>
                <div className='timezone__wrapper'>
                    <p>Pick your timezone</p>
                    <TimezoneSelect
                        value={selectedTimezone}
                        onChange={setSelectedTimezone}
                    />

                    {schedule.map((sch, id) => (
                        <div className='form' key={id}>
                            <p>{sch.day}</p>
                            <div className='select__wrapper'>
                                <label htmlFor='startTime'>Start Time</label>
                                <select
                                    name='startTime'
                                    id='startTime'
                                    onChange={(e) => handleTimeChange(e, id)}
                                >
                                    {time.map((t) => (
                                        <option key={t.id} value={t.t} id={t.id}>
                                            {t.t}
                                        </option>
                                    ))}
                                </select>
                            </div>
                            <div className='select__wrapper'>
                                <label htmlFor='endTime'>End Time</label>
                                <select
                                    name='endTime'
                                    id='endTime'
                                    onChange={(e) => handleTimeChange(e, id)}
                                >
                                    {time.map((t) => (
                                        <option key={t.id} value={t.t} id={t.id}>
                                            {t.t}
                                        </option>
                                    ))}
                                </select>
                            </div>
                        </div>
                    ))}
                </div>

                <div className='saveBtn__container'>
                    <button onClick={handleSaveSchedules}>SAVE SCHEDULES</button>
                </div>
            </main>
        </div>
    );
};
The Profile component
The Profile component is a simple component that displays the user's schedule as shown below:

Copy the code below into the Profile.js file. Later in the tutorial, we'll fetch its data from the server.
import React from "react";
import { useParams } from "react-router-dom";

const Profile = () => {
    //👇🏻 The ID is the URL parameter for fetching the user's details.
    const { id } = useParams();

    return (
        <main className='profile'>
            <div style={{ width: "70%" }}>
                <h2>Hey, nevodavid</h2>
                <p>Here is your schedule: WAT</p>
                <table>
                    <tbody>
                        <tr>
                            <td>MON</td>
                            <td>8:00am</td>
                            <td>10:00pm</td>
                        </tr>
                    </tbody>
                </table>
            </div>
        </main>
    );
};

export default Profile;
The BookUser component
This page shows a user's availability according to the username from the URL and allows people to book a session with the user.

Copy the code below into the BookUser.js component.
import React, { useState } from "react";
import { useParams } from "react-router-dom";

const BookUser = () => {
    const [fullName, setFullName] = useState("");
    const [email, setEmail] = useState("");
    const [message, setMessage] = useState("");
    const { user } = useParams();

    //👇🏻 logs the user's details to the console
    const handleSubmit = (e) => {
        e.preventDefault();
        console.log(email, fullName, message);
        setFullName("");
        setMessage("");
    };

    return (
        <div className='bookContainer'>
            <h2 className='bookTitle'>Book a session with {user}</h2>
            <form onSubmit={handleSubmit} className='booking__form'>
                <label htmlFor='fullName'>Full Name</label>
                <input
                    id='fullName'
                    name='fullName'
                    type='text'
                    required
                    value={fullName}
                    onChange={(e) => setFullName(e.target.value)}
                />
                <label htmlFor='email'>Email Address</label>
                <input
                    id='email'
                    name='email'
                    required
                    type='email'
                    value={email}
                    onChange={(e) => setEmail(e.target.value)}
                />

                <label htmlFor='message'>Any important note? (optional)</label>
                <textarea
                    rows={5}
                    name='message'
                    id='message'
                    value={message}
                    onChange={(e) => setMessage(e.target.value)}
                />

                <label htmlFor='session'>
                    Select your preferred session - GMT+2 Jerusalem
                </label>

                <button className='bookingBtn'>SEND</button>
            </form>
        </div>
    );
};

export default BookUser;
The code snippet above displays a booking form that accepts the client's full name, email, and message. Later in this tutorial, we'll improve the component to book a session with a user and send a confirmation email to the user.
The ErrorPage component
This component is displayed to users when an error occurs.
import React from "react";
import { Link } from "react-router-dom";

const ErrorPage = ({ error }) => {
    return (
        <div className='errorContainer'>
            <h2 style={{ marginBottom: "30px" }}>{error}</h2>
            <Link to='/'>Go Home</Link>
        </div>
    );
};

export default ErrorPage;
User authentication with React and Node.js
Here, I'll guide you through authenticating users and how to allow only authorized users to access protected pages within the web application.
Creating new users
Add a register POST route on the server that accepts the user's username, email, and password from the React application.
app.post("/register", (req, res) => {
    const { username, email, password } = req.body;
    console.log(req.body);
});
Create an asynchronous function within the utils/resource.js file that accepts the user's credentials.
export async function handleRegister(email, username, password, navigate) {
    //...data
}
Import the handleRegister function into the Signup component and pass in the required parameters.
import { handleRegister } from "../utils/resource";
import { useNavigate } from "react-router-dom";

const navigate = useNavigate();

const handleSubmit = (e) => {
    e.preventDefault();
    if (username.trim() && password.trim() && email.trim()) {
        handleRegister(email, username, password, navigate);
        setPassword("");
        setUsername("");
        setEmail("");
    }
};
Update the handleRegister function to make a POST request to the server.
export async function handleRegister(email, username, password, navigate) {
    try {
        const request = await fetch("http://localhost:4000/register", {
            method: "POST",
            body: JSON.stringify({
                email,
                username,
                password,
            }),
            headers: {
                Accept: "application/json",
                "Content-Type": "application/json",
            },
        });
        const data = await request.json();
        if (data.error_message) {
            toast.error(data.error_message);
        } else {
            toast.success(data.message);
            navigate("/");
        }
    } catch (err) {
        console.error(err);
        toast.error("Account creation failed");
    }
}
Accept the user's credentials and create an account on the server.
//👇🏻 array representing the data
const database = [];
//👇🏻 generates a random string as ID
const generateID = () => Math.random().toString(36).substring(2, 10);

app.post("/register", (req, res) => {
    const { username, email, password } = req.body;
    //👇🏻 checks if the user does not exist
    let result = database.filter(
        (user) => user.email === email || user.username === username
    );
    //👇🏻 creates the user's data structure on the server
    if (result.length === 0) {
        database.push({
            id: generateID(),
            username,
            password,
            email,
            timezone: {},
            schedule: [],
        });
        return res.json({ message: "Account created successfully!" });
    }
    //👇🏻 returns an error
    res.json({ error_message: "User already exists!" });
});
Logging users into the application
Add a login POST route on the server that accepts the username and password from the React application.
app.post("/login", (req, res) => {
    const { username, password } = req.body;
    console.log(req.body);
});
Create an asynchronous function that accepts the username and password from the user within the utils/resource.js file.
export async function handleLogin(username, password, navigate) {
    //...data
}
Import the handleLogin function into the Login component as follows:
import { handleLogin } from "../utils/resource";
import { useNavigate } from "react-router-dom";

const navigate = useNavigate();

//👇🏻 The Login button function
const handleSubmit = (e) => {
    if (username.trim() && password.trim()) {
        e.preventDefault();
        //👇🏻 accepts the user's password and email
        handleLogin(username, password, navigate);
        setPassword("");
        setUsername("");
    }
};
Update the handleLogin function to make a POST request to the server.
export async function handleLogin(username, password, navigate) {
    try {
        const request = await fetch("http://localhost:4000/login", {
            method: "POST",
            body: JSON.stringify({
                username,
                password,
            }),
            headers: {
                Accept: "application/json",
                "Content-Type": "application/json",
            },
        });
        const data = await request.json();
        if (data.error_message) {
            toast.error(data.error_message);
        } else {
            //👇🏻If login successful
            toast.success(data.message);
            //👇🏻 saves the email and id for identification
            localStorage.setItem("_id", data.data._id);
            localStorage.setItem("_myEmail", data.data._email);
            navigate("/dashboard");
        }
    } catch (err) {
        console.error(err);
    }
}
Accept and verify the user's credentials on the server.
app.post("/login", (req, res) => {
    const { username, password } = req.body;
    let result = database.filter(
        (user) => user.username === username && user.password === password
    );
    //👇🏻 user doesn't exist
    if (result.length !== 1) {
        return res.json({
            error_message: "Incorrect credentials",
        });
    }
    //👇🏻 user exists
    res.json({
        message: "Login successfully",
        data: {
            _id: result[0].id,
            _email: result[0].email,
        },
    });
});
Since we'll be making requests that require authentication on the server, add the code snippet below to the Dashboard and Profile components.
useEffect(() => {
    if (!localStorage.getItem("_id")) {
        navigate("/");
    }
}, [navigate]);
Creating schedules
In this section, I'll walk you through creating the process of schedules and displaying them to the user.
Add a POST route on the server that allows users to create a new schedule.
app.post("/schedule/create", (req, res) => {
    const { userId, timezone, schedule } = req.body;
    console.log(req.body);
});
Create a handleCreateSchedule function within the utils/resource.js file that accepts the user's timezone and schedule.
export async function handleCreateSchedule(
    selectedTimezone,
    schedule,
    navigate
) {
    //..other data
}
Import the handleCreateSchedule function within the Dashboard component.
import { handleCreateSchedule } from "../utils/resource";

const handleSaveSchedules = () => {
//👇🏻 ensures the user's timezone has been selected
    if (JSON.stringify(selectedTimezone) !== "{}") {
        handleCreateSchedule(selectedTimezone, schedule, navigate);
    } else {
        toast.error("Select your timezone");
    }
};
Update the handleCreateSchedule function to make a POST request containing the schedules and the timezone.
export async function handleCreateSchedule(
    selectedTimezone,
    schedule,
    navigate
) {
    try {
        await fetch("http://localhost:4000/schedule/create", {
            method: "POST",
            body: JSON.stringify({
                userId: localStorage.getItem("_id"),
                timezone: selectedTimezone,
                schedule,
            }),
            headers: {
                Accept: "application/json",
                "Content-Type": "application/json",
            },
        });
        //👇🏻 navigates to the profile page
        navigate(`/profile/${localStorage.getItem("_id")}`);
    } catch (err) {
        console.error(err);
    }
}
Update the POST route on the server to accept the data from the React app and create a new schedule for the user.
app.post("/schedule/create", (req, res) => {
    const { userId, timezone, schedule } = req.body;
    //👇🏻 filters the database via the id
    let result = database.filter((db) => db.id === userId);
    //👇🏻 updates the user's schedule and timezone
    result[0].timezone = timezone;
    result[0].schedule = schedule;
    res.json({ message: "OK" });
});
Congratulations! 🎉 We've been able to update the user's schedule and timezone.
Displaying the schedules
Here, I will walk you through fetching the user's schedules from the server.
Add a GET route on the server that retrieves the user's data from the database array.
app.get("/schedules/:id", (req, res) => {
    const { id } = req.params;
    //👇🏻 filters the array via the ID
    let result = database.filter((db) => db.id === id);
    //👇🏻 returns the schedule, time and username
    if (result.length === 1) {
        return res.json({
            message: "Schedules successfully retrieved!",
            schedules: result[0].schedule,
            username: result[0].username,
            timezone: result[0].timezone,
        });
    }
    //👇🏻 if user not found
    return res.json({ error_message: "Sign in again, an error occured..." });
});
Create a function within the Profile.js file that sends a request to the GET route when the page is loaded.
const [schedules, setSchedules] = useState([]);
const [loading, setLoading] = useState(true);
const [username, setUsername] = useState("");
const [timezone, setTimezone] = useState("");

useEffect(() => {
    function getUserDetails() {
        if (id) {
            fetch(`http://localhost:4000/schedules/${id}`)
                .then((res) => res.json())
                .then((data) => {
                    setUsername(data.username);
                    setSchedules(data.schedules);
                    setTimezone(data.timezone.label);
                    setLoading(false);
                })
                .catch((err) => console.error(err));
        }
    }
    getUserDetails();
}, [id]);
And display the data as shown below:
return (
    <main className='profile'>
        {loading ? (
            <p>Loading...</p>
        ) : (
            <div>
                <h2>Hey, {username}</h2>
                <p>Here is your schedule: - {timezone}</p>
                <table>
                    <tbody>
                        {schedules.map((sch) => (
                            <tr key={sch.day}>
                                <td style={{ fontWeight: "bold" }}>{sch.day.toUpperCase()}</td>
                                <td>{sch.startTime || "Unavailable"}</td>
                                <td>{sch.endTime || "Unavailable"}</td>
                            </tr>
                        ))}
                    </tbody>
                </table>
            </div>
        )}
    </main>
);
Booking appointments with EmailJS
In this section, you'll learn how to send email notifications via EmailJS when clients book an appointment with a user.
EmailJS is a JavaScript library that enables us to send emails via client-side technologies only - without a server. With EmailJS, you can send texts and email templates and add attachments to the emails.
Create a POST route on the server that fetches the user's data.
app.post("/schedules/:username", (req, res) => {
    const { username } = req.body;
    //👇🏻 filter the databse via the username
    let result = database.filter((db) => db.username === username);
    if (result.length === 1) {
        const scheduleArray = result[0].schedule;
        //👇🏻 return only the selected schedules
        const filteredArray = scheduleArray.filter((sch) => sch.startTime !== "");
        //return the schedules and other information
        return res.json({
            message: "Schedules successfully retrieved!",
            schedules: filteredArray,
            timezone: result[0].timezone,
            receiverEmail: result[0].email,
        });
    }
    return res.json({ error_message: "User doesn't exist" });
});
Add a fetchBookingDetails function within the resource.js file.
export function fetchBookingDetails(
    user,
    setError,
    setTimezone,
    setSchedules,
    setReceiverEmail
) {
    //...data
}
Import the function into the BookUser.js component and call it with its necessary parameters on page load.
const [schedules, setSchedules] = useState([]);
const [timezone, setTimezone] = useState("");
const [error, setError] = useState(false);
const [receiverEmail, setReceiverEmail] = useState("");

useEffect(() => {
    fetchBookingDetails(
        user,
        setError,
        setTimezone,
        setSchedules,
        setReceiverEmail
    );
}, [user]);

if (error) {
    return <ErrorPage error="User doesn't exist" />;
}
Update the fetchBookingDetails function to retrieve the information from the server and update the state parameters.
export function fetchBookingDetails(
    user,
    setError,
    setTimezone,
    setSchedules,
    setReceiverEmail
) {
    fetch(`http://localhost:4000/schedules/${user}`, {
        method: "POST",
        body: JSON.stringify({
            username: user,
        }),
        headers: {
            Accept: "application/json",
            "Content-Type": "application/json",
        },
    })
        .then((res) => res.json())
        .then((data) => {
            if (data.error_message) {
                toast.error(data.error_message);
                setError(true);
            } else {
                setTimezone(data.timezone.label);
                setSchedules(data.schedules);
                setReceiverEmail(data.receiverEmail);
            }
        })
        .catch((err) => console.error(err));
}
Render the schedule within the form to enable users to select their preferred appointment time.
<select name='duration' onChange={(e) => setDuration(e.target.value)}>
    {schedules.map((schedule) => (
        <option
            value={`${schedule.day} - ${schedule.startTime} : ${schedule.endTime}`}
            key={schedule.day}
        >{`${schedule.day} - ${schedule.startTime} : ${schedule.endTime}`}</option>
    ))}
</select>
Sending email notifications with EmailJS
Here, I'll guide you through adding EmailJS to the React.js application and how to send emails to users whenever someone books an appointment with them.
Install EmailJS to the React application by running the code below:
npm install @emailjs/browser
Create an EmailJS account here and add an email service provider to your account.
Add an email template as done in the image below:

The words in curly brackets represent variables that can hold dynamic data.
Import EmailJS into the utils/resource.js file and create a function that sends an email notification to the user.
import emailjs from "@emailjs/browser";

export const sendEmail = (
    receiverEmail,
    email,
    fullName,
    message,
    duration
) => {
    emailjs
        .send(
            "YOUR_SERVICE_ID",
            "YOUR_TEMPLATE_ID",
            {
                to_email: receiverEmail,
                from_email: email,
                fullName,
                message,
                duration,
            },
            "YOUR_PUBLIC_KEY"
        )
        .then(
            (result) => {
                console.log(result.text);
                toast.success("Session booked successfully!");
            },
            (error) => {
                console.log(error.text);
                toast.error(error.text);
            }
        );
};
You can get your EmailJS Public key from the Account section of your EmailJS dashboard.
Add the sendEmail function into the BookUser component to send an email to the user containing the booking information whenever the form is submitted.
const handleSubmit = (e) => {
    e.preventDefault();
    sendEmail(receiverEmail, email, fullName, message, duration);
    setFullName("");
    setMessage("");
};
Congratulations! 🎉 You've completed the project for this tutorial.
Conclusion
So far, you've learnt how to create a scheduling application that enables users to set their availability and get notified via EmailJS when they have an appointment.
This tutorial walks you through a mini project you can build using React and Node.js. You can improve the application by adding an authentication library and storing the data in a database.
The source code for this tutorial is available here:
https://github.com/novuhq/blog/tree/main/scheduling-app-with-react-nodejs-emailjs
Thank you for reading!
Help me out!
If you feel like this article helped you understand WebSockets better! I would be super happy if you could give us a star! And let me also know in the comments ❤️
https://github.com/novuhq/novu