

 800+ IT
News
als RSS Feed abonnieren
800+ IT
News
als RSS Feed abonnieren📚 Web workers, React, and TypeScript
💡 Newskategorie: Programmierung
🔗 Quelle: dev.to
Written by Onuorah Bonaventure✏️
In this article, we will learn about web workers and how to use them in a React and TypeScript project by building a paginated data table. We'll learn how to determine the length, filter, slice, and map through long arrays without affecting the performance and UX of our web applications. Essentially, we'll examine how to boost web applications' performance using web workers that give us a multi-thread capability to handle long processes in the background.
Web workers are a means for web browsers to run scripts in the background without interfering with the UI. If set up correctly, a web worker can send and receive messages to the JavaScript or TypeScript code where it was set up.
You can clone the source code here ahead of time if you like:  Jump ahead:
- Setting up our React and TypeScript web worker project
- Preparing the TypeScript data
- Creating enums
- Building
App.tsandgeneratingtypes - Designing a web worker for checking array lengths
- Creating the
Loadercomponent
- Creating the
- Using the
countweb worker in TypeScript - Creating a worker in TypeScript to get data
- Building a table
- Using the
getDataweb worker with TypeScript - Create a worker for table
paginationin TypeScript- Implementing the
paginationcomponent from React
- Implementing the
- Designing page handlers
- Using the
paginationcomponent- Adding styling to your web workers
Setting up our React and TypeScript web worker project
To set up our project, we will create a new folder to contain our code. I'm naming my folder app. Then, open the new folder in a code editor of your choice and run this code in the terminal to set up a React and TypeScript project:
npx create-react-app ./ --template TypeScript.
After the project has been set up, we will create three folders inside src:
-
components: Thecomponentswill containLoader.tsx,Pagination.tsx, andTable.tsx -
data: This will contain theindex.tsfile -
longProcess: This will be made up ofcount.ts,enums.ts, andgetData.ts
Our folder and file structure should look similar to this:
app
├── README.md
├── node_modules
├── package.json
├── tsconfig.json
├── .gitignore
├── public
│   ├── favicon.ico
│   ├── index.html
│   ├── logo192.png
│   ├── logo512.png
│   ├── manifest.json
│   └── robots.txt
└── src
    ├──components
    │   ├── Loader.tsx
    │   ├── Pagination.tsx
    │   └── Table.tsx
    |
    ├──data
    │   └── index.ts
    |
    ├──longProcesses
    │   ├── count.ts
    │   ├── enums.ts
    │   └── getData.ts
    ├── App.css
    ├── App.js
    ├── App.test.js
    ├── index.css
    ├── index.js
    ├── logo.svg
    ├── serviceWorker.js
    └── setupTests.js
Next, we can run npm start or yarn start in the terminal to start our development server.
Preparing the TypeScript data
In the data/index.ts, we'll add this long array to it. The array contains 5000 objects that all look similar to this:
    {
      "albumId": 1,
      "id": 2,
      "title": "reprehenderit est deserunt velit ipsam",
      "url": "https://via.placeholder.com/600/771796",
      "thumbnailUrl": "https://via.placeholder.com/150/771796"
    },
Creating enums
Enums are used to define a set of named constants or variables that do not change. An Enum is a special "class" in TypeScript representing a group of unchangeable variables. It's like an object with a freeze method called on it. Enums ensure that the proper variable names are always used in our code. It helps prevent errors that might occur when a variable gets misspelled.
To learn more about extending enums in TypeScript, check out this guide.
So, in longProcesses/enums.ts, we have to create and export processList and ProfileEnum enums that would be used in files to make sure we are calling the correct variables:
// longProcesses/enums.ts

export enum processList {
 count = "count",
 getData = "getData",
}

export enum ProfileEnum {
 albumId = "Album Id",
 id = "ID",
 title = "Title",
 url = "Url",
 thumbnailUrl = "Thumbnail",
}
Building App.ts and Generate types
One of the most important features of TypeScript is its ability to check for types. However, we can define types for any variable, parameter, object, or array. This feature ensures that we are always using the right data type.
The App.ts is the entry point for our app. Here, we will define four types: LengthCountType, ProfileType, ProfileListType, and GetDataType. We will also create a functional component that returns a jsx with two section nested in a div, as shown in the code below:
// App.ts

type LengthCountType = {
  loading: boolean;
  value: number;
};

export type ProfileType = {
  albumId: number | string;
  id: number | string;
  title: string;
  url: string;
  thumbnailUrl: string;
};

export type ProfileListType = {
  loading: boolean;
  list: unknown & Array<ProfileType>;
  page: number;
};

export type GetDataType = {
  action: string;
  period: "initial" | "next" | "prev" | "pageNumber";
  thePageNumber: number;
};

export const listPageSize = 50;

const App = () => {
    return (
        <main className="main-container">
            <section className="count"></section>
            <section className="table-container"></section>
        </main>
    )
}
Designing a web worker for checking array lengths
Determining the length of a long array blocks the single thread a web application uses. However, using a web worker, we can successfully check for the length of a long array without blocking the thread. Hence, The longProcesses/count.ts will hold the worker code that we can use to determine the length of a long array.
To do this, write the following code in it:
// longProcesses/count.ts

/* eslint-disable no-restricted-globals */
import { profiles } from "../data";
import { processList } from "./enums";

self.onmessage = (e: MessageEvent<string>) => {
  if (e.data === processList.count) {
    const findLength = profiles.length;

    self.postMessage(findLength);
  }
};

export {};
Let's break it down a bit.
First, we begin by disabling the error that says we've used self incorrectly. Next, we'll import the array and the processList enum. Then, we'll listen to the onmessage event fired when a message has been posted to the worker file.
Then, check if the passed data is equivalent to the count enum. If it is, we will get the length of the data and post it back to the originating file in the DOM.
Finally, export an empty object to prevent TypeScript from throwing an error.
Creating the Loader component
The Loader component will indicate when the process is being processed in the background. So, in the components/Loader.ts, add the following code:
// components/Loader.ts

import React from "react";

type Props = {
 color?: "black" | "white";
 size?: number;
 display?: "inline-block" | "block";
};

const Loader = ({
 color = "black",
 size = 20,
 display = "inline-block",
}: Props) => {
 return (
   <div
     style={{
       border: `4px solid ${color}`,
       width: `${size}px`,
       height: `${size}px`,
       borderRightColor: "transparent",
       borderRadius: "50%",
       display,
       margin: display === "block" ? "50px auto" : "none",
     }}
     className="loader"
   ></div>
 );
};

export default Loader;
Now, let's break it down. The Loader accepts three props: color, size, and display. It returns a single div with the styles. It also has a loader class that has been styled in index.css to spin it around:
// index.css

.loader {
 animation: spinner 1s linear forwards infinite;
}

@keyframes spinner {
 from {
   transform: rotate(0deg);
 }

 to {
   transform: rotate(360deg);
 }
}
Using the count web worker in TypeScript
The count web worker determines the length of the long array we have. To use the count worker, open App.ts and import useMemo, useEffect, and useState Hooks from react and the processList enum:
// App.ts

import React, { useEffect, useMemo, useRef, useState } from "react";
import { processList } from "./longProcesses/enums";
Then, inside the component, we will initialize a new web worker with the count.ts worker file we already created:
// App.ts

// const App = () => {

  const counter: Worker = useMemo(
    () => new Worker(new URL("./longProcesses/count.ts", import.meta.url)),
    []
  );
Next, we'll create a state that will store the length of the array locally for us:
// App.ts

  const [lengthCount, setLengthCount] = useState<LengthCountType>({
    loading: true,
    value: 0,
  });
From there, we'll use the initialized counter to post a message to the count worker inside a useEffect:
// App.ts

  useEffect(() => {
    if (window.Worker) {
      counter.postMessage(processList.count);
    }
  }, [counter]);
Next, we'll create a set of the appropriate values to the lengthCount state:
  useEffect(() => {
    if (window.Worker) {
      counter.onmessage = (e: MessageEvent<string>) => {
        setLengthCount((prev) => ({
          ...prev,
          loading: false,
          value: Number(e.data) && Number(e.data),
        }));
      };
    }
  }, [counter]);
Finally, we'll use the lengthCount state to render a loader and the length of the array on the UI:
// App.ts

    <section className="count">
        Total count of Profiles is{" "}
        <b>{lengthCount.loading ? <Loader size={14} /> : lengthCount.value}</b>
      </section>
So, what did we do here? Let's break it down. In the counter variable, useMemo is used to wrap the instance of a worker to prevent unnecessary re-initialization on re-renders. Inside the function, we used the new Worker method and passed in a new instance of a generated URL that contains the path to the count worker file:
-
lengthCount: This state holds theloadingandvaluestate of the counter -
useEffect: The firstuseEffectruns thecountworker on the first re-render. It essentially checks if the user's browser supports web workers before posting a message to thecountworker file- The second
useEffectis used to receive a response from thecountworker and set the received response to thelengthCountstate
- The second
In the Markup, we are displaying a loader when the process is still running and the value when completed.
Create a worker in TypeScript to get data
Getting data from a long array like the one we have can cause a lag in a user's devices and result in a bad UX. Therefore, we'll use a web worker to prevent that.
To get started, we'll begin by adding the following code to longProcesses/getData.ts:
// getData.ts

/* eslint-disable no-restricted-globals */
import { GetDataType, listPageSize, ProfileListType } from "../App";
import { profiles } from "../data";
import { processList } from "./enums";

self.onmessage = (e: MessageEvent<string>) => {
  const data = JSON.parse(e.data) as GetDataType;

  if (data.action !== processList.getData) {
    return;
  }
  if (data.period === "initial") {
    const items = profiles.filter((item, index) => index < listPageSize);

    const response = {
      loading: false,
      list: items,
      page: data.thePageNumber,
    } as ProfileListType;

    self.postMessage(JSON.stringify(response));
  }
}

export {};
First, we import the defined types in App.ts, the list of data, and processList. Next, we parse the returned data in the event and set it as GetDataType. After that, check if the type of action is invalid.
Right after that, check if the period of the action is initiated. If that is so, we will get the first 50 items in our list using the JavaScript filter method, create a response object, and then post it as a string.
Building a table
The table will display the list of the items on the UI. In the components/Table.tsx, add the following code:
import React from "react";
import { ProfileType } from "../App";
import { ProfileEnum } from "../longProcesses/enums";

type Props = {
  list: Array<ProfileType>;
};

const Table = ({ list }: Props) => {
  return (
    <div className="table">
      <table>
        <thead>
          <tr>
            <th>#</th>
            <th>{ProfileEnum.id}</th>
            <th>{ProfileEnum.title}</th>
            <th>{ProfileEnum.albumId}</th>
            <th>{ProfileEnum.thumbnailUrl}</th>
          </tr>
        </thead>
        <tbody>
          {list.length > 0 &&
            list.map((item, index: number) => {
              return (
                <tr key={item?.id}>
                  <td>{index + 1}</td>
                  <td>{item?.id}</td>
                  <td>{item?.title}</td>
                  <td>{item?.albumId}</td>
                  <td>
                    <img
                      src={item?.thumbnailUrl}
                      alt={item?.title}
                      width={50}
                      height={50}
                      loading="lazy"
                    />
                  </td>
                </tr>
              );
            })}
        </tbody>
      </table>
    </div>
  );
};

export default Table;
Here, the first thing we did was import ProfileType and ProfileEnum. Next, we defined a PropType for our Table component.
Right after that, we created a div that returns a table. Here's what they do:
-
table:Returns atheadandtbody -
thead: Returns atrthat contains fiveth -
tbody: Contains amapthat returns atr -
tr: Returns fivetd
Note: The images have been lazy-loaded using the
loading="lazy"attribute to boost performance.
Using the getData web worker with TypeScript
Using the getData web worker is similar to how we used the count worker. We begin by initializing a new worker with the code below:
// App.ts

const getData: Worker = useMemo(
    () => new Worker(new URL("./longProcesses/getData.ts", import.meta.url)),
    []
  );
Next, we will define the local state to handle the profileList state:
// App.ts

  const [profileList, setProfileList] = useState<ProfileListType>({
    loading: true,
    list: [],
    page: 1,
  });
Then, we will create a useEffect where we use getData at the initial render:
// App.ts

  useEffect(() => {
    if (window.Worker) {
      const request = {
        action: processList.getData,
        period: "initial",
        thePageNumber: profileList.page,
      } as GetDataType;

      getData.postMessage(JSON.stringify(request));
    }
    // eslint-disable-next-line react-hooks/exhaustive-deps
  }, []);
Next, we will create another useEffect that will handle receiving the response from the getData web worker file:
// App.ts

  useEffect(() => {
    if (window.Worker) {
      getData.onmessage = (e: MessageEvent<string>) => {
        const response = JSON.parse(e.data) as unknown as ProfileListType;

        setProfileList((prev) => ({
          ...prev,
          loading: response.loading,
          list: response.list,
          page: response.page,
        }));
      };
    }
  }, [getData]);
Finally, we will display the data using the Table component we created:
    <section className="table-container">
        {profileList.loading ? (
          <Loader size={40} display="block" />
        ) : (
          <>
            <Table list={profileList.list} />
          </>
        )}
      </section>
In the getData variable, useMemo is used to wrap the instance of a worker to prevent unnecessary re-initialization on re-renders. Inside the function, we use the new Worker method and pass in a new instance of a generated URL that contains the path to the getData worker file. The profileList state holds the loading, list, and page state of the getData worker locally in our app.
The first useEffect runs getData on the first re-render. It checks if the user's browser has support for web workers, it also houses a request object that is stringified before being sent to the getData worker file. The request object contains an action, period, and thePageNumber key-value pairs. The second useEffect is used to receive a response from getData and set the received response to the profileList state.
In the Markup, we display a loader when the process is still running and then render a table when completed:
Note: The classes passed to the elements are used to style them.
Create a worker for table pagination in TypeScript
The pagination would have the functionality to go to a page when selecting the next and prev buttons. It can also go to a page when clicking the page number. To implement a worker for the functionality mentioned earlier, we will modify the getData worker inside longProcesses/getData.ts and add the following code to it:
// longProcesses/getData.ts

  if (
    data.period === "pageNumber" ||
    data.period === "next" ||
    data.period === "prev"
  ) {
    const items = profiles.slice(
      (data.thePageNumber - 1) * listPageSize,
      data.thePageNumber * listPageSize
    );
    const response = {
      loading: false,
      list: items,
      page: data.thePageNumber,
    } as ProfileListType;

    self.postMessage(JSON.stringify(response));
  }
First, we check if the period key in the data object we'll get from the file that posted a message to the getData worker is equal to pageNumber, next, or prev. We'll do this before slicing the page using the page number and the list page size. After that, create a response object and post the response as a stringified message.
Implementing the pagination component from React
To create a pagination component, we will add the following code to components/Pagination to create a pagination component.tsx:
// Pagination.tsx

import React from "react";

type Props = {
  page: number;
  pages: number;
  pageClick: (page: number) => void;
  prevHandler: () => void;
  nextHandler: () => void;
};

const Pagination = ({
  page,
  pages,
  pageClick,
  prevHandler,
  nextHandler,
}: Props) => {
  return (
    <div className="pagination-container">
      <button className="prev" onClick={prevHandler} disabled={page === 1}>
        Prev
      </button>
      <ul className="pages-container">
        {[...Array(Math.ceil(pages)).keys()].map((x, i) => {
          return (
            <li
              key={i}
              className={page - 1 === i ? "active page-item" : "page-item"}
              onClick={() => {
                pageClick(x + 1);
              }}
            >
              {x + 1}
            </li>
          );
        })}
      </ul>
      <button className="next" onClick={nextHandler} disabled={page === pages}>
        Next
      </button>
    </div>
  );
};

export default Pagination;
The first thing we do is define the props type. It contains page and pages that must accept a number. Then, pageClick, prevHandler, and nextHandler must accept a function.
In the jsx, we return a div with a class. Then inside it, we return three elements: button, ul, and another button.
The first button contains a class and an onclick event listener that runs the prevHandler function. It is also disabled when the current page is the first page. The ul contains a class and returns an array of numbers using the pages value. A map function is used to loop through the new array and return an li element. Each li contains a key, a class that changes when the li is active. It also contains an onClick event handler that runs the pageClick function.
Note: If TypeScript complains about converting a number to an array, add the following key-pair to the
compilerOptionobject in yourtsconfig.jsonfile:
// tsconfig.json
    "downlevelIteration": true /** This fixes error when converting numbers to array of numbers*/,
The last button is the next button. It accepts a class and an onClick event handler that runs the nextHandler function. It is also disabled when the current page is the last page.
Designing page handlers
The page handlers are the functions we pass to the Pagination component when using it. The first function to create is the handlePageNumber, which will be called when clicking a page:
  const handlePageNumber = (userSelectedPage: number) => {
    if (window.Worker) {
      const request = {
        action: processList.getData,
        period: "pageNumber",
        thePageNumber: userSelectedPage,
      } as GetDataType;

      getData.postMessage(JSON.stringify(request));
    }
  };
The second function is the prevHandler. It will be called when the prev button is clicked:
  const prevHandler = (userSelectedPage: number) => {
    if (profileList.page === 1) {
      return;
    }

    if (window.Worker) {
      const request = {
        action: processList.getData,
        period: "prev",
        thePageNumber: userSelectedPage - 1,
      } as GetDataType;

      getData.postMessage(JSON.stringify(request));
    }
  };
Finally, our last function is the nextHandler. It will be called when the next button is clicked:
  const nextHandler = (userSelectedPage: number, thePageLength: number) => {
    if (userSelectedPage < thePageLength) {
      if (window.Worker) {
        const request = {
          action: processList.getData,
          period: "next",
          thePageNumber: userSelectedPage + 1,
        } as GetDataType;

        getData.postMessage(JSON.stringify(request));
      }
    }
  };
The handlePageNumber accepts the userSelectedPage as a param. We then check if the browser supports web workers. After that, we create a request object that contains the action, period, and thePageNumber. Next, we post the request as a stringified message to the getData web worker.
Our next function, prevHandler accepts the userSelectedPage as a param. Then, we check if the current page is the first page and do nothing. After that, we create a request object. However, we will send a decremented thePageNumber key.
Finally, nextHandler is like the first two functions except that it accepts two props instead. We first check if the userSelectedPage is less than the value of thePageLength variable we defined above. Also, the thePageNumber key is incremented.
Use Pagination component
To use the Pagination component, we need to import the component into component/App.ts:
// App.ts

import Pagination from "./components/Pagination";
Next, we will add the following Markup below the Table component:
// App.ts

  <Pagination
    page={profileList.page}
    pages={lengthCount.value / listPageSize}
    pageClick={(pageNumber) => {
      handlePageNumber(pageNumber);
    }}
    prevHandler={() => prevHandler(profileList.page)}
    nextHandler={() =>
      nextHandler(profileList.page, lengthCount.value / listPageSize)
    }
  />
First of all, we pass profileList.page to the page and pass lengthCount.value / listPageSize to the pages. Then, pass the handlePageNumber function to the pageClick prop. Next, we pass the prevHandler and the nextHandler to their appropriate props.
Adding styling to your web workers
You can decide to use whatever style of your choice. However, here is the style I have already created:
// index.css

body {
  margin: 0;
  font-family: -apple-system, BlinkMacSystemFont, "Segoe UI", "Roboto", "Oxygen",
    "Ubuntu", "Cantarell", "Fira Sans", "Droid Sans", "Helvetica Neue",
    sans-serif;
  -webkit-font-smoothing: antialiased;
  -moz-osx-font-smoothing: grayscale;
  padding-bottom: 4rem;
}

.loader {
  animation: spinner 1s linear forwards infinite;
}

@keyframes spinner {
  from {
    transform: rotate(0deg);
  }

  to {
    transform: rotate(360deg);
  }
}

.main-container {
  display: flex;
  flex-direction: column;
  align-items: center;
  padding-top: 2rem;
}

.count {
  padding: 2rem 0 3rem;
  font-size: 2rem;
  text-align: center;
}

.table-container {
  width: 95%;
  padding: 0 0.5rem;
  max-width: 700px;
}

table,
td,
th {
  border: 1px solid black;
  padding: 0.2rem;
}

table {
  border-collapse: collapse;
  width: 100%;
  min-height: 700px;
}

th {
  white-space: nowrap;
}

td {
  text-align: left;
  vertical-align: top;
}

td:first-child {
  font-weight: 300;
}

.pagination-container {
  display: flex;
  align-items: center;
  justify-content: center;
  margin: auto;
  gap: 1rem;
  width: 100%;
  max-width: 500px;
}

.pages-container {
  display: flex;
  list-style: none;
  gap: 0.5rem;
  overflow-x: scroll;
  padding-bottom: 0.5rem;
}

.pages-container > * {
  background-color: rgb(49, 150, 238);
  padding: 0.3rem;
  min-width: 40px;
  text-align: center;
  cursor: pointer;
  border: none;
  border-radius: 8px;
}

.page-item.active {
  background-color: blue;
  color: white;
}

.prev,
.next {
  padding: 0.6rem;
  text-align: center;
  cursor: pointer;
}
You can clone the source code here.
Conclusion
Using web workers with TypeScript and React has become much easier over the years. This means it is now very easy to handle operations and heavy tasks in the background while boosting performance and improving the UX.
Thank you for reading through. I hope you enjoyed this article, and be sure to leave a comment if you have any questions. Happy coding!
Cut through the noise of traditional React error reporting with LogRocket
LogRocket is a React analytics solution that shields you from the hundreds of false-positive errors alerts to just a few truly important items. LogRocket tells you the most impactful bugs and UX issues actually impacting users in your React applications.
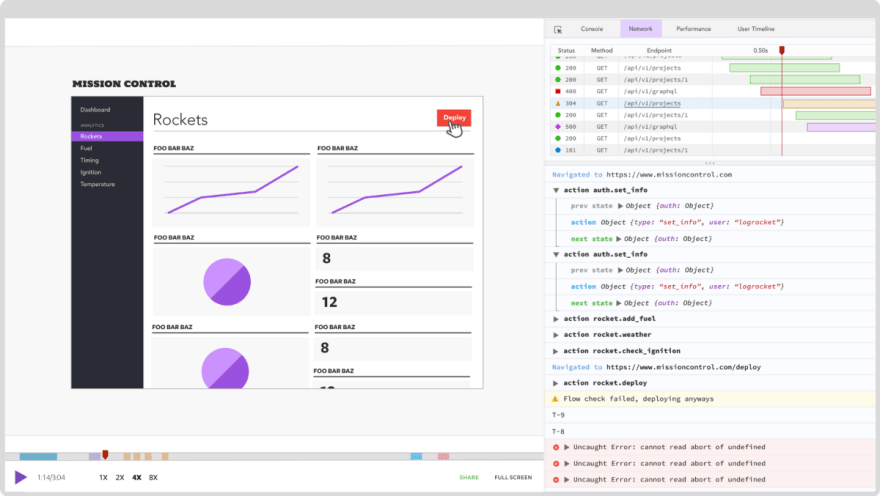
LogRocket automatically aggregates client side errors, React error boundaries, Redux state, slow component load times, JS exceptions, frontend performance metrics, and user interactions. Then LogRocket uses machine learning to notify you of the most impactful problems affecting the most users and provides the context you need to fix it.
Focus on the React bugs that matter — try LogRocket today.
...