

 800+ IT
News
als RSS Feed abonnieren
800+ IT
News
als RSS Feed abonnieren📚 WhatsApp UI in React Native (part 1)
💡 Newskategorie: Programmierung
🔗 Quelle: dev.to
Billion of us rely on WhatsApp every day.
WhatsApp's simple interface is a a huge part of their success.
But how hard is it to build WhatsApp's UI in React Native?
Let's find out!

You can see the full code for this project here
In part two, I will complete more features of the UI.
Setup
I'm using Expo for this project.
I recommend checking out the Expo docs but you should follow something like the below:
$ npm install --global expo-cli && npx create-expo-$app my-app
$ cd my-app
$ npx expo install react-dom react-native-web @expo/webpack-config
$ npx expo start
Screens & components
Screens
We will have two main screens, and two placeholder screens.
- screens/Chats/Chats.tsx - this is a list of Chat conversations. I put it in a folder along with its styling file, Chats.styles.ts
- screens/Chat/Chat.tsx - this is the screen for a conversation. I put it in a folder along with its styling file, Chat.styles.ts
- screens/Status.tsx - this is a placeholder for the status tab - we won't work on it today
- screens/Calls.tsx - this is a placeholder for the status tab - we won't work on it today
Components
- components/ChatMessages/ChatMessages.tsx - this is the list of all the chat messages in any given chat conversation
- components/ConversationPreview/ConversationPreview.tsx - This is the preview of a message that you see in the list of all your chat conversations
- components/MessageBubble/MessageBubble.tsx - this is an individual message within a chat conversation
- components/SendButton/SendButton.tsx - This is the whole section where you send a message: including the text input and the actual button to send the message.
Navigation - Chats / Status / Calls
The central navigation feature for Whatsapp is navigating between Chats and Calls (+ Status but who uses that?!)

To get these cool tabs, we can use:
import { createMaterialTopTabNavigator } from "@react-navigation/material-top-tabs";
This gets us most of the way without any styling.

But before we start styling, we still need to think about navigation between screens.
For example, we need a list of all the chat conversations and then we need to be able to navigate to that specific chat conversation.
But we don't want each chat conversations to be in their own tab. They need to be within the chat conversations tab.
And we need to be able to see other chats with the back button.

So we need another StackNavigator.
The initial way I thought about structuring the navigation was having a navigator nested within each of the tabs like this:
TopTabsNavigator
-----ChatNavigator
------------ChatMessage
-----StatusNavigator
-----CallsNavigator
But then you end up seeing your Top Tabs at every level. And we only want them on that home screen.
So instead we can create a StackNavigator at the root and render our TopTabNavigator as the default Screen within it.
Then within our TopTabsNavigator, the default Screen is our Chats screen.
One potential point of confusion
One thing that could be confusing is that our Conversation Chat screen is within our Root Navigator.
That's because when someone clicks on a conversation preview in our Chats list, they are navigating from one screen in the Root stack (Chats in TopTabsNavigator), to another screen in the Root stack.
Finally, our RootNavigator is wrapped in a NavigationContainer and this is exported as a Navigation component so we can render it inside App.tsx.
// navigation/index.tsx
import { NavigationContainer } from "@react-navigation/native";
import { createNativeStackNavigator } from "@react-navigation/native-stack";
import * as React from "react";

import TopTabNavigator from "./TopTabNavigator";
import Chat from "../screens/Chat/Chat";
import CallsScreen from "../screens/Calls";
import StatusScreen from "../screens/Status";
import ModalScreen from "../screens/ModalScreen";
import { RootStackParamList } from "../types";

export default function Navigation() {
  return (
    <NavigationContainer>
      <RootNavigator />
    </NavigationContainer>
  );
}
const Stack = createNativeStackNavigator<RootStackParamList>();

function RootNavigator() {
  return (
    <Stack.Navigator>
      <Stack.Screen name="Root" component={TopTabNavigator} />
      <Stack.Screen name="Chat" component={Chat} />
      <Stack.Group screenOptions={{ presentation: "modal" }}>
        <Stack.Screen name="Modal" component={ModalScreen} />
      </Stack.Group>
    </Stack.Navigator>
  );
}
// navigation/TopTabNavigator.tsx
import * as React from "react";
import { createMaterialTopTabNavigator } from "@react-navigation/material-top-tabs";

import ChatsScreen from "../screens/Chats/Chats";
import StatusScreen from "../screens/Status";

import { RootTabParamList, RootTabScreenProps } from "../types";

const TopTab = createMaterialTopTabNavigator<RootTabParamList>();
export default function TopTabNavigator() {
  return (
    <TopTab.Navigator tabBarPosition="top" initialRouteName="Chats">
      <TopTab.Screen
        name="Chats"
        component={ChatsScreen}
        options={({ navigation }: RootTabScreenProps<"Chats">) => ({
          title: "Chats",
        })}
      />
      <TopTab.Screen
        name="Status"
        component={StatusScreen}
        options={{
          title: "Status",
        }}
      />
      <TopTab.Screen
        name="Calls"
        component={CallsScreen}
        options={{
          title: "Calls",
        }}
      />
    </TopTab.Navigator>
  );
}
In our App.tsx file, we want to return a Navigation component like this:
// App.tsx
import Navigation from "./navigation";

export default function App() {
  return (
    <SafeAreaProvider>
      <Navigation />
    </SafeAreaProvider>
  );
}
To style the navigation, you can play around with screenOptions to get the WhatsApp-y look.
I used the following options, to get it looking pretty close.
    <TopTab.Navigator
      tabBarPosition="top"
      initialRouteName="Chats"
      screenOptions={{
        tabBarIndicatorStyle: {
          backgroundColor: Colors.light.white,
        },
        tabBarInactiveTintColor: Colors.light.inactiveGreen,
        tabBarActiveTintColor: Colors.light.white,
        tabBarLabelStyle: { fontSize: 16, fontWeight: "bold" },
        tabBarStyle: {
          backgroundColor: Colors.light.darkGreen,
        },
      }}
    >

We can also add some options to the "Root" screen to make the header look a bit more WhatsApp-y too.
      <Stack.Screen
        name="Root"
        component={TopTabNavigator}
        options={{
          headerShown: true,
          headerTitle: "WhatsApp",
          headerStyle: {
            backgroundColor: Colors.light.darkGreen,
          },
          headerTitleStyle: {
            fontWeight: "bold",
            color: Colors.light.white,
            fontSize: 20,
          },
          headerTitleAlign: "left",
        }}
      />

Rough Data structure of Whatsapp
This is mostly a frontend exercise but we need some kind of simple data.
I laid mine out like this:
export type Conversation = {
  id: string; // a unique id of conversation
  messages: Message[]; // messages sent
  users: number[]; // ids of users in the conversation
  title: string; e.g. "Nick Cage" or "30th birthday"
};

export type Message = {
  text: string; // message contents
  time: Date; // timestamp of send time
  userID: number; // userID of sender
  id: string; // unique of of message
};
You can see an example of fake data I generated here, I saved it in data/messages
State management
I found it a lot easier to build this with some global state management.
To do this I used react's context to manage:
- conversations - (also includes the messages)
- sendMessage - this adds messages to the conversation and sorts them
- setCurrentConversation - this keeps track of which conversation you pressed on
- getCurrentConversation - this tells you which conversation to load
To build this I set up a ConversationsProvider that contains the values above that I need globally
export const ConversationsContext = createContext<ConversationsContextType>({
  conversations: startingConversations,
  sendMessage: () => {},
  getCurrentConversation: () => {
    return { id: "", messages: [], users: [], title: "" };
  },
  setCurrentConversation: (id) => {},
});

export const ConversationsProvider = ({ children }) => {
  const [conversations, setConversations] = useState<ConversationType[]>(
    sortConversations(startingConversations)
  );
  const [currConversation, setCurrConversation] = useState<ConversationType>();

  const getCurrentConversation = () => {
    if (currConversation) return currConversation;
    else return { id: "", messages: [], users: [], title: "" };
  };

  const setCurrentConversation = (id: string) => {
    const currentConvo = conversations.filter((conv) => conv.id === id)[0];
    setCurrConversation(currentConvo);
  };

  function sendMessage(
    newMsg: string,
    thisConversationID: string,
    userID: number,
    setNewMsg: (msg: string) => void,
    isTyping: boolean,
    setIsTyping: (isTyping: boolean) => void
  ) {
    if (isTyping) {
      setNewMsg("");
      setIsTyping(false);
      if (currConversation && currConversation.id === thisConversationID) {
        setCurrConversation((prevConvo: ConversationType) => {
          return {
            ...prevConvo,
            messages: [...prevConvo.messages, formatMessage(newMsg, userID)],
          };
        });
      }
      setConversations((previousConversations: ConversationType[]) => {
        const allConversations = previousConversations.map(
          (conversation: ConversationType) => {
            if (conversation.id === thisConversationID) {
              return {
                ...conversation,
                messages: [
                  ...conversation.messages,
                  formatMessage(newMsg, userID),
                ],
              };
            }
            return conversation;
          }
        );
        return sortConversations(allConversations);
      });
    }
  }
  return (
    <ConversationsContext.Provider
      value={{
        conversations,
        sendMessage,
        getCurrentConversation,
        setCurrentConversation,
      }}
    >
      {children}
    </ConversationsContext.Provider>
  );
};
Sending a message
When a message is sent, its appended on to the end of the messages array within the relevant conversation.
It also clears the state of the message box so it becomes empty again.
sorting conversations
I wrote a function to sort conversations and I run it every time a message is sent
const sortConversations = (conversations: ConversationType[]) => {
  return conversations.sort((a, b) => {
    const lastMessageA = a.messages[a.messages.length - 1];
    const lastMessageB = b.messages[b.messages.length - 1];
    return lastMessageB.time.getTime() - lastMessageA.time.getTime();
  });
};
Accessing the state
To access this global state, I wrap the rest of my app in the ConversationsProvider
export default function App() {
  return (
    <ConversationsProvider>
      <SafeAreaProvider>
        <Navigation />
      </SafeAreaProvider>
    </ConversationsProvider>
  );
}
And then I can access this state with:
const { conversations, sendMessage } = useContext(ConversationsContext);
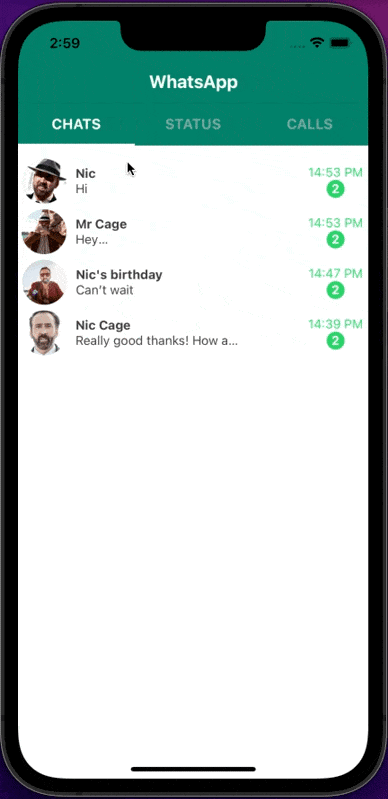
List of chat conversations
Our chat conversations will work great as a FlatList. But instead of FlatList we're doing to use FlashList from Shopify, which is said to have better performance than FlatList (but I've not verified this).
// screens/Chats/Chats.tsx
import { View } from "react-native";
import { FlashList } from "@shopify/flash-list";

import ConversationPreview from "../../components/ConversationPreview/ConversationPreview";
import { Conversation, RootTabScreenProps } from "../../types";
import conversations from "../../data/messages";
import styles from "./Chats.styles";

interface ConversationItemProps {
  item: Conversation;
}
export default function ChatsScreen({}: RootTabScreenProps<"Chats">) {
  const renderConversationPreview = (props: ConversationItemProps) => {
    const { item } = props;
    return <ConversationPreview key={item.id} conversation={item} />;
  };
  return (
    <View style={styles.mainContainer}>
      <FlashList
        data={conversations}
        renderItem={renderConversationPreview}
        keyExtractor={(item) => item.id}
        estimatedItemSize={40}
      />
    </View>
  );
}
I estimated the size as being 40 items but feel free to adjust this. FlashList perform more effectively by knowing roughly how many items you will have.
I kept the styling fairly light.
// screens/Chats/Chats.styles.ts
import { StyleSheet } from "react-native";
import Colors from "../../constants/Colors";

export default StyleSheet.create({
  mainContainer: {
    backgroundColor: Colors.light.white,
    height: "100%",
    paddingTop: "3%",
  },
});
In our FlashList, we render out a ConversationPreview for each of our conversations. It looks something like this.

ConversationPreview
In ConversationPreview, I'm doing a few fun things.
Text previews
We can create the '...' eliptical effect by fetching the last message from the conversation and then setting the following options in our text component.
numberOfLines={1}
ellipsizeMode="tail"
Profile images
We are setting profile image by the conversation id - they're saved on an images object which we store the assets on.
const images: {
  [key: string]: any;
} = {
  "101": require("./images/101.jpeg"),
  "102": require("./images/102.jpeg"),
  "103": require("./images/103.jpeg"),
  "104": require("./images/104.jpeg"),
  "105": require("./images/105.jpeg"),
};

export default images;
Times & notifications
We use the dayjs library for getting the timestamp of our messages and we're hard coding a notification as default for now.
// components/ConversationPreview/ConversationPreview.tsx
import { Image, Text, View, TouchableOpacity } from "react-native";
import { useNavigation } from "@react-navigation/native";
import { useContext } from "react";
import dayjs from "dayjs";

import { ConversationType } from "../../types";
import styles from "./ConversationPreview.styles";
import { ConversationsContext } from "../../context/conversationContext";
import images from "../../assets/index";

interface ConversationPreviewProps {
  conversation: ConversationType;
}

interface ChatRouteParams {
  conversation: ConversationType;
}

export default function ConversationPreview(props: ConversationPreviewProps) {
  const { conversation } = props;
  const { setCurrentConversation } = useContext(ConversationsContext);
  const navigation = useNavigation();
  const profileImg = images[conversation.id];

  const chatRouteParams: ChatRouteParams = {
    conversation,
  };

  const _onPress = () => {
    setCurrentConversation(conversation.id);
    navigation.navigate("Chat", chatRouteParams);
  };

  return (
    <TouchableOpacity onPress={_onPress} style={styles.messageContainer}>
      <View style={styles.imgAndMsgSubContainer}>
        <Image style={styles.profileImg} source={profileImg} />
        <View>
          <Text style={styles.msgTitle}>{conversation.title}</Text>
          <Text
            numberOfLines={1}
            ellipsizeMode="tail"
            style={styles.msgPreview}
          >
            {conversation.messages[conversation.messages.length - 1].text}
          </Text>
        </View>
      </View>
      <View style={styles.msgDataContainer}>
        <View style={styles.msgDataSubContainer}>
          <Text style={styles.timeText}>
            {dayjs(
              conversation.messages[conversation.messages.length - 1].time
            ).format("HH:mm")}
          </Text>
          <View style={styles.numberOfMsgsContainer}>
            <Text style={styles.numberOfMsgsText}>2</Text>
          </View>
        </View>
      </View>
    </TouchableOpacity>
  );
}
// components/ConversationPreview/ConversationPreview.styles.ts
import { StyleSheet } from "react-native";
import Colors from "../../constants/Colors";
import { Dimensions } from "react-native";
const windowHeight = Dimensions.get("window").height;
const windowWidth = Dimensions.get("window").width;

export default StyleSheet.create({
  messageContainer: {
    width: windowWidth * 0.97,
    height: windowHeight / 15,
    flexDirection: "row",
    justifyContent: "space-around",
  },
  imgAndMsgSubContainer: {
    flexDirection: "row",
    width: "90%",
    height: "100%",
    alignItems: "center",
  },
  profileImg: {
    width: 50,
    height: 50,
    marginRight: 10,
    marginLeft: 10,
    borderRadius: 50,
  },
  msgTitle: {
    fontWeight: "bold",
    color: Colors.light.offBlack,
  },
  msgPreview: {
    color: Colors.light.offBlack,
    width: "80%",
  },
  msgDataContainer: {
    flexDirection: "row",
    alignItems: "center",
  },
  msgDataSubContainer: {
    flexDirection: "column",
    alignItems: "center",
  },
  timeText: {
    color: Colors.light.brightGreen,
  },
  numberOfMsgsContainer: {
    backgroundColor: Colors.light.brightGreen,
    height: 20,
    width: 20,
    borderRadius: 50,
    padding: 0,
    margin: 0,
    alignItems: "center",
    justifyContent: "center",
  },
  numberOfMsgsText: {
    color: Colors.light.white,
    fontWeight: "bold",
    padding: 0,
    margin: 0,
  },
});
Pressing a message
When we press on a message preview, we navigate to the Chat Screen and we set the current conversation.
  const chatRouteParams: ChatRouteParams = {
    conversation,
  };

  const _onPress = () => {
    setCurrentConversation(conversation.id);
    navigation.navigate("Chat", chatRouteParams);
  };
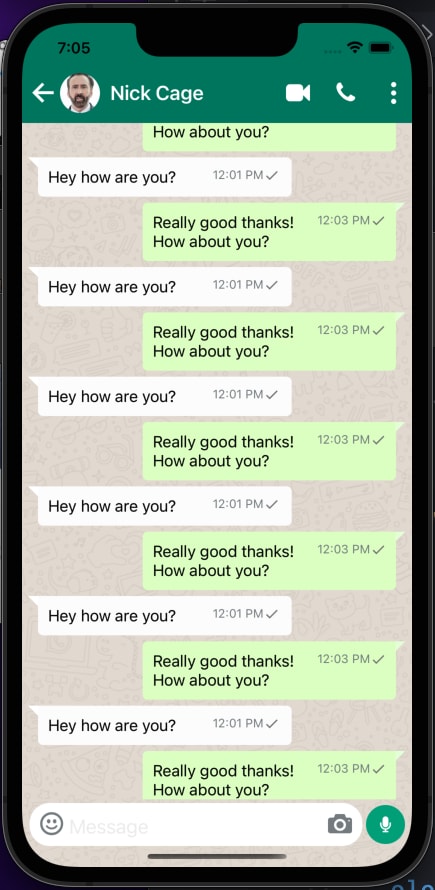
Chat
Our messages are displayed on the Chat.tsx screen
Background image
We set the background image as an image I found online.
<ImageBackground
        style={styles.backgroundImg}
        source={require(whatsappBackgroundImg)}
        resizeMode="cover"
>

We used it with the component from react-native
ChatMessages
The ChatMessages component is where we display all the messages in this conversation.
This component is a FlashList that renders all the messages as MessageBubbles.
      <FlashList
        inverted
        data={[...messages].reverse()}
        renderItem={renderMessageBubble}
        estimatedItemSize={40}
      />
Position of ChatMessages
When someone opens the keyboard, our ChatMessages need to move up above the keyboard (same as our SendButton below).
But also, when the input box expands as message size increases, ChatMessages need to move up too.

I probably overcomplicated this (let me know in the comments), but I solved it like this:
// components/ChatMessages/ChatMessages.tsx
<View
      style={{
        height:
          windowHeight * 0.8 -
          keyBoardOffsetHeight * 0.95 -
          getMessageHeightOffset(heightOfMessageBox, windowHeight),
      }}
    >
      <FlashList
        inverted
        data={[...messages].reverse()}
        renderItem={renderMessageBubble}
        estimatedItemSize={40}
      />
    </View>
and with the getMessageBoxHeightOffset function
// helpers/getMessageBoxHeightOffset.ts
const getMessageHeightOffset = (
  heightOfMessageBox: number,
  windowHeight: number
): number => {
  const maxHeightOfMessageBox = windowHeight * 0.3;
  if (heightOfMessageBox > maxHeightOfMessageBox) {
    return maxHeightOfMessageBox - windowHeight * 0.05;
  }
  if (heightOfMessageBox > 24) {
    return heightOfMessageBox - windowHeight * 0.035;
  }
  return 0;
};

export default getMessageHeightOffset;
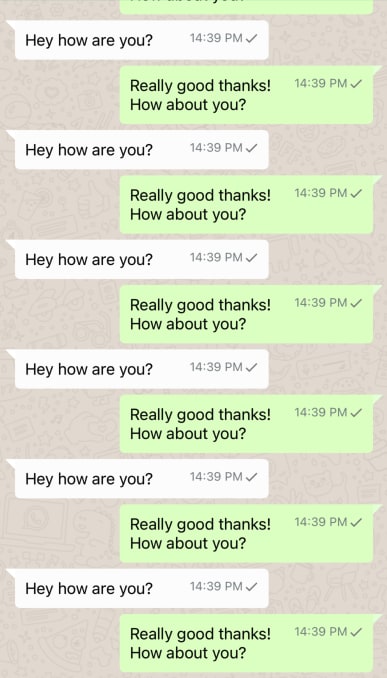
MessageBubble

There is quite a bit of styling in this component. And the styling depends on whether it is from a recipient or sender.
We just establish if I sent the message by checking if it matched my user id.
const isMyMessage = message.userID === 1;
Then we adjust the styling based on that
import { View, Text } from "react-native";
import { MaterialCommunityIcons } from "@expo/vector-icons";
import dayjs from "dayjs";

import { MessageDataType } from "../../types";
import styles from "./MessageBubble.styles";

export default function MessageBubble(props: MessageDataType) {
  const { message } = props;
  const isMyMessage = message.userID === 1;
  const isMessageRead = false;
  return (
    <View
      style={{
        ...styles.messageContainer,
        alignSelf: isMyMessage ? "flex-start" : "flex-end",
        backgroundColor: isMyMessage ? "#fcfcfc" : "#dfffc7",
        borderTopLeftRadius: isMyMessage ? 0 : 5,
        borderTopRightRadius: isMyMessage ? 5 : 0,
      }}
    >
      <View
        style={{
          ...styles.leftMessageArrow,
          display: isMyMessage ? "flex" : "none",
        }}
      ></View>
      <Text
        style={{
          ...styles.messageText,
          left: isMyMessage ? 0 : 10,
        }}
      >
        {message.text}
      </Text>
      <View
        style={{
          ...styles.timeAndReadContainer,
          left: isMyMessage ? 0 : 10,
        }}
      >
        <Text style={styles.timeText}>
          {dayjs(message.time).format("HH:mm A")}
        </Text>
        <View>
          {isMessageRead ? (
            <MaterialCommunityIcons name="read" size={16} color="#5bb6c9" />
          ) : (
            <MaterialCommunityIcons name="check" size={16} color="grey" />
          )}
        </View>
        <View
          style={{
            ...styles.rightMsgArrow,
            display: isMyMessage ? "none" : "flex",
          }}
        ></View>
      </View>
    </View>
  );
}
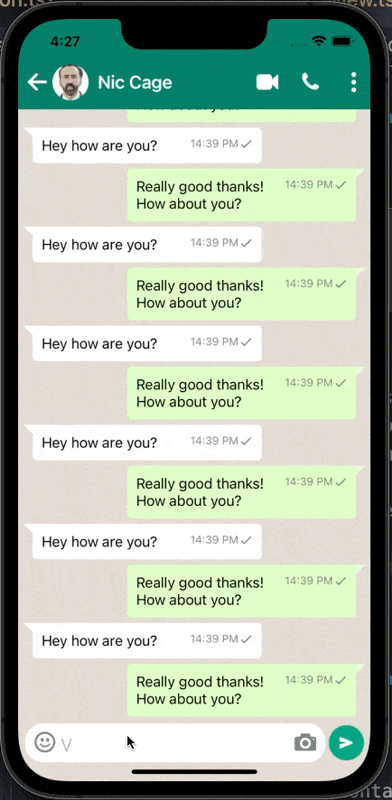
SendButton
The sendButton is a fun one.
position of the sendButton
The Whatsapp sendButton starts at the bottom, but when someone opens the keyboard, it moves upwards.
So we need the style to be absolute and dependent on whether the keyboard is open.
bottom: Math.max(keyBoardOffsetHeight, windowHeight * 0.02),
To get this keyBoardOffsetHeight I wrote a hook
// components/SendButton/SendButton.tsx
const keyBoardOffsetHeight = useKeyboardOffsetHeight();
// helpers/useKeyboardOffsetHeight.tsx
import { useEffect, useState } from "react";
import { Keyboard } from "react-native";

export default function useKeyboardOffsetHeight(): number {
  const [keyBoardOffsetHeight, setKeyboardOffsetHeight] = useState(0);

  useEffect(() => {
    const keyboardWillShowListener = Keyboard.addListener(
      "keyboardWillShow",
      (e) => {
        setKeyboardOffsetHeight(e.endCoordinates.height);
      }
    );
    const keyboardWillHideListener = Keyboard.addListener(
      "keyboardWillHide",
      () => {
        setKeyboardOffsetHeight(0);
      }
    );

    return () => {
      keyboardWillHideListener.remove();
      keyboardWillShowListener.remove();
    };
  }, []);

  return keyBoardOffsetHeight;
}
Typing = icon change animation
When we start typing, WhatsApp changes the voice record icon to the send icon.

Switching the icons is easy - we just keep an isTyping flag. It's initialised in Chat.tsx because its shared across components.
But for it to look smooth, we want an animation between the icons so we can use react-native-reanimated library
<Transitioning.View ref={ref} transition={msgTypeTransition}>
              {isTyping ? (
                <Ionicons name="send" size={16} color={Colors.light.white} />
              ) : (
                <FontAwesome5
                  name="microphone"
                  size={16}
                  color={Colors.light.white}
                />
              )}
            </Transitioning.View>

const msgTypeTransition = (
  <Transition.Together>
    <Transition.Out type="scale" durationMs={100} />
    <Transition.Change interpolation="easeInOut" />
    <Transition.In type="scale" durationMs={100} />
  </Transition.Together>
);