

 800+ IT
News
als RSS Feed abonnieren
800+ IT
News
als RSS Feed abonnieren📚 How to build a Barcode Widget in React Native (part I: Android)
💡 Newskategorie: Programmierung
🔗 Quelle: dev.to
A widget, or a gadget, is a tiny application or extension which enables additional features and improves the user's general experience. They can help us facilitate access to the most used functions of a device and offer us visual information without the need to run anything else.
Unfortunately, widget development is not feasible using React Native alone. An alternative is to create a native widget and a "bridge" that will allow communication between the widget and the React Native application.
In this part we are focusing on building barcode widget for Android platform, using Java.
In part II of this series we will show how to create iOS widget using Swift.
1. Intro
First, we are going to create a simple widget that will only display the barcode number (string value) pulled from our React Native app that we're making the widget for.
Later, we will generate a barcode image from our barcode string and display it on our widget layout.
2. Creating the widget
We can start by opening our React Native project in Android Studio. Be sure to select the android folder when opening your project. Navigate to res > New > Widget > App Widget. This will let us create the widget extension for Android.

Here we are able to configure some default options for our widget. This includes: the class name, minimum width and height (in cells), resizability (horizontally, vertically, none), the source language (Java/Kotlin) etc.
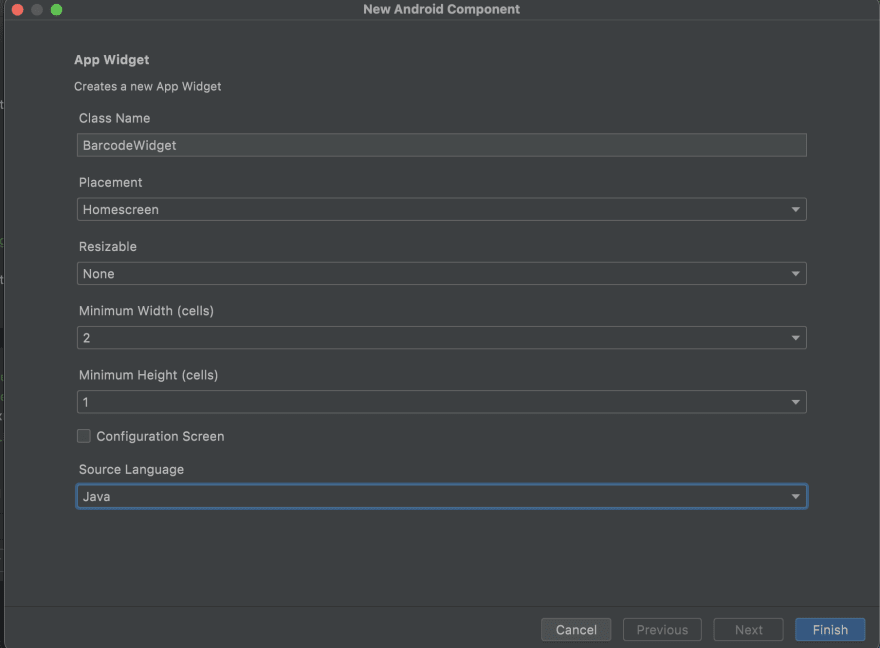
This time I am going to create a 2x1 widget that isn't resizable.
If we click "finish", Android studio is going to display a preview of all the files that are going to be created. Here, we can also note that setting our class name to BarcodeWidget will create a java file with the same name.
3. Bridging
In order to let our app communicate with the widget, control what's displayed and share data, we have to make the previously mentioned "bridge". Bridging is simply building your own custom modules that aren't provided by the default Components given by React.
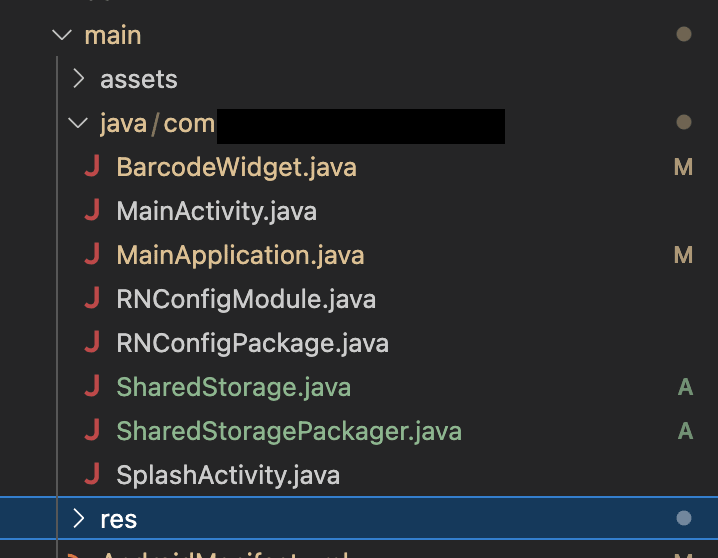
Now you may find the folder where your MainActivity.java file is located. In this folder we are going to add two files: SharedStorage.java and SharedStoragePackager.java.
In the first file we are going to add the code written below. This code includes a set() method that we're going to use later to set some data in the shared storage.
So, let's add the following code to out SharedStorage.java file:
// PUT YOUR PACKAGE NAME HERE, IT'S THE SAME AS IN MainApplication.java
package com.yourpackage;

import com.facebook.react.bridge.NativeModule;
import com.facebook.react.bridge.ReactApplicationContext;
import com.facebook.react.bridge.ReactContext;
import com.facebook.react.bridge.ReactContextBaseJavaModule;
import com.facebook.react.bridge.ReactMethod;

import android.app.Activity;
import android.appwidget.AppWidgetManager;
import android.content.ComponentName;
import android.content.Context;
import android.content.Intent;
import android.content.SharedPreferences;
import android.util.Log;

public class SharedStorage extends ReactContextBaseJavaModule {
    ReactApplicationContext context;

    public SharedStorage(ReactApplicationContext reactContext) {
        super(reactContext);
        context = reactContext;
    }

    @Override
    public String getName() {
        return "SharedStorage";
    }

    @ReactMethod
    public void set(String message) {
        SharedPreferences.Editor editor = context.getSharedPreferences("DATA", Context.MODE_PRIVATE).edit();
        editor.putString("appData", message);
        editor.commit();

        // CHANGE TO THE NAME OF YOUR WIDGET
        Intent intent = new Intent(getCurrentActivity().getApplicationContext(), Widget.class);
        intent.setAction(AppWidgetManager.ACTION_APPWIDGET_UPDATE);
        // CHANGE TO THE NAME OF YOUR WIDGET
        int[] ids = AppWidgetManager.getInstance(getCurrentActivity().getApplicationContext())
                .getAppWidgetIds(new ComponentName(getCurrentActivity().getApplicationContext(), Widget.class));
        intent.putExtra(AppWidgetManager.EXTRA_APPWIDGET_IDS, ids);
        getCurrentActivity().getApplicationContext().sendBroadcast(intent);

    }
}
Be sure to replace com.yourpackage with your own package name, and Widget.class with the class you created.
As you can see, in the method set() we can now use SharedPreferences object. This object points to a file containing key-value pairs and provides simple methods to read and write them.
The second file is the one that will allow us to use SharedStorage as a native module. So update your SharedStoragePackager.java file like this:
// PUT YOUR PACKAGE NAME HERE, IT'S THE SAME AS IN MainApplication.java
package com.yourpackage;

import com.facebook.react.ReactPackage;
import com.facebook.react.bridge.JavaScriptModule;
import com.facebook.react.bridge.NativeModule;
import com.facebook.react.bridge.ReactApplicationContext;
import com.facebook.react.uimanager.ViewManager;

import java.util.ArrayList;
import java.util.Collections;
import java.util.List;

public class SharedStoragePackager implements ReactPackage {

    @Override
    public List<ViewManager> createViewManagers(ReactApplicationContext reactContext) {
        return Collections.emptyList();
    }

    @Override
    public List<NativeModule> createNativeModules(ReactApplicationContext reactContext) {
        List<NativeModule> modules = new ArrayList<>();

        modules.add(new SharedStorage(reactContext));

        return modules;
    }

}
Again make sure your package name is written correctly at the beginning of the code.
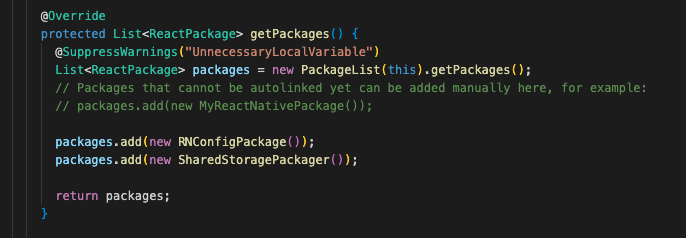
Now that we added the files, we have to import our SharedStoragePackager in the MainApplication.java file. Add the following line to your getPackages() method:
packages.add(new SharedStoragePackager());
It should look something like this:
4. Layout
To start editing the layout, let's check which other files Android Studio created in our project.
Navigate to res > layout.
Here, we can update the interface of our widget. We can add different view elements and styles to the XML file in order to change the widget's appearance.
We can style our Android widget in two ways:
- Drag and drop options directly from Android Studio
- Adding layout elements to our XML file manually
Drag and drop method
Let's take a look at the first method.
By accessing our XML file (res > layout > XML code) from the Android Studio we are able to browse through a Palette menu and simply drag and drop any element we need.
Underneath the Palette menu you may also find a Component Tree. This window shows us exactly how our elements are being nested in the widget layout.
Manual method
Another way to customize the look of our widget includes opening the XML file through the editor and put in our own elements manually.
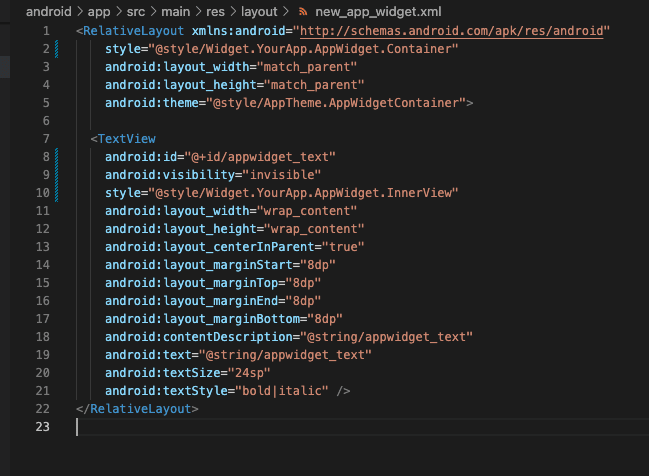
Take a note of the android:id attribute since you are going to use it later to access these View components from Java code.
For additional information on these attributes and descriptions, and how to configure your widget, click here.
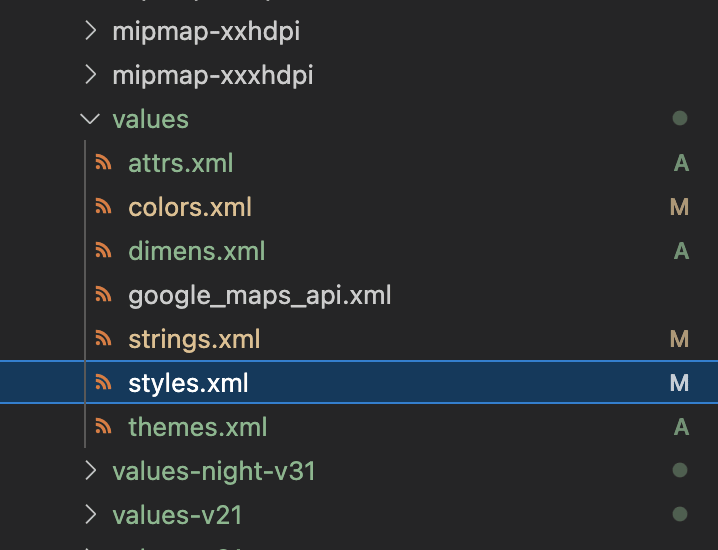
In the values folder you can set up additional information such as strings, styles, colours, themes...
If, for any reason, you want to edit the configuration properties (eg. minimum height/width) that you set at the very beginning, you can do so by opening barcode_widget_info.xml located in the res > xml folder.
Here you can also set the preview image that will be displayed in the widget gallery. This is done by editing the android:previewImage attribute and importing a new PNG image in drawable-nodpi folder.

Take note of the text that follows after @layout/. In our example this is "barcode_widget". (@layout/barcode_widget)
This information serves as a unique identification and will be crucial later on when we edit data from the java code.
Notice that here we are using targetCellWidth and targetCellHeight displayed in cells for Android 12 and more. For lower versions of Android, make sure that you have set minWidth and minHeight since the previous two attributes would be ignored. (Here you can find more information about these attributes.)
5. Setting the data from the React Native app
If we run our code now - we will be able to see our widget in the widget library, but still no data from our app will be shown.
To display our own data, we have to open our App.js file and try setting the barcode string value in our newly created SharedStorage module.
First, import the native module.
import { NativeModules } from 'react-native';
const SharedStorage = NativeModules.SharedStorage;
Then add this anywhere to your code:
let barcode = "1234567"
useEffect(() => {
  if (Platform.OS === 'android') {
    SharedStorage.set(JSON.stringify({barcode: barcode}))
  }
}, [barcode])
As shown above, we are using the set method from SharedStorage class to set the barcode value to a key barcode.
This is pretty much it for the React Native part, now let's go to our BarcodeWidget.java file that was created in the same folder as MainApplication.java.
6. Updating the widget content
Check out the updateAppWidget() method since this is where we are going to do all the logics. This method is responsible for updating the widget content.
We also need to modify our BarcodeWidget class by adding the SharedPreferences object. This object helps us get the data we set earlier in our App.js file.
import org.json.JSONException;
import org.json.JSONObject;
import android.content.SharedPreferences;
...

static void updateAppWidget(Context context, AppWidgetManager appWidgetManager, int appWidgetId) {

 try {
  SharedPreferences sharedPref = context.getSharedPreferences("DATA", Context.MODE_PRIVATE);
  String appString = sharedPref.getString("appData", "{\"text\":'no data'}");
  JSONObject appData = new JSONObject(appString);
  // Construct the RemoteViews object
  RemoteViews views = new RemoteViews(context.getPackageName(), R.layout.barcode_widget);
  views.setTextViewText(R.id.appwidget_text, appData.getString("barcode"));
  // Instruct the widget manager to update the widget
  appWidgetManager.updateAppWidget(appWidgetId, views);
 } catch (JSONException e) {
  e.printStackTrace();
 }
}
To access specific value from the storage we will use:
appData.getString("barcode")
The argument of the getString method is the key that we set in React Native app with SharedStorage.set() method.
Also, don't forget to change "barcode_widget" in R.layout.barcode_widget to your own widget id (located in barcode_widget_info.xml file that we talked about earlier).
If we run the app again the text displayed on your widget will finally be the same as the one we set in the React Native app.
Let's quickly go back to our updateAppWidget() method. To access any element in the widget layout XML file we are going to use RemoteView.
In our example, we used the setTextViewText() method to set content description to our TextView component.
The first argument is the id of the view component and the second is the value.
For more details about this class and other methods you can use, check this link.
7. Generating the barcode image from a string value
Finally, we are going to modify our BarcodeWidget.java class so it can generate a barcode image from the barcode string we sent before.
Add following functions and imports to the BarcodeWidget class:
import com.google.zxing.BarcodeFormat;
import com.google.zxing.MultiFormatWriter;
import com.google.zxing.WriterException;
import com.google.zxing.common.BitMatrix;
import android.graphics.Bitmap;

public class BarcodeWidget extends AppWidgetProvider {

  private static int size_width = 720;
  private static int size_height = 244;
  public static Bitmap createBarcode(String barcodeText) {
    Bitmap bitmap = null;
    try {
      bitmap = CreateImage(barcodeText);
    } catch (WriterException we) {
      we.printStackTrace();
    }

    return bitmap;
  }

  public static Bitmap CreateImage(String message) throws WriterException {
      BitMatrix bitMatrix = new MultiFormatWriter().encode(message, BarcodeFormat.CODE_128, size_width, size_height);

      int width = bitMatrix.getWidth();
      int height = bitMatrix.getHeight();
      int [] pixels = new int [width * height];
      for (int i = 0 ; i < height ; i++) {
        for (int j = 0 ; j < width ; j++) {
          if (bitMatrix.get(j, i)) {
            pixels[i * width + j] = 0xff000000;
          } else {
            pixels[i * width + j] = 0xffffffff;
          }
        }
      }
      Bitmap bitmap = Bitmap.createBitmap(width, height, Bitmap.Config.ARGB_8888);
      bitmap.setPixels(pixels, 0, width, 0, 0, width, height);
      return bitmap;
  }
...
}
As shown above, we are using the zxing library here, so we should update the build.gradle file with the following code:
implementation 'com.google.zxing:core:3.5.1'
The CreateImage() method is going to generate a bitmap from the string that we sent as an argument. It works by setting the value of a pixel to either black or white.
There are also many different format options when creating a bit matrix. We are going to use CODE128. For other options check this link.
Now, let's call this function in the updateAppWidget() method:
static void updateAppWidget(Context context, AppWidgetManager appWidgetManager,
                                int appWidgetId) {
  try {
    SharedPreferences sharedPref = context.getSharedPreferences("DATA", Context.MODE_PRIVATE);
    String appString = sharedPref.getString("appData", "{\"text\":'no data'}");
    JSONObject appData = new JSONObject(appString);

    // Construct the RemoteViews object
    RemoteViews views = new RemoteViews(context.getPackageName(), R.layout.barcode_widget);
    views.setTextViewText(R.id.appwidget_text, appData.getString("barcode"));
    Bitmap myBitmap = createBarcode(appData.getString("barcode"));

    // Instruct the widget manager to update the widget
    appWidgetManager.updateAppWidget(appWidgetId, views);
  } catch (JSONException e) {
    e.printStackTrace();
  }
}
To display our image we need to add the ImageView component to our barcode_widget.xml file located in layout folder:
<RelativeLayout
  android:layout_width="wrap_content"
  android:layout_height="wrap_content">
  <ImageView
    android:id="@+id/imageView_id"
    android:layout_width="wrap_content"
    android:layout_height="wrap_content" />
</RelativeLayout>
Again, pay attention to the id attribute (imageView_id) that we are going to use to get the current ImageView component:
static void updateAppWidget(Context context, AppWidgetManager appWidgetManager,
                                int appWidgetId) {
  try {
    SharedPreferences sharedPref = context.getSharedPreferences("DATA", Context.MODE_PRIVATE);
    String appString = sharedPref.getString("appData", "{\"text\":'no data'}");
    JSONObject appData = new JSONObject(appString);

    // Construct the RemoteViews object
    RemoteViews views = new RemoteViews(context.getPackageName(), R.layout.barcode_widget);
    views.setTextViewText(R.id.appwidget_text, appData.getString("barcode"));

    //setting up Bitmap image we created from barcode string to ImageView
    Bitmap myBitmap = createBarcode(appData.getString("barcode"));
    views.setImageViewBitmap(R.id.imageView_id, myBitmap);

    // Instruct the widget manager to update the widget
    appWidgetManager.updateAppWidget(appWidgetId, views);
  } catch (JSONException e) {
    e.printStackTrace();
  }
}
8. The end
Now, the only thing that's left is to run the application again.
Your widget should now display both the text and the generated image. If this is the case - then we are done!
You can now play around with the design and customize your widget further by adding more attributes and styles to your barcode layout xml file.
Hope this tutorial helped you and good luck with your project!
