

 800+ IT
News
als RSS Feed abonnieren
800+ IT
News
als RSS Feed abonnieren📚 #refineweek: Adding CRUD Actions and Authentication
💡 Newskategorie: Programmierung
🔗 Quelle: dev.to
In this post, we build on our existing understanding of dataProvider and authProvider props of <Refine /> to implement CRUD operations in our Pixels app that we initialized in the previous post. While doing so, we discuss the roles of <Refine /> component's resources and routerProvider props as well.
CRUD actions are supported by the Supabase data provider we chose for our project and in this post we use them to build a public gallery of canvases. We implement creation and displaying of individual canvases as well as drawing on them. We also add authentication features supported by the supabaseClient we discussed on Day Two of the refineWeek series.
This is Day Three and refineWeek is a seven-part tutorial that aims to help developers learn the ins-and-outs of refine's powerful capabilities and get going with refine within a week.
refineWeek series
- Day 1 - Pilot & refine architecture
- Day 2 - Setting Up the Client App
Overview
In the last episode, we explored refine's auth and data providers in significant detail. We saw that <Refine />'s dataProvider and authProvider props were set to support Supabase thanks to the @pankod/refine-supabase package.
We mentioned that dataProvider methods allow us to communicate with API endpoints and authProvider methods help us with authentication and authorization. We are able to access and invoke these methods from consumer components via their corresponding hooks.
In this post, we will be leveraging Supabase dataProvider methods to implement CRUD operations for a canvases resource. We are going to start by adding canvases as a resource on which we will be able to perform create, show and list actions. We will first work on a public gallery that lists all canvases and a dashboard page that shows a selection of featured canvases by implementing the the list action. We will allow users to perform the canvas create action from a modal. Then we will also implement the show action for a canvas.
We will then apply Supabase auth provider to allow only logged in users to carry out create actions on canvases and pixels. On the way, we will explore how refine does the heavylifting under the hood for us with React Query, and its own set of providers and hooks - making CRUD operations implementation a breeze.
But before we start, we have to set up Supabase with our database tables and get the access credentials.
Setting Up Supabase for Refine
For this app, we are using a PostgreSQL database for our backend. Our database will be hosted in the Supabase cloud. In order to set up a PostgreSQL server, we need to sign up with Supabase first.
After signing up and logging in to a developer account, we have to complete the following steps:
- Create a PostgreSQL server with an appropriate name.
- Create necessary tables in the database and add relationships.
- Get API keys provided by Supabase for the server and set up
supabaseClientinside our refine project.
Below, we go over these steps one by one.
1. Creating a PostgreSQL Server with Supabase
Creating a database server is quite intutive in Supabase. Just go over to your organization's dashboard and start doing something. For me, I have initialized a server with the name refine-pixels under a free tier. If you need a quick hand, please follow this quickstart guide.
2. Adding Tables to a Supabase Database
For our app, we have four tables: auth.users, public.users, canvases and pixels. The entity relational diagram for our database looks like this:

We have a fifth, logs table which we are going to use for audit logging with the auditLogProvider on Day Seven. However, as we are progressing step by step, we are not concerned with that at the moment. We will be adding the logs table on its day.
In order to add the above tables to your Supabase database, please follow the below instructions:
2.1 auth.users Table
The auth.users table is concerned with authentication in our app. It is created by Supabase as part of its authentication module, so we don't need to do anything about it.
Supabase supports a myriad of third party authentication providers as well as user input based email / password authentication. In our app, we'll implement GitHub authentication besides the email / password based option.
2.2 public.users Table
Supabase doesn't allow a client to query the auth.users table for security reasons. So, we need to create a shadow of the auth.users table in public.users with additional columns. We need this shadow table to be able to query user information, such as avatar_url and roles from this table.

So, in order to create the pubic.users table, go ahead and run this SQL script in the SQL Editor of your Supabase project dashboard:
-- Create a table for public users
create table users (
  id uuid references auth.users not null primary key,
  updated_at timestamp with time zone,
  username text unique,
  full_name text,
  avatar_url text
);

-- This trigger automatically creates a public.users entry when a new user signs up via Supabase Auth.
-- See https://supabase.com/docs/guides/auth/managing-user-data#using-triggers for more details.
create or replace function public.handle_new_public_user()
returns trigger as $$
begin
  insert into public.users (id, full_name, avatar_url)
  values (new.id, new.raw_user_meta_data->>'full_name', new.raw_user_meta_data->>'avatar_url');
  return new;
end;
$$ language plpgsql security definer;
create trigger on_auth_user_created
  after insert on auth.users
  for each row execute procedure public.handle_new_public_user();

-- Set up Storage!
insert into storage.buckets (id, name)
  values ('avatars', 'avatars');

-- Set up access controls for storage.
-- See https://supabase.com/docs/guides/storage#policy-examples for more details.
create policy "Avatar images are publicly accessible." on storage.objects
  for select using (bucket_id = 'avatars');

create policy "Anyone can upload an avatar." on storage.objects
  for insert with check (bucket_id = 'avatars');
2.3 canvases Table
For the canvases table, run this SQL script inside the Supabase SQL Editor:
create table canvases (
  id text unique primary key not null,
  user_id uuid references users on delete cascade not null,
  name text not null,
  width int8 not null,
  height int8 not null,
  is_featured boolean default false not null,

  created_at timestamp with time zone default timezone('utc'::text, now()) not null,
  updated_at timestamp with time zone default timezone('utc'::text, now()) not null
);
2.4 pixels Table
For the pixels table run the following SQL script:
create table pixels (
  id int8 generated by default as identity primary key not null,
  user_id uuid references users on delete cascade not null,
  canvas_id text references canvases on delete cascade not null,
  x int8 not null,
  y int8 not null,
  color text not null,

  created_at timestamp with time zone default timezone('utc'::text, now()) not null
);
If you want to create the tables using Table Editor from the dashboard, feel free to use the Supabase docs.
2.5 Relationship Between Tables
If we look closely, public.users table has a one-to-many relationship with canvases and a canvas must belong to a user.
Similarly canvases also has a one-to-many relationship with pixels. A canvas has many pixels and a pixel must belong to a canvas.
Also, public.users has a one-to-many relationship with pixels.
2.5 Disable RLS
For simplicity, we'll disable Row Level Security:

3. Set Up supabaseClient for <Refine /> Providers
Now it's time to use the Supabase hosted database server inside our refine app.
First, we need to get the access credentials for our server from the Supabase dashboard. We can avail them by following this section in the Supabase quickstart guide.
I recommend storing these credentials in a .env file:
// .env
SUPABASE_URL=YOUR_SUPABASE_URL
SUPABASE_KEY=YOUR_SUPABASE_KEY
Doing so will let us use these credentials to update the supabaseClient.ts file created by refine at initialization:
// supabaseClient.ts

import { createClient } from "@pankod/refine-supabase";

const SUPABASE_URL = process.env.SUPABASE_URL ?? "";
const SUPABASE_KEY = process.env.SUPABASE_KEY ?? "";

export const supabaseClient = createClient(SUPABASE_URL, SUPABASE_KEY);
<Refine /> component's dataProvider, authProvider and liveProvider objects utilize this supabaseClient to connect to the PostgreSQL server hosted on Supabase.
With this set up, now we can introduce canvases resource and start implementing CRUD operations for our app so that we can perform queries on the canvases table.
<Refine />'s resources Prop
If we look at our initial App.tsx component, it looks like this:
 // App.tsx

import React from "react";
import { Refine } from "@pankod/refine-core";
import {
  AuthPage,
  notificationProvider,
  ReadyPage,
  ErrorComponent,
} from "@pankod/refine-antd";

import { dataProvider, liveProvider } from "@pankod/refine-supabase";
import routerProvider from "@pankod/refine-react-router-v6";
import { supabaseClient } from "utility";
import authProvider from "./authProvider";

function App() {
  return (
    <Refine
      dataProvider={dataProvider(supabaseClient)}
      liveProvider={liveProvider(supabaseClient)}
      authProvider={authProvider}
      routerProvider={{
        ...routerProvider,
        routes: [
          {
            path: "/register",
            element: <AuthPage type="register" />,
          },
          {
            path: "/forgot-password",
            element: <AuthPage type="forgotPassword" />,
          },
          {
            path: "/update-password",
            element: <AuthPage type="updatePassword" />,
          },
        ],
      }}
      LoginPage={() => (
        <AuthPage
          type="login"
          providers={[
            {
              name: "google",
              label: "Sign in with Google",
            },
          ]}
        />
      )}
      notificationProvider={notificationProvider}
      ReadyPage={ReadyPage}
      catchAll={<ErrorComponent />}
      Layout={Layout}
    />
  );
}

export default App;
Focusing on the top, in order to add a resource to our app, we have to introduce the resources prop to <Refine />. The value of resources prop should be an array of resource items with RESTful routes in our app. A typical resource object contains properties and values related to the resource name, options, and intended actions:
// Typical resource object inside resources array

{
  name: "canvases",
  options: {
    label: "Canvases",
  },
  list: CanvasList,
  show: CanvasShow,
}
We can have as many resource items inside our resources array as the number of entities we have in our app.
refine simplifies CRUD actions and routing related to all items in the resources array. It's worth spending a few minutes exploring the possible properties of a resource item from the resources docs here.
For the above canvases resource, the name property denotes the name of the resource. Behind the scenes, refine auto-magically adds RESTful routes for the actions defined on a resource name to the routerProvider object - i.e. for us here along the /canvases path.
We'll ignore the options object for now, but list and show properties represent the CRUD actions we want. And their values are the components we want to render when we navigate to their respective RESTful routes, such as /canvases and /canvases/show/a-canvas-slug. Once again, refine generates these routes, places them into the routerProvider object. It then matches them to their corresponding components when these routes are visited.
We will use a modal form for the create action, so we don't need /canvases/create route. Therefore, we won't assign create property for canvases resource.
Adding resources to <Refine />
For our app, we'll configure our resources object with actions for canvases. So, let's add canvases resource with list and show actions:
// App.tsx

<Refine
   ...
  //highlight-start
  resources={[
    {
      name: "canvases",
      option: {
        label: "Canvases",
      },
      list: CanvasList,
      show: CanvasShow,
    },
  ]};
  //highlight-end
/>
We will consider these two actions with their respective components in the coming sections. We should have the CanvasList and CanvasShow components premade. In a refine app, CRUD action related components are typically placed in a directory that has a structure like this: src/pages/resource_name/.
In our case, we'll house canvases related components in the src/pages/canvases/ folder.
index Files
We are also using index.ts files to export contents from our folders, so that the components are easily found by the compiler in the global namespace.
Adding required files
Here is the finalized version of what we'll be building in this article:
https://github.com/refinedev/refine/tree/master/examples/pixels
Before we move on, you need to add required page and components to the project if you want build the app by following the article. Please add the following components and files into src folder in the project:
- pages: https://github.com/refinedev/refine/tree/master/examples/pixels/src/pages
- components: https://github.com/refinedev/refine/tree/master/examples/pixels/src/components
- utility: https://github.com/refinedev/refine/tree/master/examples/pixels/src/utility
- types: https://github.com/refinedev/refine/tree/master/examples/pixels/src/types
- styles: https://github.com/refinedev/refine/tree/master/examples/pixels/src/styles
After creating files above you need to add some imports to App.tsx, simply add replace your App.tsx with following.
// App.tsx

import React from 'react';
import { Refine } from '@pankod/refine-core';
import {
    AuthPage,
    notificationProvider,
    ReadyPage,
    ErrorComponent,
    Icons
} from '@pankod/refine-antd';
import '@pankod/refine-antd/dist/reset.css';
import { dataProvider, liveProvider } from '@pankod/refine-supabase';
import routerProvider from '@pankod/refine-react-router-v6';

import { supabaseClient } from 'utility';
import authProvider from './authProvider';
import { Layout } from 'components/layout';
import { CanvasFeaturedList, CanvasList, CanvasShow } from 'pages/canvases';
import 'styles/style.css';

const { GithubOutlined } = Icons;

function App() {
    return (
        <Refine
            dataProvider={dataProvider(supabaseClient)}
            liveProvider={liveProvider(supabaseClient)}
            authProvider={authProvider}
            routerProvider={{
                ...routerProvider,
                routes: [
                    {
                        path: '/register',
                        element: <AuthPage type="register" />,
                    },
                    {
                        path: '/forgot-password',
                        element: <AuthPage type="forgotPassword" />,
                    },
                    {
                        path: '/update-password',
                        element: <AuthPage type="updatePassword" />,
                    },
                ],
            }}
            LoginPage={() => (
                <AuthPage
                    type="login"
                    providers={[
                        {
                            name: 'github',
                            icon: (
                                    <GithubOutlined
                                      style={{ fontSize: "18px" }}
                                    />
                                    ),
                            label: 'Sign in with GitHub',
                        },
                    ]}
                />
            )}
            resources={[
                {
                    name: 'canvases',
                    options: {
                        label: 'Canvases',
                    },
                    list: CanvasList,
                    show: CanvasShow,
                },
            ]}
            notificationProvider={notificationProvider}
            ReadyPage={ReadyPage}
            catchAll={<ErrorComponent />}
            Layout={Layout}
        />
    );
}

export default App;
<Refine /> list Action
The list action represents a GET request sent to the canvases table in our Supabase db. It is done through the dataProvider.getList method that @pankod/refine-supabase gave us. From the consumer <CanvasList /> component, it can be accessed via the useList() hook.
refine defines the routes for list action to be the /canvases path, and adds it to the routerProvider object. /canvases path, in turn, renders the <CanvasList /> component, as specified in the resources array.
The contents of our <CanvasList /> component look like this:
// src/pages/canvases/list.tsx

import { AntdList, Skeleton, useSimpleList } from "@pankod/refine-antd";

import { CanvasTile } from "components/canvas";
import { SponsorsBanner } from "components/banners";
import { Canvas } from "types";

export const CanvasList: React.FC = () => {
    const { listProps, queryResult } = useSimpleList<Canvas>({
        resource: "canvases",
        pagination: {
            pageSize: 12,
        },
        initialSorter: [
            {
                field: "created_at",
                order: "desc",
            },
        ],
    });

    const { isLoading } = queryResult;

    return (
        <div className="container">
            <div className="paper">
                {isLoading ? (
                    <div className="canvas-skeleton-list">
                        {[...Array(12)].map((_, index) => (
                            <Skeleton key={index} paragraph={{ rows: 8 }} />
                        ))}
                    </div>
                ) : (
                    <AntdList
                        {...listProps}
                        className="canvas-list"
                        split={false}
                        renderItem={(canvas) => <CanvasTile canvas={canvas} />}
                    />
                )}
            </div>
            <SponsorsBanner />
        </div>
    );
};
There are a few of things to note here: the first being the use of Ant Design with refine's @pankod/refine-antd module. The second thing is the useSimpleList() hook that is being used to access listProps and queryResult items to feed UI elements. And third, the use of pagination and sorting in the query sent.
Let's briefly discuss what's going on:
1. refine-antd Components
refine makes all Ant Design components available to us via the @pankod/refine-antd package. They can be used with their same name in Ant Design. However, Ant Design's <List /> component is renamed as <AntdList />, which we are using above.
It takes in the props inside listProps object that useSimpleList() hook prepares for us from the fetched canvases array and shows each canvas data inside the <CanvasTile /> component. All the props and presentation logic are being handled inside the Ant Design <List /> component. For detailed info on the <List /> component, please visit this Ant Design reference.
Refer to complete refine CRUD app with Ant Design tutorial here.
2. useSimpleList() Hook
The useSimpleList() is a @pankod/refine-antd hook built on top of the low level useList() hook to fetch a resource collection. After fetching data according to the the value of the resource property, it prepares it according to the listProps of the Ant Design's <List /> component.
In our <CanvasList /> component, we are passing the listProps props to <AntdList /> in order to show a list of canvases.
Please feel free to go through the useSimpleList documentation here for as much as information as you need. It makes life a lot easier while creating a dashboard or list of items.
3. Sorting
If you are already looking at the useSimpleList() argument object's properties, notice that we are able to pass options for pagination and initialSorter for the API call and get the response accordingly.
With this set up - and connected to the Internet - if we run the dev server with yarn dev and navigate to http://localhost:3000, we are faced with a login screen:

Well... That's mean!
Okay, this is because we have authProvider prop activated in the boilerplate <App /> component. Additionally, the LoginPage prop was also set to refine's special <AuthPage /> component. Because of this, we are being presented with the <AuthPage /> component's login type variant which basically wants us to authenticate before we move forward.
Also you can inspect the pages/auth/index.tsx component to see how we customized the default Auth Page component.
However, we want our gallery at /canvases to be public. So we need to bypass authentication for this path. And we can do that by tweaking the authProvider.checkAuth() method.
Let's look at its current implementation and discussn the whats and hows before we come up with the changes.
Public Routes in refine
If we revisit the authProvider object, we can see that the checkAuth() method only allows logged in users into the root route. All other attempts are rejected:
// src/authProvider.ts

checkAuth: async () => {
  const session = supabaseClient.auth.session();
  const sessionFromURL = await supabaseClient.auth.getSessionFromUrl();

  if (session || sessionFromURL?.data?.user) {
    return Promise.resolve();
  }

  return Promise.reject();
},
We'll change this to be the opposite. To check for the session from the current url and allow all users to /:
// src/authProvider.ts

checkAuth: async () => {
  await supabaseClient.auth.getSessionFromUrl();
  return Promise.resolve();
},
We'll modify the getUserIdentity() method as well, because we are using it in the <Header /> component which houses a button for creating a canvas:
// src/authProvider.ts

getUserIdentity: async () => {
  const user = supabaseClient.auth.user();

  if (user) {
    return Promise.resolve({
      ...user,
      name: user.email,
    });
  }

  return Promise.reject();
},
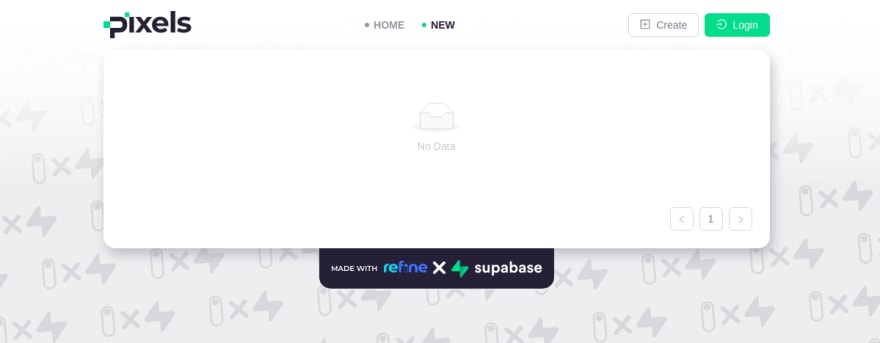
Now, if we refresh our browser at /, we see it redirected to /canvases. This is because when the resources object is set, refine configures the root route to be the list action of the first resource item in the resources array. Since we only have canvases as our resource, it leads to /canvases.
At the moment, we don't have any canvas created in our app yet, so at /canvases we don't see the gallery:
The change in checkAuth brings caveats, as removing the return Promise.reject() disables the LoginPage prop of <Refine />, so with this change we will get a 404 error when we visit /login. We'll come back to this in the section related to Authentication.
But, let's now go ahead and implement how to create canvases.
<Refine /> create Action
The create action represents a POST request sent to the canvases table in our Supabase database. It is done with the dataProvider.create() method that @pankod/refine-supabase package gave us.
We are presenting the canvas form inside a modal contained in a <CreateCanvas /> component, which is placed in the <Header /> component. And the modal is accessed with a Create canvas button we have in the <Header />.
The <Header /> component looks like this:
// src/components/layout/header/index.tsx

import React from "react";
import {
    useGetIdentity,
    useLogout,
    useMenu,
    useNavigation,
    useRouterContext,
} from "@pankod/refine-core";
import { Button, Image, Space, Icons, useModalForm } from "@pankod/refine-antd";

import { CreateCanvas } from "components/canvas";
import { Canvas } from "types";

const { PlusSquareOutlined, LogoutOutlined, LoginOutlined } = Icons;

export const Header: React.FC = () => {
    const { Link, useLocation } = useRouterContext();
    const { isError } = useGetIdentity();
    const { mutate: mutateLogout } = useLogout();
    const { push } = useNavigation();
    const { selectedKey } = useMenu();
    const { pathname } = useLocation();

    const { modalProps, formProps, show } = useModalForm<Canvas>({
        resource: "canvases",
        action: "create",
        redirect: "show",
    });

    const isLogin = !isError;

    const handleRedirect = () => {
        if (pathname === "/") {
            push("/login");
        }

        push(`/login?to=${encodeURIComponent(pathname)}`);
    };

    return (
        <div className="container">
            <div className="layout-header">
                <Link to="/">
                    <Image
                        width="120px"
                        src="/pixels-logo.svg"
                        alt="Pixels Logo"
                        preview={false}
                    />
                </Link>
                <Space size="large">
                    <Link
                        to="/"
                        className={`nav-button ${
                            selectedKey === "/" ? "active" : ""
                        }`}
                    >
                        <span className="dot-icon" />
                        HOME
                    </Link>
                    <Link
                        to="/canvases"
                        className={`nav-button ${
                            selectedKey === "/canvases" ? "active" : ""
                        }`}
                    >
                        <span className="dot-icon" />
                        NEW
                    </Link>
                </Space>
                <Space>
                    <Button
                        icon={<PlusSquareOutlined />}
                        onClick={() => {
                            if (isLogin) {
                                show();
                            } else {
                                handleRedirect();
                            }
                        }}
                        title="Create a new canvas"
                    >
                        Create
                    </Button>
                    {isLogin ? (
                        <Button
                            type="primary"
                            danger
                            onClick={() => {
                                mutateLogout();
                            }}
                            icon={<LogoutOutlined />}
                            title="Logout"
                        />
                    ) : (
                        <Button
                            type="primary"
                            onClick={() => {
                                handleRedirect();
                            }}
                            icon={<LoginOutlined />}
                            title="Login"
                        >
                            Login
                        </Button>
                    )}
                </Space>
            </div>
            <CreateCanvas modalProps={modalProps} formProps={formProps} />
        </div>
    );
};
Our create action involves the useModalForm() hook which manages UI, state, error and data fetching for the refine-antd <Modal /> and <Form /> components. Let's zoom in on what exactly it is doing.
The useModalForm() Hook
In the <Header /> component above, we are invoking the useModalForm() hook with its argument object containing resource, action and redirect properties. We are getting the modalProps and formProps properties that it prepares for us from the response data.
There are loads of things happening here. So I recommend going through the useModalForm() documentation.
It is also important that we understand how the Ant Design <Modal /> component accepts the modalProps props from this page and how the <Form /> works with formProps from here.
We are using the <Modal /> and <Form /> inside the <CreateCanvas /> component that receives the modalProps and formProps and relays them to these descendents:
CreateCanvas component code
// src/components/canvas/create.tsx

import React, { useState } from "react";
import { useGetIdentity } from "@pankod/refine-core";
import {
    Form,
    FormProps,
    Input,
    Modal,
    ModalProps,
    Radio,
} from "@pankod/refine-antd";

import { getRandomName, DEFAULT_CANVAS_SIZE } from "utility";

type CreateCanvasProps = {
    modalProps: ModalProps;
    formProps: FormProps;
};

export const CreateCanvas: React.FC<CreateCanvasProps> = ({
    modalProps,
    formProps,
}) => {
    const { data: user } = useGetIdentity();

    const [values, setValues] = useState(() => {
        const name = getRandomName();
        return {
            name: name,
            id: name.replace(/\s/g, "-").toLowerCase(),
            width: DEFAULT_CANVAS_SIZE,
            height: DEFAULT_CANVAS_SIZE,
        };
    });

    return (
        <Modal
            {...modalProps}
            title="Create Canvas"
            width={600}
            centered
            afterClose={() => {
                const name = getRandomName();
                setValues({
                    name: name,
                    id: name.replace(/\s/g, "-").toLowerCase(),
                    width: DEFAULT_CANVAS_SIZE,
                    height: DEFAULT_CANVAS_SIZE,
                });
            }}
            bodyStyle={{ borderRadius: "6px" }}
        >
            <Form
                {...formProps}
                labelCol={{ span: 6 }}
                wrapperCol={{ span: 12 }}
                onFinish={() => {
                    return (
                        formProps.onFinish &&
                        formProps.onFinish({
                            ...values,
                            user_id: user?.id,
                        })
                    );
                }}
            >
                <Form.Item label="ID:">
                    <Input value={values.id} disabled />
                </Form.Item>

                <Form.Item label="Name:">
                    <Input value={values.name} disabled />
                </Form.Item>

                <Form.Item label="Size:">
                    <Radio.Group
                        options={[10, 20, 30]}
                        onChange={({ target: { value } }) =>
                            setValues((p) => ({
                                ...p,
                                height: value,
                                width: value,
                            }))
                        }
                        value={values.width}
                        optionType="button"
                        buttonStyle="solid"
                    />
                </Form.Item>
            </Form>
        </Modal>
    );
};
Notice the use of the formProps.onFinish() method on <Form />'s onFinish prop. This is the form event which initiates the create action.
Behind the scenes, useModalForm() ultimately calls the useCreate() data hook which fetches the data with the dataProvider.create() method.
For details about how the useCreate() hook works, please refer to this refine documentation.
Notice also that we are passing the redirect property to the useModalForm() hook which specifies that we redirect to the show action of the resource. We'll come to this in the next section related to adding show action in our canvases resource.
If we now click on the Create button in our navbar, we will be again redirected to the /login page.
This is because for the onClick event on the Create canvas button inside the <Header /> component, we have asked the router to authenticate the user if they are not logged in:
// src/components/layout/header/index.tsx

<Button
  icon={<PlusSquareOutlined />}
  onClick={() => {
    if (isLogin) {
      show();
    } else {
      handleRedirect();
    }
  }}
  title="Create a new canvas"
>
  Create
</Button>
And because of the change we made in authProvider.checkAuth(), we get a 404 error. Let's just bypass authentication by disabling the authProvider prop on <Refine /> by commenting it out:
// src/App.tsx

<Refine
  ...
  // authProvider={authProvider}
/>
Now if we click on the Create canvas button on the navbar, we should be presented with a modal with the form inside:
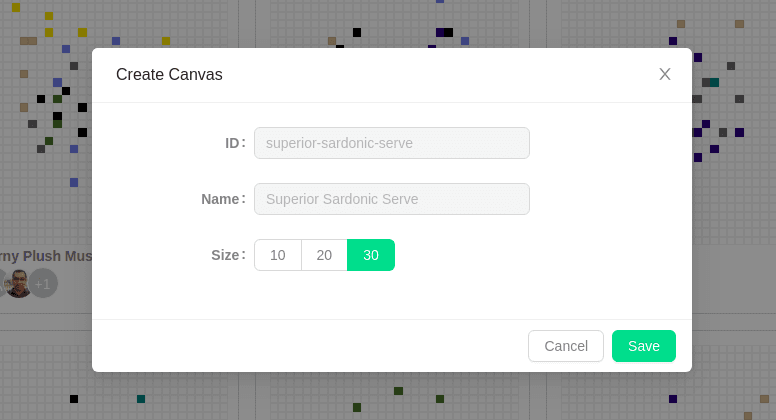
So, we are able to see the form for canvas create action, but can't really create a canvas because we don't have a user_id as we have authentication disabled at this point. We'll start creating canvases after we have our show page ready and once we have authentication fully implemented and reactivated.
<Refine /> show Action
We noted in the previous section that after a successful create action, useModalForm() is set to redirect the page to the show action.
The show action represents a GET request to the canvases table in our Supabase database. It is done with the dataProvider.getOne() method. In the <CanvasShow /> component, it can be accessed via the useShow() hook.
The <CanvasShow /> component looks like this:
// src/pages/canvases/show.tsx

import { useState } from "react";
import {
    useCreate,
    useGetIdentity,
    useNavigation,
    useShow,
} from "@pankod/refine-core";
import { Button, Typography, Icons, Spin } from "@pankod/refine-antd";

import { CanvasItem, DisplayCanvas } from "components/canvas";
import { ColorSelect } from "components/color-select";
import { AvatarPanel } from "components/avatar";
import { colors } from "utility";
import { Canvas } from "types";

const { LeftOutlined } = Icons;
const { Title } = Typography;

export const CanvasShow: React.FC = () => {
    const [color, setColor] = useState<typeof colors[number]>("black");

    const { data: identity } = useGetIdentity();
    const {
        queryResult: { data: { data: canvas } = {} },
    } = useShow<Canvas>();
    const { mutate } = useCreate();
    const { list, push } = useNavigation();

    const onSubmit = (x: number, y: number) => {
        if (!identity) {
            return push("/login");
        }

        if (typeof x === "number" && typeof y === "number" && canvas?.id) {
            mutate({
                resource: "pixels",
                values: {
                    x,
                    y,
                    color,
                    canvas_id: canvas?.id,
                    user_id: identity.id,
                },
                successNotification: false,
            });
        }
    };

    return (
        <div className="container">
            <div className="paper">
                <div className="paper-header">
                    <Button
                        type="text"
                        onClick={() => list("canvases")}
                        style={{ textTransform: "uppercase" }}
                    >
                        <LeftOutlined />
                        Back
                    </Button>
                    <Title level={3}>{canvas?.name ?? canvas?.id ?? ""}</Title>
                    <Button type="text" style={{ visibility: "hidden" }}>
                        <LeftOutlined />
                        Back
                    </Button>
                </div>

                {canvas ? (
                    <DisplayCanvas canvas={canvas}>
                        {(pixels) =>
                            pixels ? (
                                <div
                                    style={{
                                        display: "flex",
                                        justifyContent: "center",
                                        gap: 48,
                                    }}
                                >
                                    <div>
                                        <ColorSelect
                                            selected={color}
                                            onChange={setColor}
                                        />
                                    </div>
                                    <CanvasItem
                                        canvas={canvas}
                                        pixels={pixels}
                                        onPixelClick={onSubmit}
                                        scale={(20 / (canvas?.width ?? 20)) * 2}
                                        active={true}
                                    />
                                    <div style={{ width: 120 }}>
                                        <AvatarPanel pixels={pixels} />
                                    </div>
                                </div>
                            ) : (
                                <div className="spin-wrapper">
                                    <Spin />
                                </div>
                            )
                        }
                    </DisplayCanvas>
                ) : (
                    <div className="spin-wrapper">
                        <Spin />
                    </div>
                )}
            </div>
        </div>
    );
};
In the code above, we have two instances of data hooks in action. First, with the useShow() hook, we are getting the created canvas data to display it in the grid:
// src/pages/canvases/show.tsx

const {
  queryResult: { data: { data: canvas } = {} },
} = useShow<Canvas>();
Additionally, we are letting another mutation to create a pixel in our pixels table with the following:
// src/pages/canvases/show.tsx
const { mutate } = useCreate();

const onSubmit = (x: number, y: number) => {
  if (typeof x === "number" && typeof y === "number" && canvas?.id) {
    mutate({
      resource: "pixels",
      values: { x, y, color, canvas_id: canvas?.id },
    });
  }
};
Now that we have our <CanvasShow /> component ready, let's start implementing Supabase authentication for our app.
Supabase Authentication with Refine
Let's re-activate authentication by uncommenting authProvider={authProvider}:
// src/App.tsx

<Refine
  ...
  authProvider={authProvider}
/>
And if we click on the Create canvas button, we are redirected to /login route that leads to the 404 error.
Email Authentication with Supabase in Refine
For implementing authentication, we look back at the App.tsx file.
refine's Supabase module has produced all the auth page variations we need to register an account, login, recover password and update password - along with the code for routing, https requests and authentication providers.
Namely, authentication related routing has been added:
// src/App.tsx

<Refine
  ...
  routerProvider={{
    ...routerProvider,
    // auth routes start
    routes: [
      {
        path: "/register",
        element: <AuthPage type="register" />,
      },
      {
        path: "/forgot-password",
        element: <AuthPage type="forgotPassword" />,
      },
      {
        path: "/update-password",
        element: <AuthPage type="updatePassword" />,
      },
    ],
  // auth routes end
  }}
/>
The LoginPage prop was also added:
// src/App.tsx

<Refine
  LoginPage={() => (
    <AuthPage
      type="login"
      providers={[
        {
          name: "github",
          label: "Sign in with GitHub",
        },
      ]}
    />
/>
However, we changed the authProvider.checkAuth() method earlier in order to accommodate our public gallery. Because of this change, the LoginPage prop gets deactivated. So, in the following section we are moving the login page to the routes prop.
Custom Login
In order to add a custom login route, we add a new entry to the routes prop of <Refine />. You can replace your App.tx with the following:
// src/App.tsx

import { Refine } from "@pankod/refine-core";
import {
    notificationProvider,
    ReadyPage,
    ErrorComponent,
    Icons,
    ConfigProvider,
} from "@pankod/refine-antd";
import { dataProvider, liveProvider } from "@pankod/refine-supabase";
import routerProvider from "@pankod/refine-react-router-v6";

import { Layout } from "components/layout";
import { CanvasFeaturedList, CanvasList, CanvasShow } from "pages/canvases";
import { AuthPage } from "pages/auth";

import { supabaseClient } from "utility";
import authProvider from './authProvider';

import "@pankod/refine-antd/dist/reset.css";

import "styles/style.css";

const { GithubOutlined } = Icons;

function App() {
    return (
        <ConfigProvider
            theme={{
                token: {
                    colorPrimary: "#3ecf8e",
                    colorText: "#80808a",
                    colorError: "#fa541c",
                    colorBgLayout: "#f0f2f5",
                    colorLink: "#3ecf8e",
                    colorLinkActive: "#3ecf8e",
                    colorLinkHover: "#3ecf8e",
                },
            }}
        >
            <Refine
                dataProvider={dataProvider(supabaseClient)}
                liveProvider={liveProvider(supabaseClient)}
                authProvider={authProvider}
                routerProvider={{
                    ...routerProvider,
                    routes: [
                        {
                            path: "/login",
                            element: (
                                <AuthPage
                                    type="login"
                                    providers={[
                                        {
                                            name: "github",
                                            icon: (
                                                <GithubOutlined
                                                    style={{ fontSize: "18px" }}
                                                />
                                            ),
                                            label: "Sign in with GitHub",
                                        },
                                    ]}
                                />
                            ),
                        },
                        {
                            path: "/register",
                            element: <AuthPage type="register" />,
                        },
                        {
                            path: "/forgot-password",
                            element: <AuthPage type="forgotPassword" />,
                        },
                        {
                            path: "/update-password",
                            element: <AuthPage type="updatePassword" />,
                        },
                    ],
                }}
                DashboardPage={() => <CanvasFeaturedList />}
                resources={[
                    {
                        name: "canvases",
                        list: CanvasList,
                        show: CanvasShow,
                    },
                ]}
                notificationProvider={notificationProvider}
                ReadyPage={ReadyPage}
                catchAll={<ErrorComponent />}
                Layout={Layout}
            />
        </ConfigProvider>
    );
}

export default App;
We are also using a customized version of the <AuthPage /> component now. We will not discuss about customizing the <AuthPage /> component since it is pretty straight forward. But you can find the updated <AuthPage /> component in the src/pages/auth directory.
If you haven't already, it is definitely worth spending time to go over the <AuthPage /> customization details here.
Registering an Account
Since we haven't created any account with the auth.users table on our Supabase server, we need to navigate to the /register route where we are presented with the customized sign up form.
At this point, if we register with our email and a password, it gets added to the auth.users table in Supabase.
After registration, the user is automatically signed in and the browser redirects to the root route, which takes us to the /canvases route thanks to refine's sensible routing defaults.
And now, since we are logged in, we should be able to create a canvas. After successful creation of a canvas, we should be redirected to /canvases/:id:

Feel free to create a few more canvases and draw on them so that the gallery gets populated.
With the main features functioning now, let's focus on adding and activating third party authentication.
We have a providers prop on <AuthPage />. We want to add GitHub authentication as well.
GitHub Authentication with Supabase in Refine
We implemented GitHub authentication with Supabase in our app.
In order to do so, we just need to add the following object to the providers prop in <AuthPage /> component:
{
  name: "github",
  icon: <GithubOutlined style={{ fontSize: "18px" }} />,
  label: "Sign in with GitHub",
}
In our Supabase backend, we have to configure and enable GitHub authentication. Feel free to use this Supabase guide.
And now we should be able to sign in to our app with GitHub as well.
Implementing a Public Dashboard with Refine
Now it's time to focus on the DashboardPage prop. We put the <CanvasFeaturedList /> in this page:
// App.tsx

<Refine
  Dashboard={() => <CanvasFeaturedList />}
/>
The DashboardPage prop places its component at the / route and it precedence over the first item in the resources prop.
So, now if we visit the root route we can see the <CanvasFeaturedList /> component, and not the <CanvasList /> component.
There will not be any item in the dashboard page because is_featured is set to false for a canvas by default. At this stage, in order to get a list of featured canvases, we have to set is_featured: true from Supabase dashboard for some of the canvases created.
I've done that and the featured canvases are listed in the Home route:

Summary
In this post, we added canvases resource to our <Refine /> component. We implemented list action on a public gallery and a dashboard page and the show action to display a canvas. The create action is implemented from inside a modal accessible on a button click. While working through these, we inspected into individual data provider methods and hooks for these actions.
We also saw how refine handles a simple email/password based authentication out-of-the-box. We then went ahead implemented social login using GitHub authentication provider.
In the next article, we'll move things to the next level by adding live collaboration features using refine's Supabase liveProvider.