

 800+ IT
News
als RSS Feed abonnieren
800+ IT
News
als RSS Feed abonnieren📚 Build C++ Applications in a Linux Docker Container with Visual Studio
💡 Newskategorie: Programmierung
🔗 Quelle: devblogs.microsoft.com
Docker containers provide a consistent development environment for building, testing, and deployment. The virtualized OS, file system, environment settings, libraries, and other dependencies are all encapsulated and shipped as one image that can be shared between developers and machines. This is especially useful for C++ cross-platform developers because you can target a container that runs a different operating system than the one on your development machine.
In this blog post we’re going to use Visual Studio’s native CMake support to build a simple Linux application in a Linux docker container over SSH. This post focuses on creating your first docker container and building from Visual Studio. If you’re interested in learning more about Docker as a tool to configure reproducible build environments, check out our post on using multi-stage containers for C++ development.
This workflow leverages Visual Studio’s native support for CMake, but the same instructions can be used to build a MSBuild-based Linux project in Visual Studio.
Set-up your first Linux docker container
First, we’ll set-up a Linux docker container on Windows. You will need to download the Docker Desktop Client for Windows and create a docker account if you haven’t already. See Install Docker Desktop on Windows for download information, system requirements, and installation instructions.
We’ll get started by pulling down an image of the Ubuntu OS and running a few commands. From the Windows command prompt run:
> docker pull ubuntu
This will download the latest image of Ubuntu from Docker. You can see a list of your docker images by running:
> docker images

Next, we’ll use a Dockerfile to create a custom image based on our local image of Ubuntu. Dockerfiles contain the commands used to assemble an image and allow you to automatically reproduce the same build environment from any machine. See Dockerfile reference for more information on authoring your own Dockerfiles. The following Dockerfile can be used to install Visual Studio’s required build tools and configure SSH. CMake is also a required dependency but I will deploy statically linked binaries directly from Visual Studio in a later step. Use your favorite text editor to create a file called ‘Dockerfile’ with the following content.
# our local base image
FROM ubuntu

LABEL description="Container for use with Visual Studio"

# install build dependencies
RUN apt-get update && apt-get install -y g++ rsync zip openssh-server make

# configure SSH for communication with Visual Studio
RUN mkdir -p /var/run/sshd

RUN echo 'PasswordAuthentication yes' >> /etc/ssh/sshd_config &&
   ssh-keygen -A

# expose port 22
EXPOSE 22
We can then build an image based on our Dockerfile by running the following command from the directory where your Dockerfile is saved:
> docker build -t ubuntu-vs .
Next, we can run a container derived from our image:
> docker run -p 5000:22 -i -t ubuntu-vs /bin/bash
The -p flag is used to expose the container’s internal port to the host. If this step was successful, then you should automatically attach to the running container. You can stop your docker container at any time and return to the command prompt using the exit command. To reattach, run docker ps -a, docker start <container-ID>, and docker attach <container-ID> from the command prompt.
Lastly, we will interact with our docker container directly to start SSH and create a user account to use with our SSH connection. Note that you can also enable root login and start SSH from your Dockerfile if you want to avoid any manual and container-specific configuration. Replace <user-name> with the username you would like to use and run:
> service ssh start
> useradd -m -d /home/<user-name> -s /bin/bash -G sudo <user-name>
> passwd <user-name>
The -m and -d flags create a user with the specified home directory, and the -s flag sets the user’s default shell.
You are now ready to connect to your container from Visual Studio.
Connect to your docker container from Visual Studio
Make sure you have Visual Studio 2019 and the Linux development with C++ workload installed.
Open Visual Studio 2019 a create a new CMake Project. CMake is cross-platform and allows you to configure an application to run on both Windows and Linux.
Once the IDE has loaded, you can add a SSH connection to your Linux docker container the same way you would add any other remote connection. Navigate to the Connection Manager (Tools > Options > Cross Platform > Connection Manager) and select “Add” to add a new remote connection.
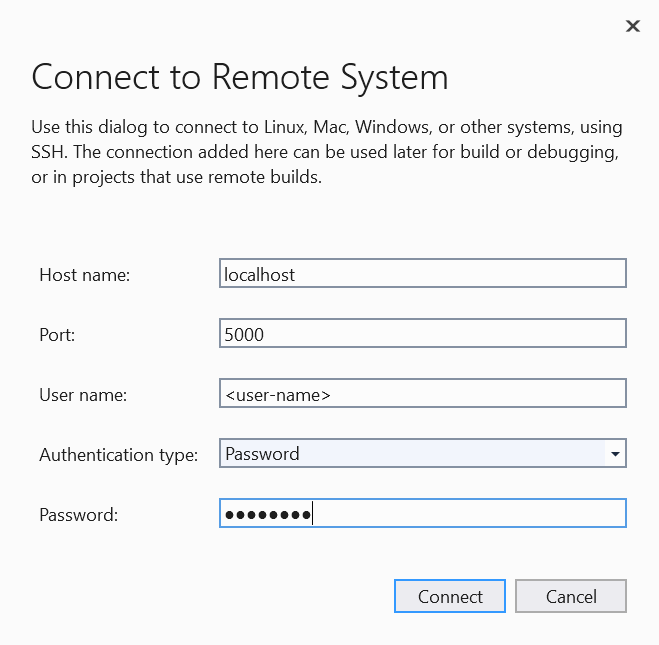
Your host name should be “localhost”, the port should be whatever you are using for your SSH connection (in this example we’re using 5000), and your username and password should match the user account that you just created for your container.
Configure build in Visual Studio
At this point the project behaves like any other CMake project in Visual Studio. To configure and build the console application in our Linux container navigate to “Manage Configurations…” in the configuration drop-down.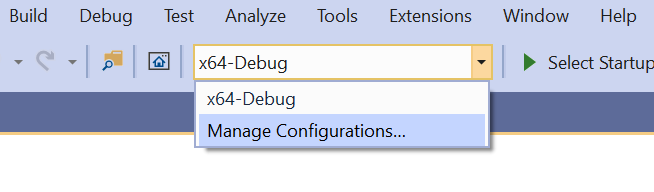
You can then select the green plus sign in the CMake Settings Editor to add a new “Linux-Debug” configuration. Make sure that the remote machine name of your Linux configuration matches the remote connection we created for our Linux docker container.

Save the CMake Settings Editor (ctrl + s) and select your new Linux configuration from the configuration drop-down to kick off a CMake configuration. If you don’t already have CMake installed on your docker container, then Visual Studio will prompt you to deploy statically linked binaries directly to your remote connection as a part of the configure step.
At this point you can build your application in your Linux docker container directly from Visual Studio. Additional build settings (including custom toolchain files, CMake variables, and environment variables) can be configured in the CMake Settings Editor. The underlying CMakeSettings.json file can store multiple build configurations and can be checked into source control and shared between team members.
Coming next
This post showed you how to build a C++ application in a Linux docker container with Visual Studio. Stay tuned for our next post, where will we show you how to copy the build artifacts back to your local Windows machine and debug using gdbserver on a second remote system.
Give us your feedback
Do you have feedback on our Linux tooling or CMake support in Visual Studio? We’d love to hear from you to help us prioritize and build the right features for you. We can be reached via the comments below, Developer Community, email (visualcpp@microsoft.com), and Twitter (@VisualC).
The post Build C++ Applications in a Linux Docker Container with Visual Studio appeared first on C++ Team Blog.
...