Introduction
In March 2020, ML.NET added is an open-source and cross-platform machine learning framework for .NET developers. Model Builder is a tool in Visual Studio that provides a graphical user interface that uses Automated Machine Learning (Auto ML) to train and consume custom ML.NET models for your .NET applications.
Prerequisites
To follow along, you’ll need the following prerequisites:
- .
- .NET Core cross-platform development workload
To use Model Builder, make sure to enable the preview feature. In the Visual Studio Menu Bar, select Tools > Options > Environment > Preview Features. Then, check the Enable ML.NET Model Builder box.
Model training workflow
The process of training models usually consists of the steps outlined below:
- Get the data
- Create a .NET Core application. This can be a console, desktop, or web application.
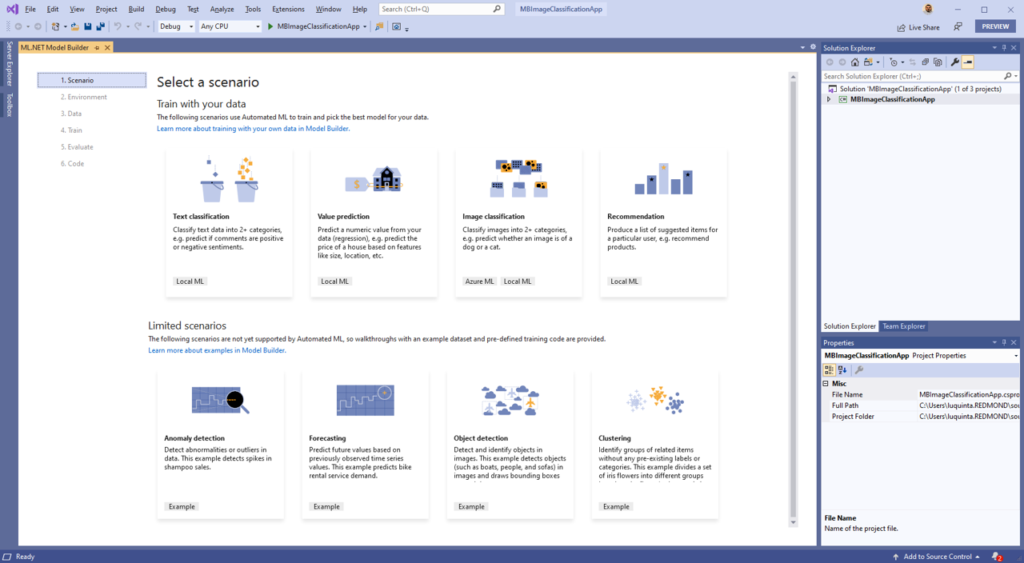
- Choose a scenario
- Configure your training environment
- Load the data
- Train the model
- Evaluate the model
- Add the code to make predictions
Add the data
The dataset used in this guide is based on the
The full license information is provided in the LICENSE.txt file which is included as part of the same image set.
The dataset is divided into separate subfolders, one for each flower category:
- Daisy
- Dandelion
- Roses
- Sunflowers
- Tulips
Download the data anywhere on your PC and unzip it.
Model Builder requires data to be in a certain format. This dataset is already in the correct format. For more information, see Microsoft Docs to learn more about . This process may take a few minutes.
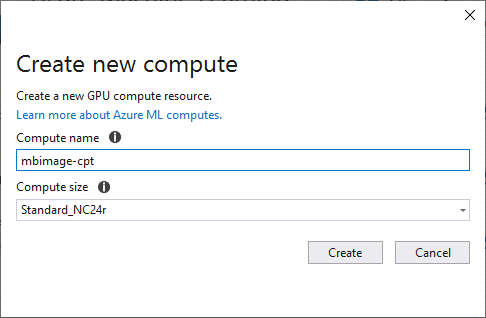
In the Create New Experiment dialog, leave the default experiment name and select Create.
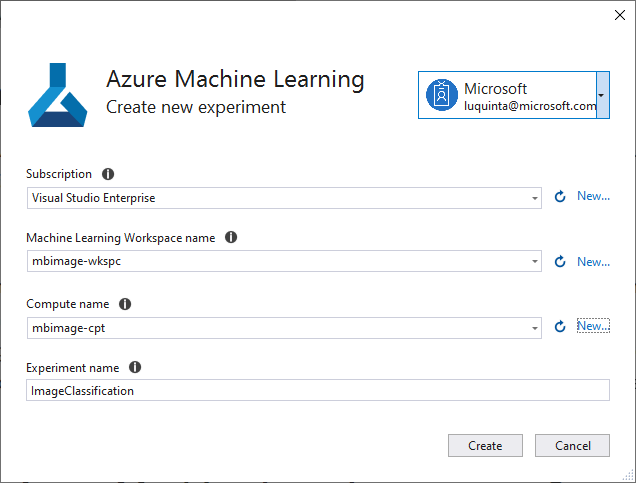
The first experiment is created and its name is registered in the workspace. Any subsequent runs – if the same experiment name is used – are logged as part of the same experiment. Otherwise, a new experiment is created.
If you’re satisfied with your configuration, select the Data button to move to the next step.
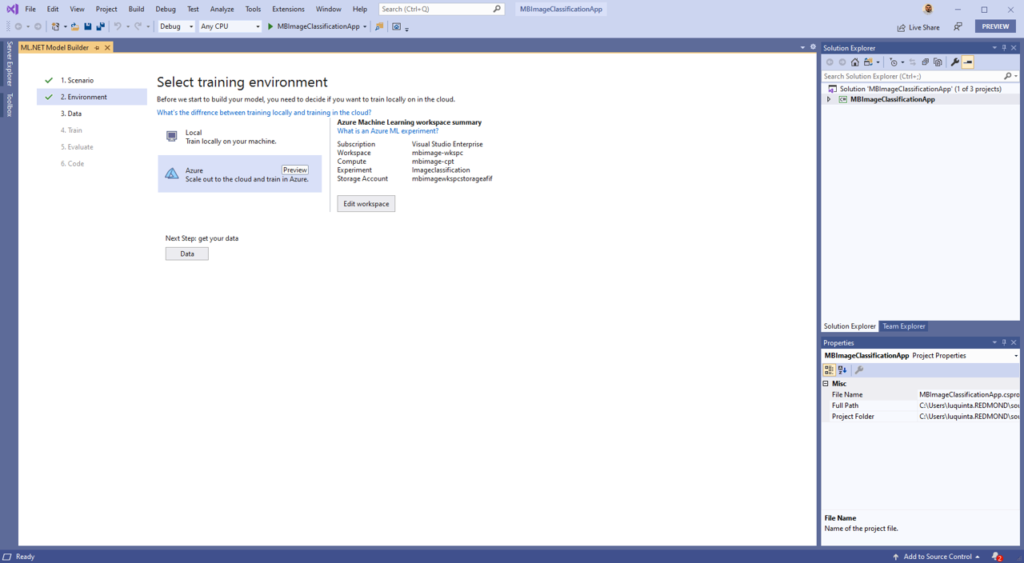
Load the data
In the Add data screen, load your data by selecting the button next to the Select a folder text box and use the file explorer to find the unzipped directory containing the subdirectories with images.
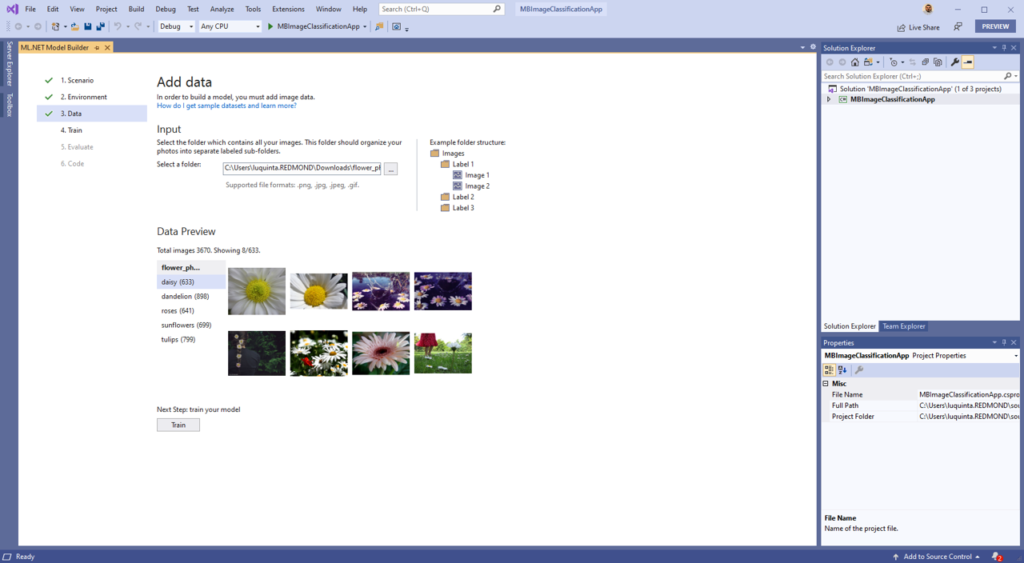
Once the data is loaded, select the Train button to train your model.
Train the model
In the Model Builder train screen, select the Start training button to start training your model.
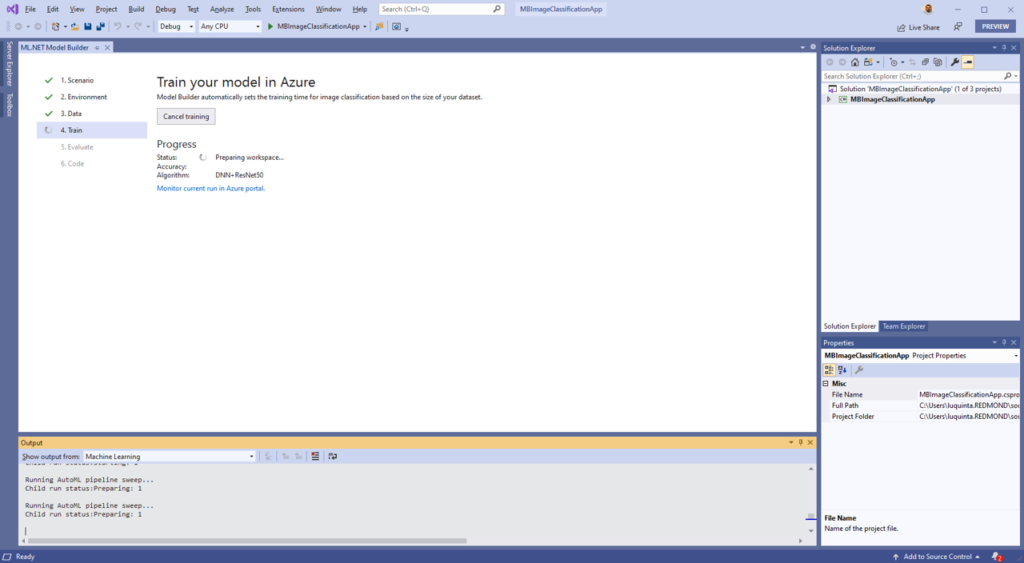
At this point, your data is uploaded to Azure Storage and the training process begins. The algorithm used to train these models is a . The training process takes some time and the amount of time may vary depending on the size of compute selected as well as the amount of data.
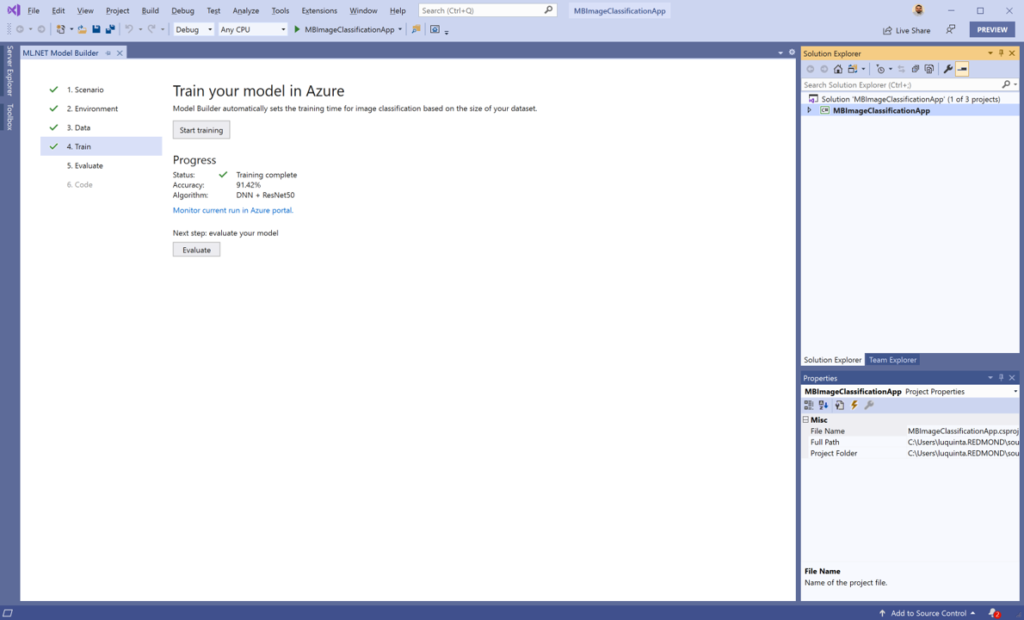
For this sample of 3670 images, training took about 30 minutes. The first time a model is trained in Azure, you can expect a slightly longer training time because resources have to be provisioned. You can track the progress of your runs in the Azure Machine Learning portal by selecting the “Monitor current run in Azure portal” link in Visual Studio.
Once the model is trained, select the Evaluate button to move to the next step.
Evaluate your model
In the evaluate screen, you are able to get an overview of the results from the training process such as how long the model took to train as well as the accuracy. Additionally, you can use the “Try your model” experience to quickly check whether your model is performing as expected. All you need to do is provide an image, preferably one that the model did not use as part of training. The model classifies the image and provides the list of categories along with their probabilities with the predicted value at the top of the list.
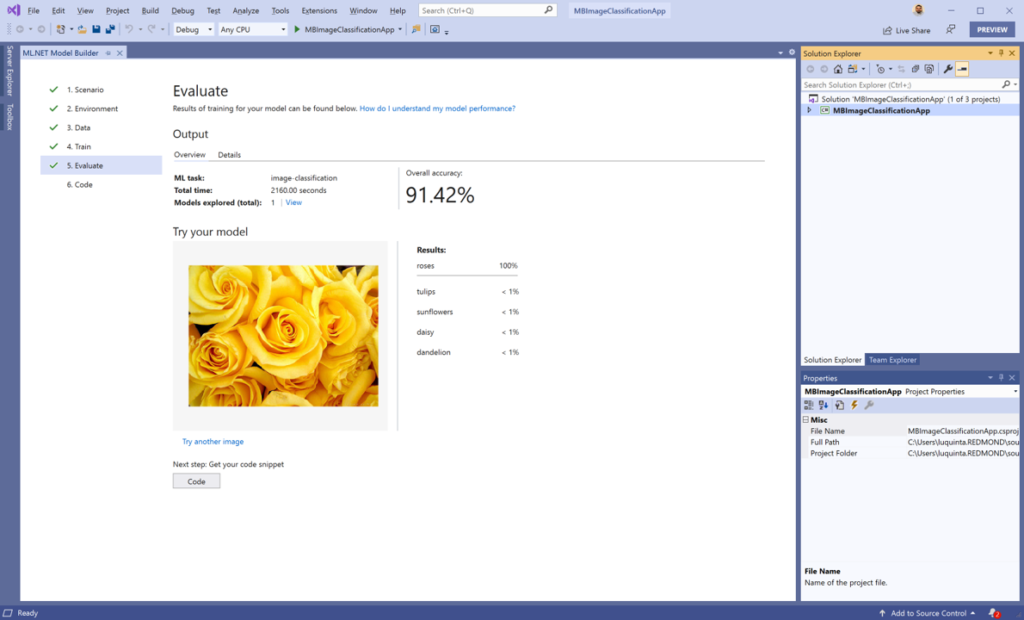
If you’re satisfied with your model, select the Code button to add the code to make predictions.
Add the code to make predictions
In the code screen, select the Add Projects button to add the auto-generated projects to your solution.
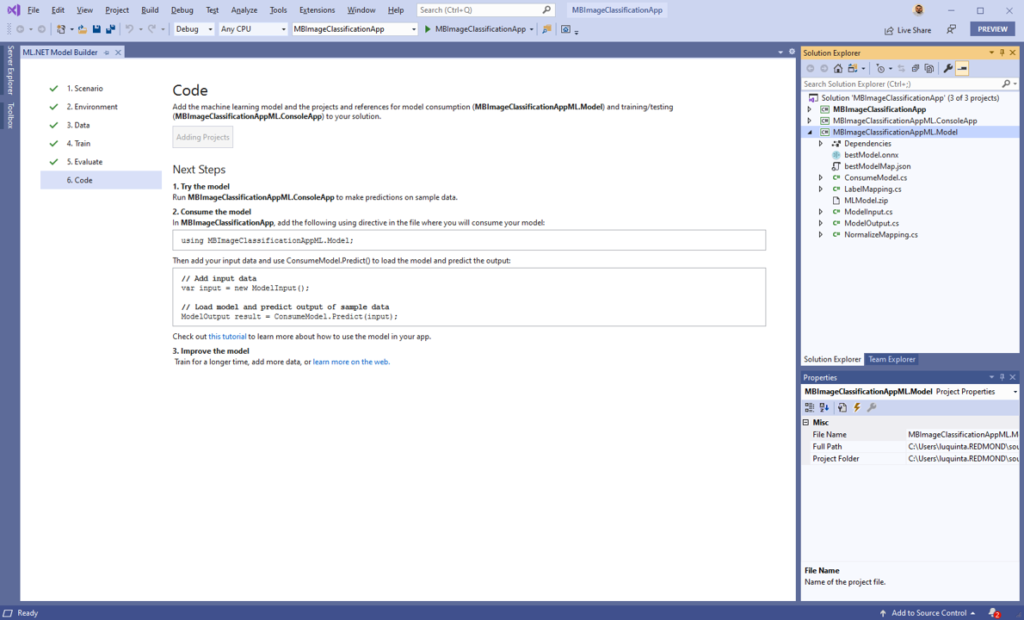
Two projects are added to your solution with the following suffixes:
- ConsoleApp: A C# .NET Core console application that provides starter code to build the prediction pipeline and make predictions.
- Model: A C# .NET Standard application that contains the data models that define the data schema of input and output model data as well as the following assets:
- bestModel.onnx: A serialized version of the model in from the internet and included it in my MBImageClassificationApp project. The model has not seen this image before. A new instance of ModelInput is created and the path of the image is used as the value for the ImageSource property.
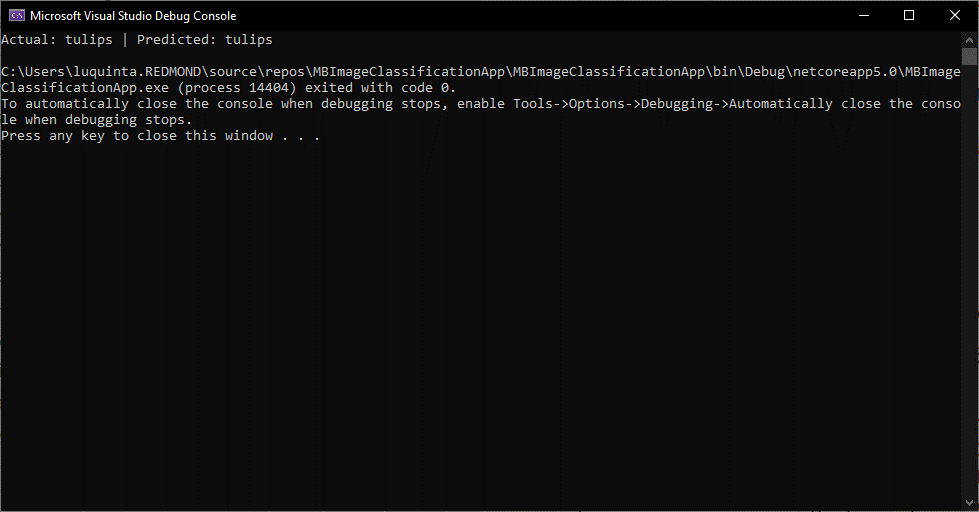
Then, ConsumeModel.Predict, a helper method that loads the MLModel.zip file and uses PredictionEngine, a convenience API to make predictions on a single instance of data, is called with the sample image as input. Finally, both the actual class the image belongs to, as well as the predicted flower category, are printed out to the console.
When you run the application, you should see output similar to the following in the console:
Clean up resources
Azure Machine Learning Enterprises are currently in preview. Therefore, there is no additional surcharge at the moment. Training this model cost less than $0.50. Depending on your scenario, your costs may vary depending on the amount of data and size of your compute. For more information on pricing, see the and select Resource groups in the portal menu.
- From the list of resource groups, select the resource group you created.
- Select Delete resource group and follow the instructions in the prompt to delete your resource group.
Share your feedback
Since Model Builder is still in Preview, your feedback is super important in driving the direction of this tool and ML.NET in general. We would love to .
Virtual ML.NET Conference
Join the community May 29-30 for a or .
Check out this .
Not currently using Visual Studio? Try out the appeared first on .NET Blog.
↗ Original-Artikel auf devblogs.microsoft.com lesenVollständiger Original-BerichtAusführliche Details, Code-Beispiele & Hersteller-Stellungnahme auf devblogs.microsoft.com. - bestModel.onnx: A serialized version of the model in from the internet and included it in my MBImageClassificationApp project. The model has not seen this image before. A new instance of ModelInput is created and the path of the image is used as the value for the ImageSource property.

SOCIAL SHARE CARD GENERATOR