



In this post I'll walk through the way I found of implementing a React app into an ASP.NET project using webpack, and also show how to connect both projects and make the ASP.NET application work as a back-end for the React pages adding a simple Web API to the existing project.
Note: I've used ASP.NET Web Forms, but this information is adaptable to every ASP.NET application.
The source code for this tutorial is available here.
1. Creating the project
Select your preferred ASP.NET template to start, or skip this part if you're using an existing application. Check out this article if your Visual Studio isn't showing the option to create an ASP.NET Web Application.


I'm leaving the Web API option unselected as I'll show how to add it later.
2. Add your React scripts into a folder and add your package.json file to the project
I'm using the React template app for the sake of simplicity, and pasting only the files contained in the /src folder (only the actual app).

3. Install webpack and webpack-cli
Go to View > Terminal to open the command line and enter these commands to install your project's packages and webpack:
cd <ProjectName>npm install webpack webpack-cli
4. Setup a webpack.config.js file and a babel.config.js file
I've used this tutorial to configure the webpack file, feel free to adapt and install the loaders according to your project.
The entry property determines the folder where your React app is located and its main file, and the output properties determine the filename of the generated bundled file, and where it'll be located. In my case, it'll be in the Scripts folder.
webpack.config.js file:
const path = require("path");

const webpack = require("webpack");

const MiniCssExtractPlugin = require("mini-css-extract-plugin");


const ROOT = path.resolve(__dirname, "app");

const DESTINATION = path.resolve(__dirname, "Scripts");


module.exports = function (_env, argv) {

    const isProduction = argv.mode === "production";

    const isDevelopment = !isProduction;


    return {

        context: ROOT,

        entry: {

            MyApp: "../my-app/index.js",

        },


        output: {

            filename: "myapp.bundle.js",

            path: DESTINATION,

        },

        module: {

            rules: [

                {

                    test: /\.(jsx|js)$/,

                    exclude: /node_modules/,

                    use: [

                        {

                            loader: "babel-loader",

                            options: {

                                presets: [

                                    "@babel/preset-env",

                                    ["@babel/preset-react", { "runtime": "automatic" }]

                                ]

                            },

                        },

                    ],

                },

                {

                    test: /\.css$/i,

                    use: [

                        isProduction ? MiniCssExtractPlugin.loader : "style-loader",

                        "css-loader",

                    ],

                },

                {

                    test: /\.(png|jpg|gif)$/i,

                    use: {

                        loader: "url-loader",

                        options: {

                            limit: 8192,

                            name: "static/media/[name].[hash:8].[ext]",

                        },

                    },

                },

                {

                    test: /\.svg$/,

                    use: ["@svgr/webpack", "url-loader"],

                },

            ],

        },

        resolve: {

            extensions: [".js", ".jsx"],

        },

        plugins: [

            // fix "process is not defined" error:

            // (do "npm install process" before running the build)

            isProduction &&

            new MiniCssExtractPlugin({

                filename: "assets/css/[name].[contenthash:8].css",

                chunkFilename: "assets/css/[name].[contenthash:8].chunk.css",

            }),


            new webpack.ProvidePlugin({

                process: "process/browser",

            }),

        ].filter(Boolean),

    };

};


//stats.errorDetails: true
babel.config.js file:
module.exports = {

    presets: [

        [

            "@babel/preset-env",

            {

                modules: false

            }

        ],

        "@babel/preset-react"

    ],

    plugins: [

        "@babel/plugin-transform-runtime",

        "@babel/plugin-syntax-dynamic-import",

        "@babel/plugin-proposal-class-properties"

    ],

    env: {

        production: {

            only: ["my-app"],

            plugins: [

                [

                    "transform-react-remove-prop-types",

                    {

                        removeImport: true

                    }

                ],

                "@babel/plugin-transform-react-inline-elements",

                "@babel/plugin-transform-react-constant-elements"

            ]

        }

    }

};
5. Install the needed loaders
For my project, I've installed the babel loader, css loader, svg loader and url loader.
npm install @babel/core babel-loader
From the cited tutorial above, I'm installing these packages to configure the babel loader:
npm install @babel/preset-env @babel/preset-react @babel/runtime @babel/plugin-transform-runtime @babel/plugin-syntax-dynamic-import @babel/plugin-proposal-class-properties babel-plugin-transform-react-remove-prop-types @babel/plugin-transform-react-inline-elements @babel/plugin-transform-react-constant-elements
CSS loader:
npm install css-loader style-loader mini-css-extract-plugin
URL loader:
npm install url-loader
SVG loader:
npm install @svgr/webpack
Install process to avoid the "process is not defined" error:
npm install process
6. Change your build script in package.json to load your webpack configuration
This will create a bundled file when you run the command npm run build, pointing to where the webpack.config.js file is located and setting the mode as development or production.
"scripts": {

    "build": "webpack --mode=development --config ./webpack.config.js"

  }
When running this command build in the terminal it shows:
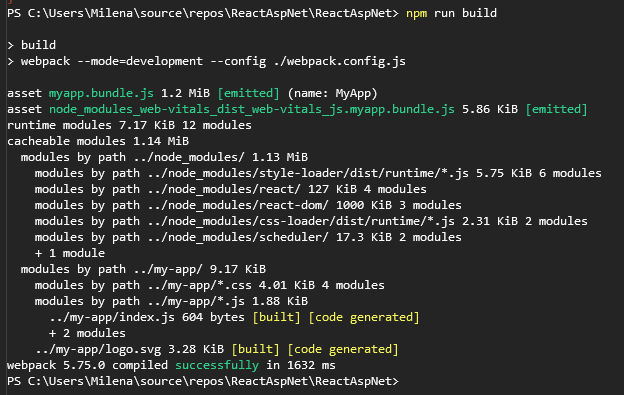
And it has successfully created a bundled file in my Scripts folder:

7. Running the npm command when the project builds
Now that your React app if fully loaded into your ASP.NET project, you can set it up to run the build command when you build and run your application, so if any changes were made to the React app, they'll be built automatically when you click run.
Right in the end of your <ProjectName>.csproj file, add:
<Project>

    ...

    <Target Name="BeforeBuild">

        <Exec Command="npm install" />

            <Exec Command="npm run build" />

        </Target>

</Project>
With this configuration, every time you run your project, it'll make sure every package is installed and the bundled file was built. Change the commands according to your project.
8. Call your react app in an ASP.NET page
According to the id set in your index.js, add a div with the same id in the desired .aspx page. In my case, the id is content.
In my index.js page:
const root = ReactDOM.createRoot(document.getElementById('content'));

root.render(

    <React.StrictMode>

        <App />

    </React.StrictMode>

);
I'll load the React app into the About page adding this code to the inside the BodyContent in the About.aspx file to create the div and load the script:
<asp:Content ID="BodyContent" ContentPlaceHolderID="MainContent" runat="server">

    <div id="content"></div>

    <script type="text/javascript" src="../Scripts/myapp.bundle.js"></script>

</asp:Content>
All done! The React app is properly running in the ASP.NET page.
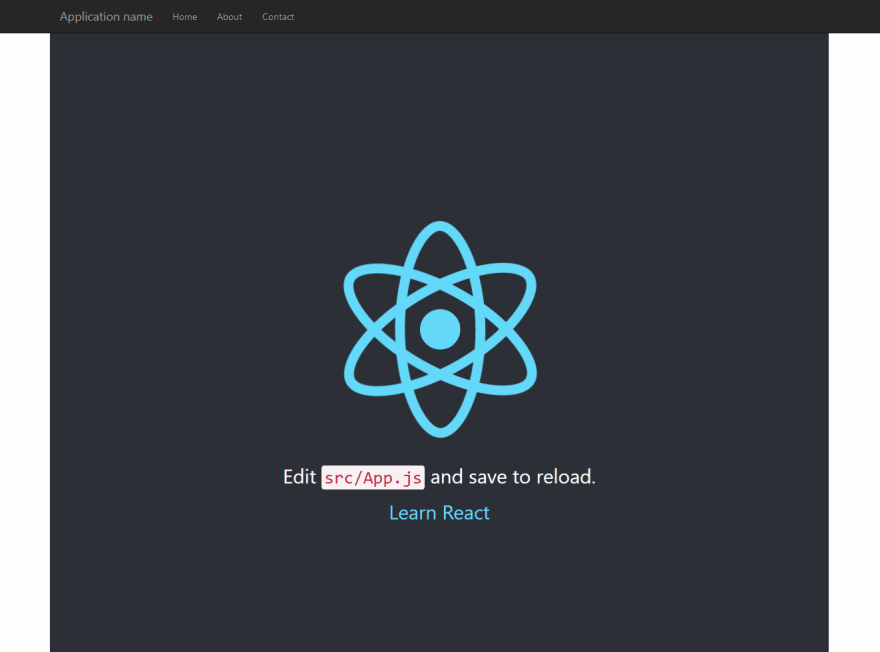
9. Connecting both applications adding a Web API to the ASP.NET project
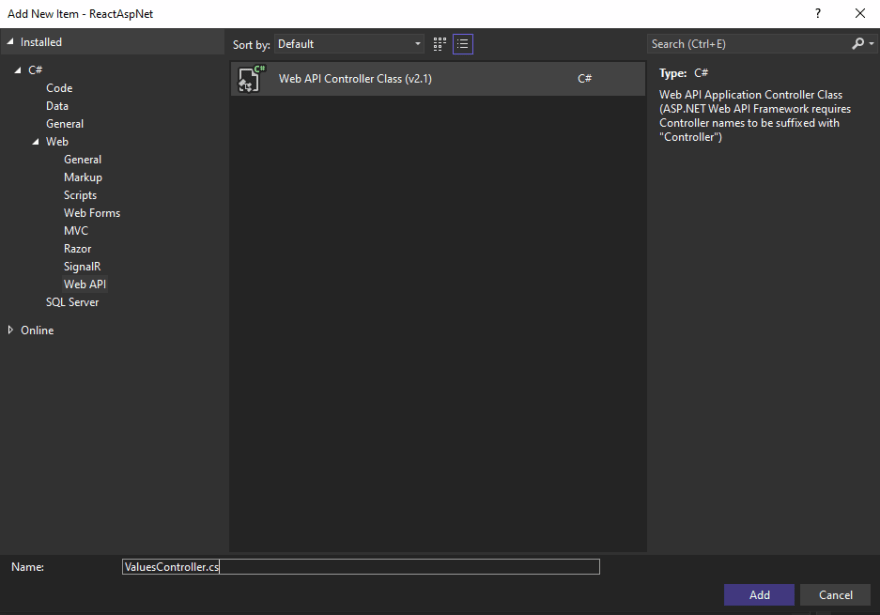
Create a new item in the project, and select Web API Controller Class:
It'll give you a template file for a ApiController like that:
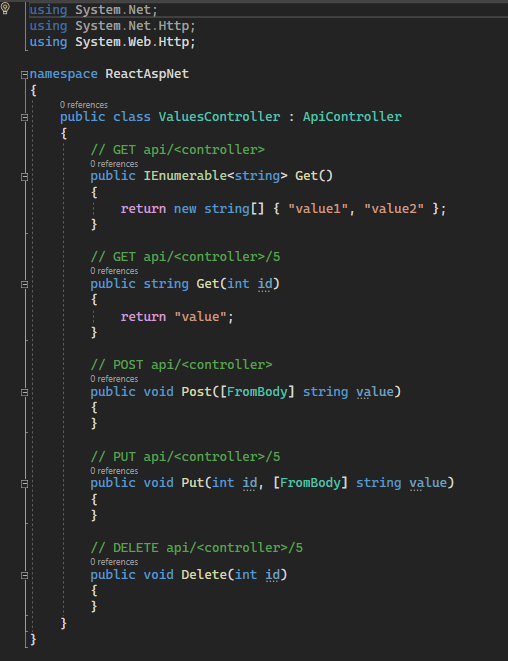
This API will be your main connection between the ASP.NET project and the React app, so it works as a proper back-end for it.
Now we just need to configure the API route to get it running.
Add an API route to your RouteConfig.cs:
RouteTable.Routes.MapHttpRoute(

                 name: "DefaultApi",

                 routeTemplate: "api/{action}/{id}",

                 defaults: new { id = System.Web.Http.RouteParameter.Optional, controller = "Values" }

            );
I've used this article in the ASP.NET documentation to customize my API route according to what my project needed. In my case all the requests will be made from the /api route, with the additional parameters being the action (method name in the controller) and the optional id. I set the default controller to be the ValuesController since it's the only controller for this application.
Testing the API:

I went to /api/get/1 as I configured, and it got the value, so it's working! Now it's time to pass this value to the React app so both projects are connected.
10. Making a request to your Web API in the React app
I'll add a simple GET request into my React app, set the value I got from the API in the state, and display it in the main page.
In my App.js:
import logo from './logo.svg';

import React, { Component } from "react";

import './App.css';


class App extends Component {

    constructor() {

        super();

        this.state = { value: [] };

    }


    async getData() {

        let resp = await fetch('/api/get/1',

            {

                method: "GET",

                headers: {

                    'Content-Type': 'application/json'

                }

            });

        if (resp.status === 200) {

            let value = await resp.json();

            return value;

        }

    }


    async componentDidMount() {

        let value = await this.getData();

        this.setState({ value: value });

    }


    render() {

        return (

            <div className="App">

                <header className="App-header">

                    <img src={logo} className="App-logo" alt="logo" />

                    <p>

                        Edit <code>src/App.js</code> and save to reload.

                    </p>

                    <a

                        className="App-link"

                        href="https://reactjs.org"

                        target="_blank"

                        rel="noopener noreferrer"

                    >

                        Learn React

                    </a>

                    <p>{this.state.value}</p>

                </header>

            </div>

        );

    }

}


export default App;
Done! The value I got from the ASP.NET Web API is showing in the React page.

Conclusion
This is my first article ever, I hope it helps people in some way, like I needed when I got the task to do this. Comment any suggestions or questions, feel free to reach out and I'll do my best to get back to you ;)