

 800+ IT
News
als RSS Feed abonnieren
800+ IT
News
als RSS Feed abonnieren📚 Cook a Recipe: Create a Web application using AWS Amplify
💡 Newskategorie: Programmierung
🔗 Quelle: dev.to

Static Website
A static website, as in contrast to a typical dynamic website, renders the webpage at the time of request and instead delivers pre-built HTML, CSS, and JavaScript files to a web browser.
Now, We are going to cook a simple static website using HTML and JavaScript which call the reverseStringCall api endpoint and Fetch the response, get it displayed on our website
Ingredient
Lambda Function (ReverseString)
Recipe: Cook a recipe with AWS: Simple and Easy Lambda FunctionsREST API endpoint that triggers the Lambda Function ReverseString created using API Gateway
Recipe: Cook a recipe with AWS: A simple API using API-Gateway
Lets Jump to the recipe
Create an HTML page that calls a Rest API endpoint built using API Gateway and displays the API Response
Create a java script file that calls the API endpoint from API Gateway, fetch the result and get it displayed to HTML file
JavaScript is an extremely popular scripting language that may be used on both the client and the server. Our websites require JavaScript because it makes them interactive.
Here, We are going to add a JavaScript script code that makes an API call, retrieves the response, and displays it to the HTML form
Copy the below code to a notepad and save it as main.js
  form.addEventListener('submit', function(e) {
    // Prevent default behavior:
    e.preventDefault();
    // Create new FormData object
    const formData = new FormData(form);
    const formDataObject = Object.fromEntries(formData.entries());
    // Post the payload using Fetch:
    fetch('<Invoke URL>', {
      method: 'POST',
      body: JSON.stringify(formDataObject)
    }).then(res => res.json()).then(data => {
//log the response obtained to the browser console
      console.log(data);
// call to the function displayToHTML
      displayToHTML(data)
    })

    function displayToHTML(data) {
      const form = document.getElementById('form');
      document.getElementById("demo").innerHTML = ' < span > Reversed String is: '+data.reversed_string + ' < /span>';
    }
  })
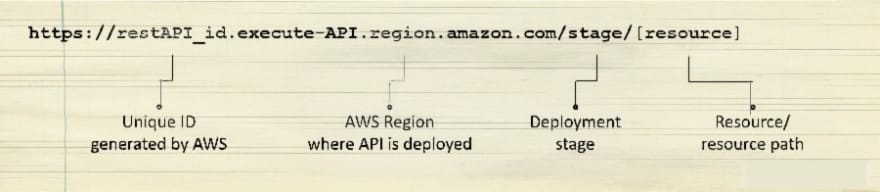
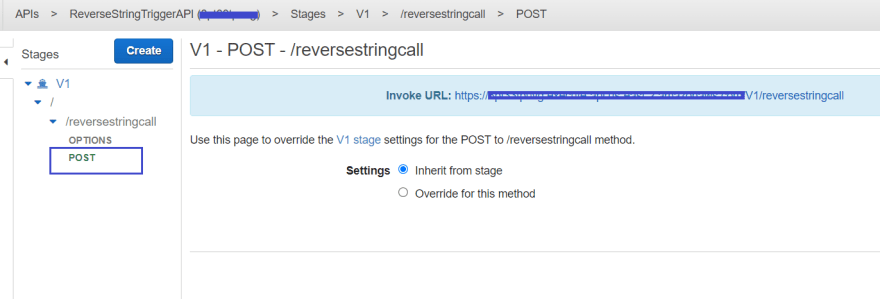
Invoke URL
When you deploy your API, you deploy to a stage, a base URL is generated which is also called as the invoke URL
All APIs created with API Gateway will follow the same pattern as the invoke URL above, with the ID of the API and the Region in which it was created, followed by a stage, and then the resource and resource path you want to expose.
fetch('<Invoke URL>', {
Here, we have to specify the Invoke URL obtained from API Gateway
Create a CSS stylesheet file to beautify and format the html file.
CSS allows you to customize the color, font, text size, spacing between elements, how elements are positioned and laid out, what background images or background colors are to be used, different displays for different devices and screen sizes, and much more!
Here, We are going to create an external style sheet, with which you can change the look of an entire website by changing just one file!
Copy the below code to the notepad and save it as main.css
body {
        background-color: #FFFFFF;
        }
    label, button {
        color: #000080;
        font-family: Arial, Helvetica, sans-serif;
        font-size: 20px;
        margin-left: 40px;
        }
     input {
        color: #00BFFF;
        font-family: Arial, Helvetica, sans-serif;
        font-size: 20px;
        margin-left: 20px;
        }

      p {
        color: #000080;
        font-family: Arial, Helvetica, sans-serif;
        font-size: 20px;
        margin-left: 40px;
      }
Create an HTML page that calls a Rest API endpoint, Link the CSS and JS files to it
I am going to create a simple html page with a Text field which accepts the input string that needs to be reversed and a Submit button.
Open your favorite text editor on your computer.
Create a new file and paste the following HTML in it:
<!--- HTML form data --->
<html>
<head>
<title> ReverseString Checker</title>
<!--- Linking the css file  --->
<link rel="stylesheet" href="main.css">

</head>

<body>
<form id='form'>
<label for="Input">Enter the String to be reversed</label>
    <input name="first_name" type="text">
    <button type="submit">Submit</button>
</form>
<p id= "demo"></p>

<!--- linking the js file  --->
<script src="main.js"></script>

</body>

</html>
Yes, Our webpage is ready, Now lets get it deployed using AWS Amplify
Deploy a website using AWS Amplify
Now we are going to deploy the above html file as a webapplication using AWS Amplify
AWS Amplify
AWS Amplify is a set of products and tools that enable mobile and front-end web developers to build and deploy secure, scalable full-stack applications, powered by AWS.
Ingredient
- The above html file saved as index.html
Prerequisites
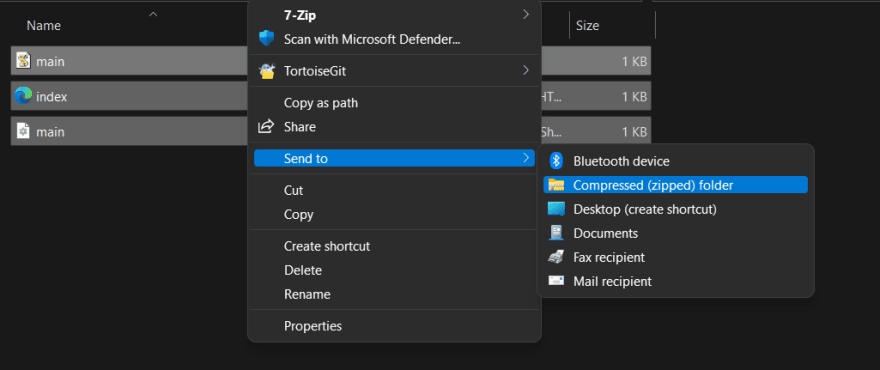
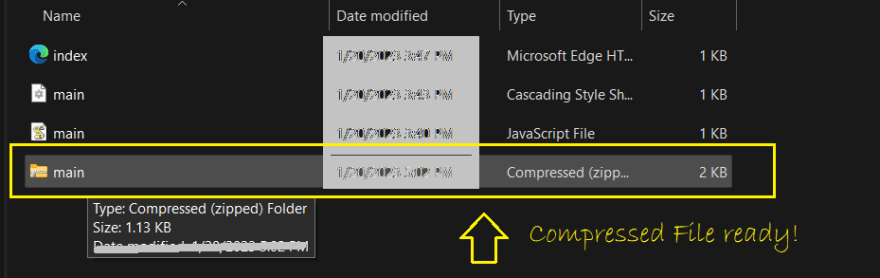
- Compress the files index.html, main.js and main.css and keep it ready
- Log into AWS account with a valid user credentials (Root user not preferred)
Steps to create
- Open the AWS Amplify service from aws console

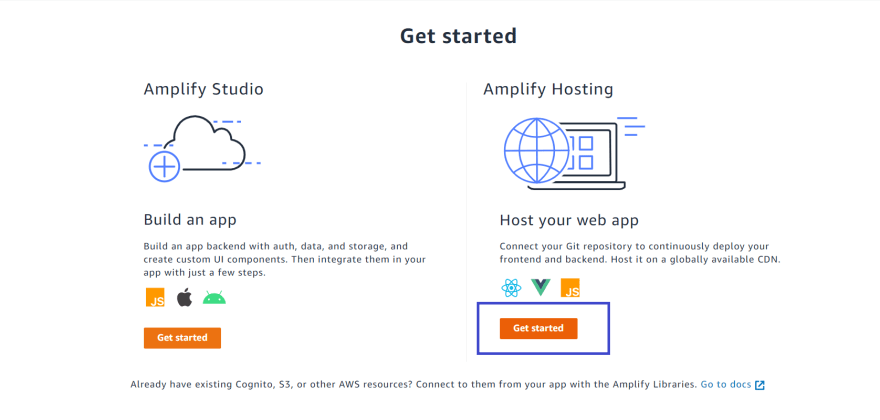
- Click Get Started button
- Now Click Get Started button under Host your web app section , as we have already created the resources such as html, css and js files and we just need to deploy them
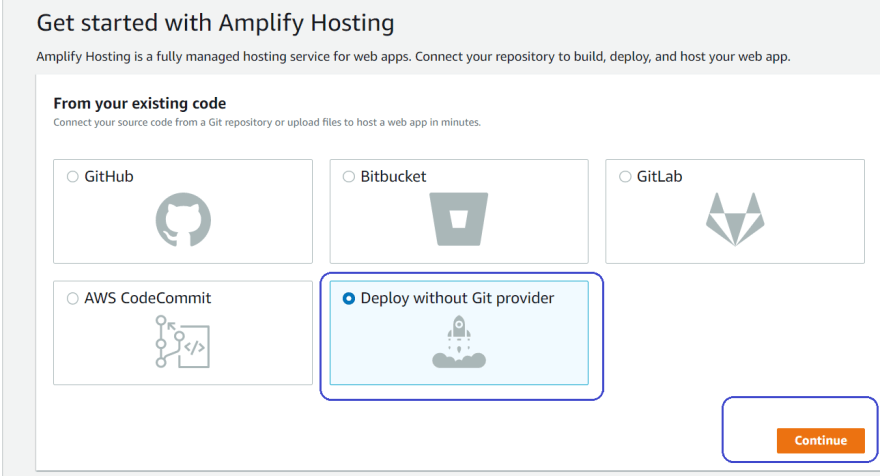
Now you will be navigated to *Get started with Amplify Hosting page *
Select without GIT Provider option, because we have saved the files local system and click Continue button
Note, GIT is a source code management system and we are not using it for this cooking this recipe now
- You will be navigated to Manual Deploy Page Specify the App name, Environment name
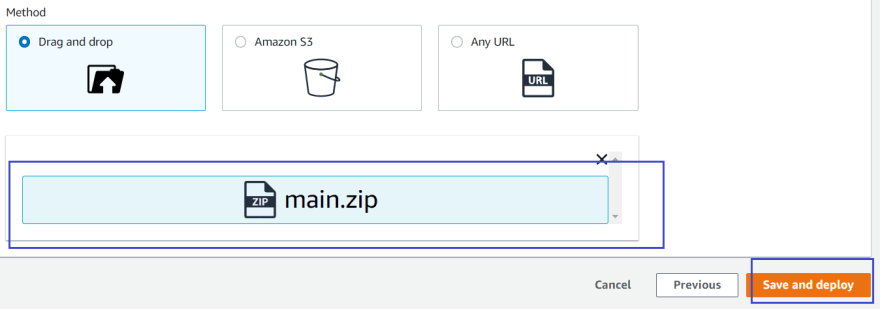
Drag and drop option will be selected by default for Method, Leave it as it is
Here we are going to drag and drop our zipped file
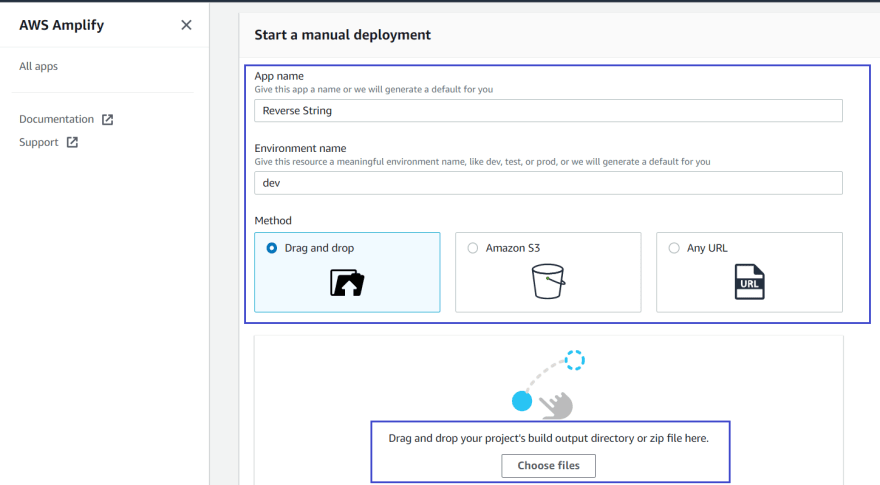
Click Choose File and Select the Zipped folder
Make sure the folder name is correct, Click Save and Deploy
- A deployment process will automatically begin
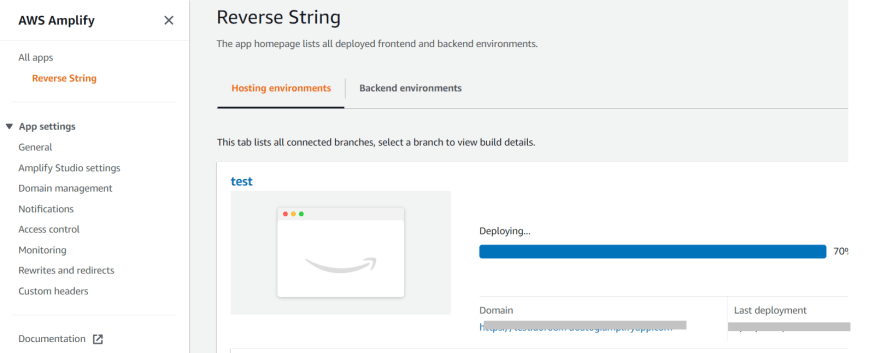
- Now wait for a couple of minutes and You will see a green bar, which indicates your deployment is completed
- You can also see the application url link below Domain

Launch the Application
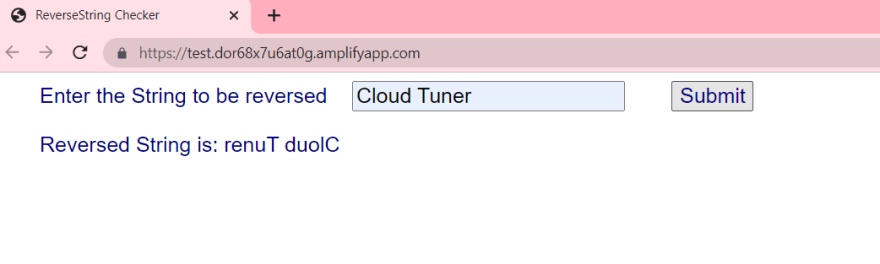
Click on the application url link and launch the web application
Yaay, Our application is ready

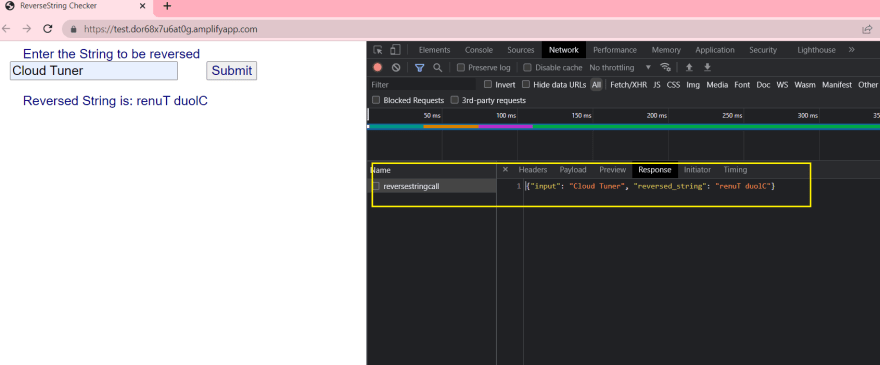
- Now Give some input string and click Submit button, See Reversed version of your string is displayed on the Website
View the Network Tab browser console and ensure if the api endpoint called and response is generated
Right click on the webpage and click on Inspect option to launch the browser console and network tabs
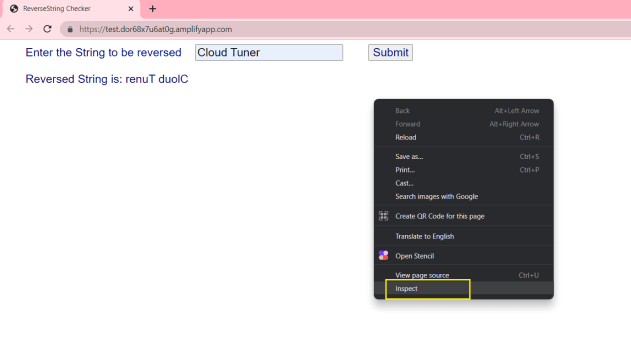
- Click Network and get into the Network tab
- Click Submit button and observe the Network tab, You can see the api endpoint getting called once you click the submit button and JSON Response is getting generated
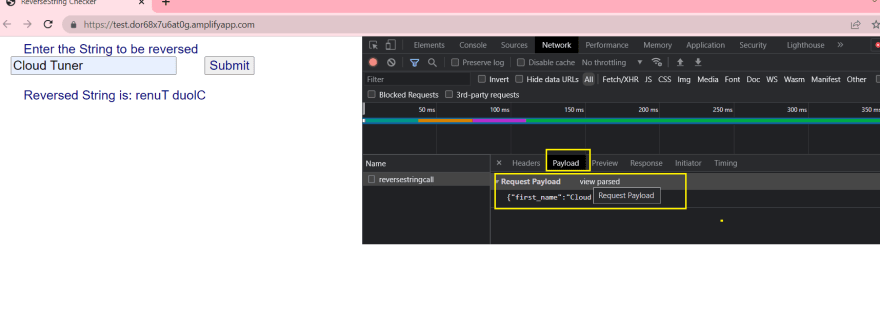
Click the Payload and observe the data sent as the input to the lambda function which is being triggered using API
- Click the Console and come to Console Tab You can see that the Response is getting displayed on console as per our JavaScript code
Code snippet from main.js below
//log the response obtained to the browser console

console.log(data);
