



Today I'm going to show you how to make your player take its first steps!
To achieve this, we're going to write some code in GDScript, Godot native language.
You can use other languages with Godot, such as C++ and C#, but this series will use GDScript.
Player basics
Let's rename our CharacterBody2D to Player
Collision shape
In the previous article, I mentioned that the CharacterBody2D needs a collision shape node. We're going to add one, and it's really easy to do so.
Right click our player node and select the + Add Child Node option, in the newly open window, search for CollisionShape2D select it and hit Create.

Another warning? 🙄
We've added a collision shape 2d node, but we need to specify what is the shape of this collision! To do this, select the CollisionShape2D node and in the inspector (right side panel), expand the Shape options and select RectangleShape2D

Know error
Note that we added a collision node but it appears in a different position than our sprite:
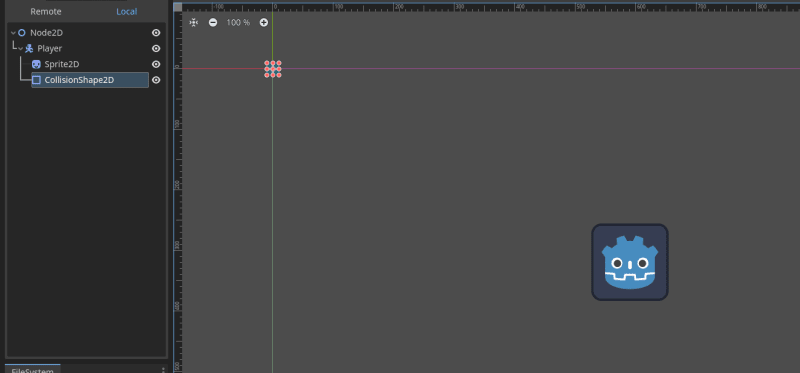
What is happening here is that the collision shape is using the position of our Player node while the sprite position is different (we moved in the preivous article).
To fix this issue, first, let's move our Sprite2D back to the starting point of our scene, that being x = 0, y = 0.
Select the Sprite2D node, expand the transform option and set position x and y to 0.
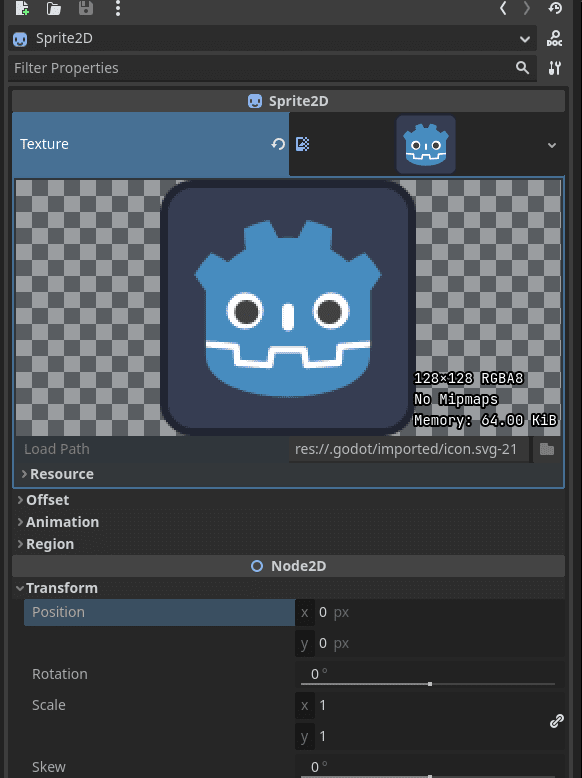
This will bring the sprite to the starting position.
Collision Size
Now, let's set the collision format properly.
Select the CollisionShape2D, you're going to notice a small blue square in the center of our sprite
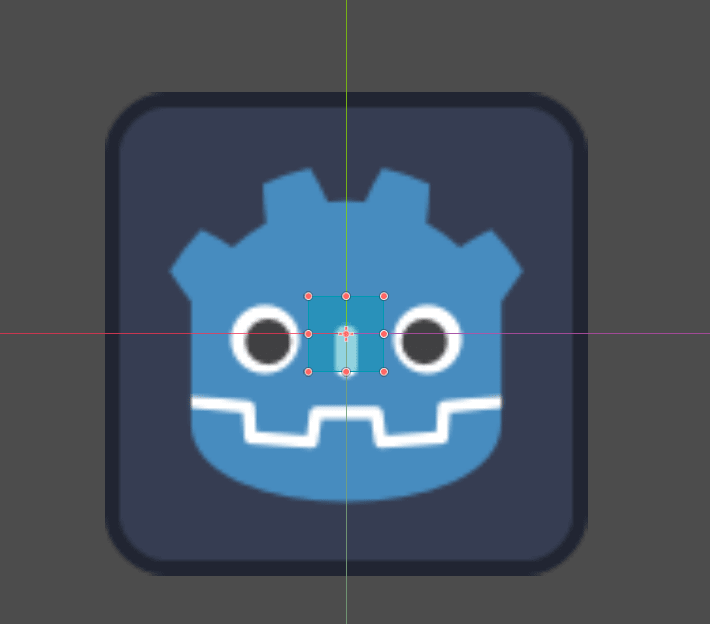
You can change the color of this shape (for debug purporses), to do this, select the CollisionShape2D and change the Debug Color to the color your heart desires, I used a yellow-ish tone.

Now, resize the Collision shape so it's the same size as the sprite.
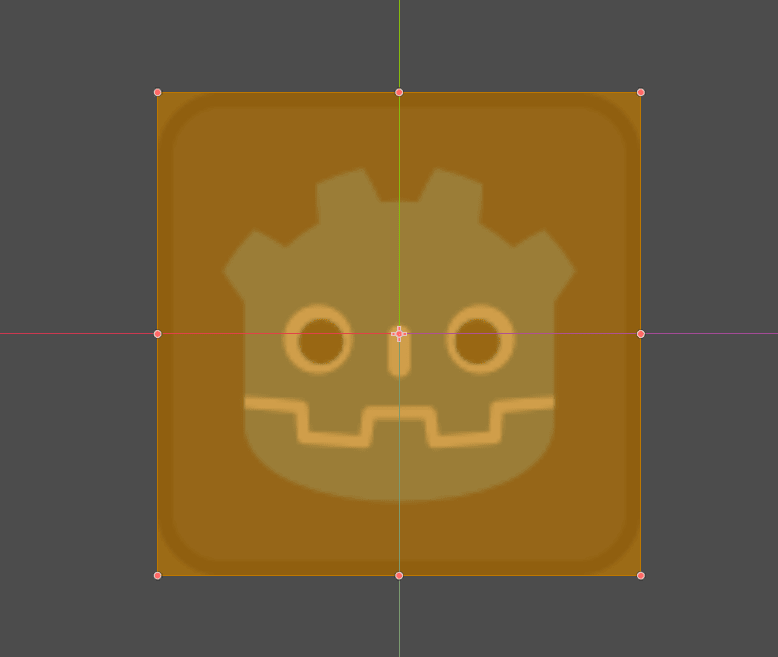
Nice! We have added a collision node to our player.
What about we make our player move around?
Folders
Let's keep our project organised, I like to have a folder for my characters (be them player, Npcs, enemies).
res://

├─ Characters/

│  ├─ Player/
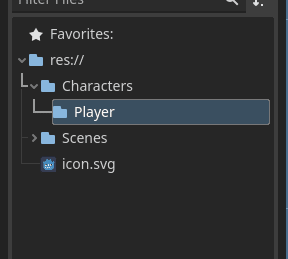
In this folder we're going to store the player scene and scripts. Since we already have a node called player in our scene, we can save this as our player.
To save our player as a scene (don't worry, a scene is like a prefab), right click our player node and select the option Save branch as scene

Save it under our Player folder.

Notice that our Player node in the scene is now just a "simple" node.

Don't worry, everything related to our player (sprites, animations, scripts, etc) are packed into this Node.
Now, double click our Player scene in the FileSystem to open our Player Scene.
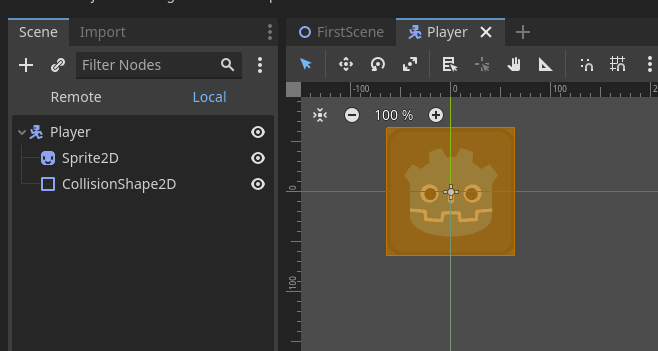
See, all our nodes are there 😉
Project settings - input mapping
Before we start coding our player, we need to tell the Engine what types of input we want and how we want it.
Select Project > Project Settings in the top men

selet the Input Map tab.

Adding an input map
Now lets get started with telling the engine how we want our inputs to work.
Select the Add New Action text field, write move_up and hit add

This will create a new action for us.
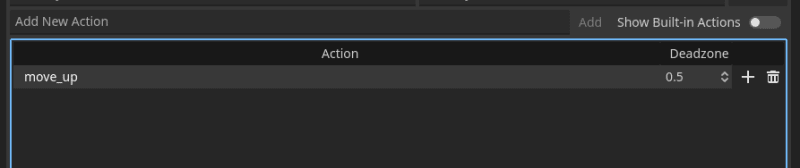
Now we need to tell to the Engine which buttons will trigger this.
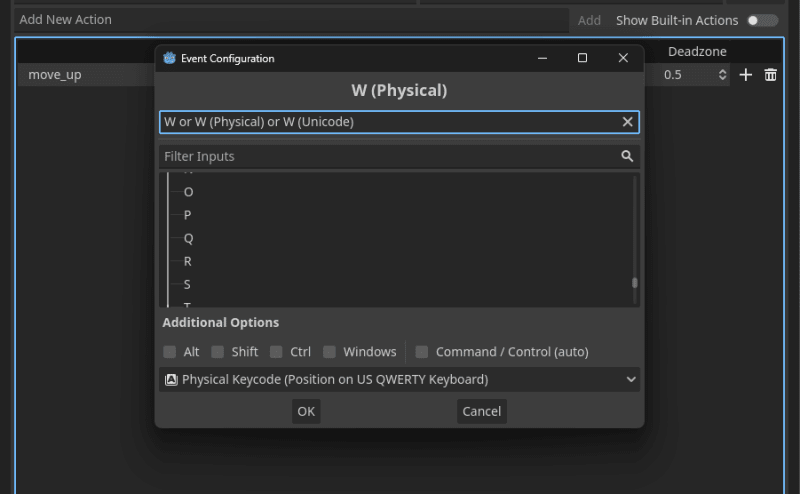
Press the + sign by the side of move_up, a new window will open up, in there, type W (or the key you want to make the player go up) and hit ok!
Note that you can add multiple inputs for this, like W, up arrow keys, up on a controller etc.
Do the same for all other movements: move_right, move_down, move_left. You should have something like this.

Close this window and we're done!
Creating the player script
The section we've all been waiting for! Creating a script!
Right click our Player node, and select the option Attach Script

Make sure the script is under the same folder and hit Create

Important functions
We're going to use a couple of functions to make our player move around.
_ready()
_ready is called once the player is added to the scene, we're going to use this function to set the innitial state of our player.
_input(event)
_input(event) is called when the engine receives an input (mapped or not), such as keyboard key presses, mouse movement, joypad button press and many others.
We're going to use this function to know what was pressed and change the player state.
Parameter: event
event is the event that it was pressed. You can read more on InputEvents from the official documentation
_process_physics(delta)
_process_physics(delta) is different than _process(delta). _process is called every frame while _process_physics is called at a fixed frame rate, being 60 frame per seconds by default, this is great for moving the player.
Parameter: delta
delta is the time, in seconds, since the previous call
Creating the player possible states
Our player will be able to walk, attack, interact and many others, so let's create an enum to keep track of there states.
enum states{

   MOVE

}


var _current_state: states;


func _ready():

    _current_state = states.MOVE;
In the above script I create an enum to hold the player states, a variable to store the current player state and in the _ready() function I'm setting the innitial state to MOVE.
Handling input
For now, we will simply return, and we will revisit this function when we have more actions.
Processing player movement
To start calculating the player movement, we're going to create a couple more variables, acceleration, friction and run speed, and use the function _process_physics(delta) to update the player position based on those properties
var _run_speed: float = 100;

var _acceleration: float = 500;

var _friction: float = 500;
You can add the @export keyword to your variables so they show in the editor and you can manipulate their value without having to change in the script.
@export var _run_speed: float = 100;

@export var _acceleration: float = 500;

@export var _friction: float = 500;

Time to make the player move. I've commented the code so it's easy to follow up on what's happening.
# delta = time between frames

# This function will move the player according to the player's input.

# @param delta: float

# @return void

func move(delta: float):

        # Set the initial vector for the player to be 0

    var input_vector = Vector2.ZERO;


    # Get input vector from player input.

    # Input.get_action_strength("move_right") - Input.get_action_strength("move_left") will return 0 if neither action is pressed,

    # 1 if move_right is pressed, -1 if move_left is pressed, and a value between -1 and 1 if both actions are pressed.

    input_vector.x = Input.get_action_strength("move_right") - Input.get_action_strength("move_left");


    # Input.get_action_strength("move_down") - Input.get_action_strength("move_up") will return 0 if neither action is pressed,

    # 1 if move_down is pressed, -1 if move_up is pressed, and a value between -1 and 1 if both actions are pressed.

    input_vector.y = Input.get_action_strength("move_down") - Input.get_action_strength("move_up");


    # Normalize input vector to prevent diagonal movement from being faster.

    input_vector = input_vector.normalized();


    # If input_vector is zero, then the player is not pressing any movement keys.

    if input_vector == Vector2.ZERO:

        # If the player is not pressing any movement keys, then the player should slow down.

        # move_toward() will move the player toward the target velocity, but will not exceed the target velocity.

        velocity = velocity.move_toward(Vector2.ZERO, _friction * delta);


        # move_and_slide() will move the player according to the velocity, and will also apply gravity.

        move_and_slide();

        return;


    # If the player is pressing movement keys, then the player should speed up.

    # move_toward() will move the player toward the target velocity, but will not exceed the target velocity.

    velocity = velocity.move_toward(input_vector * _run_speed, _acceleration * delta);


    # move_and_slide() will move the player according to the velocity, and will also apply gravity.

    # move_and_slide() will also stop the player from moving if the player is colliding with a wall.

    move_and_slide();
CONGRATULATIONS!
Now you have a player walking around a scene! This is the first step (pun intended) for a working game!
Thank you!
I hope you find this article helpful!
See you in the next article!
SOCIAL SHARE CARD GENERATOR