



Overview
In this tutorial, you will learn how to deploy a containerized application on an Nginx server using AWS App Runner. This hands-on guide is perfect for beginners and covers everything from building a container image to deploying it via App Runner.
AWS App Runner is a fully managed service that enables you to deploy containerized web applications and APIs at scale, with minimal effort. Whether you're starting with source code or a container image, App Runner takes care of the heavy lifting: automatic builds, deployments, load balancing, and traffic scaling.
What You Will Accomplish
By the end of this tutorial, you will:
- Create a container image for your web app.
- Push the image to Amazon Elastic Container Registry (ECR).
- Deploy the image using AWS App Runner.
- Clean up resources to avoid additional charges.
Prerequisites
Before diving into the steps, ensure you have:
An AWS Account:
- Ensure the account has administrator-level access. Accounts created within the past 24 hours may not have access to required services.
AWS Command Line Interface (CLI) installed and configured:
Docker Engine installed and running:
- Follow the Docker installation guide.
Visual Studio Code (or your preferred code editor):
Time and Cost
Time: ~20 minutes
Cost: Less than $0.16 (if completed within two hours and resources are deleted at the end).
Step 1: Create a Container Image
1.1 Set Up Your Project
Open a terminal and run the following commands to create a new directory for your project:
mkdir nginx-web-app

cd nginx-web-app
1.2 Create the Web Page
Open the nginx-web-app folder in Visual Studio Code (or your code editor). Inside this folder:

- Create a new file named
index.htmland paste the following code:

<!DOCTYPE html>
<html>
<head>
<title>Sample Web App</title>
<style>
html { color-scheme: light; }
body { width: 35em; margin: 0 auto; font-family: Amazon Ember, Verdana, Arial, sans-serif; }
</style>
</head>
<body>
<h1>Welcome to AWS App Runner!</h1>
<p>If you see this page, the Nginx web server is successfully installed and working.</p>
<p><em>Thank you for using AWS App Runner!</em></p>
</body>
</html>
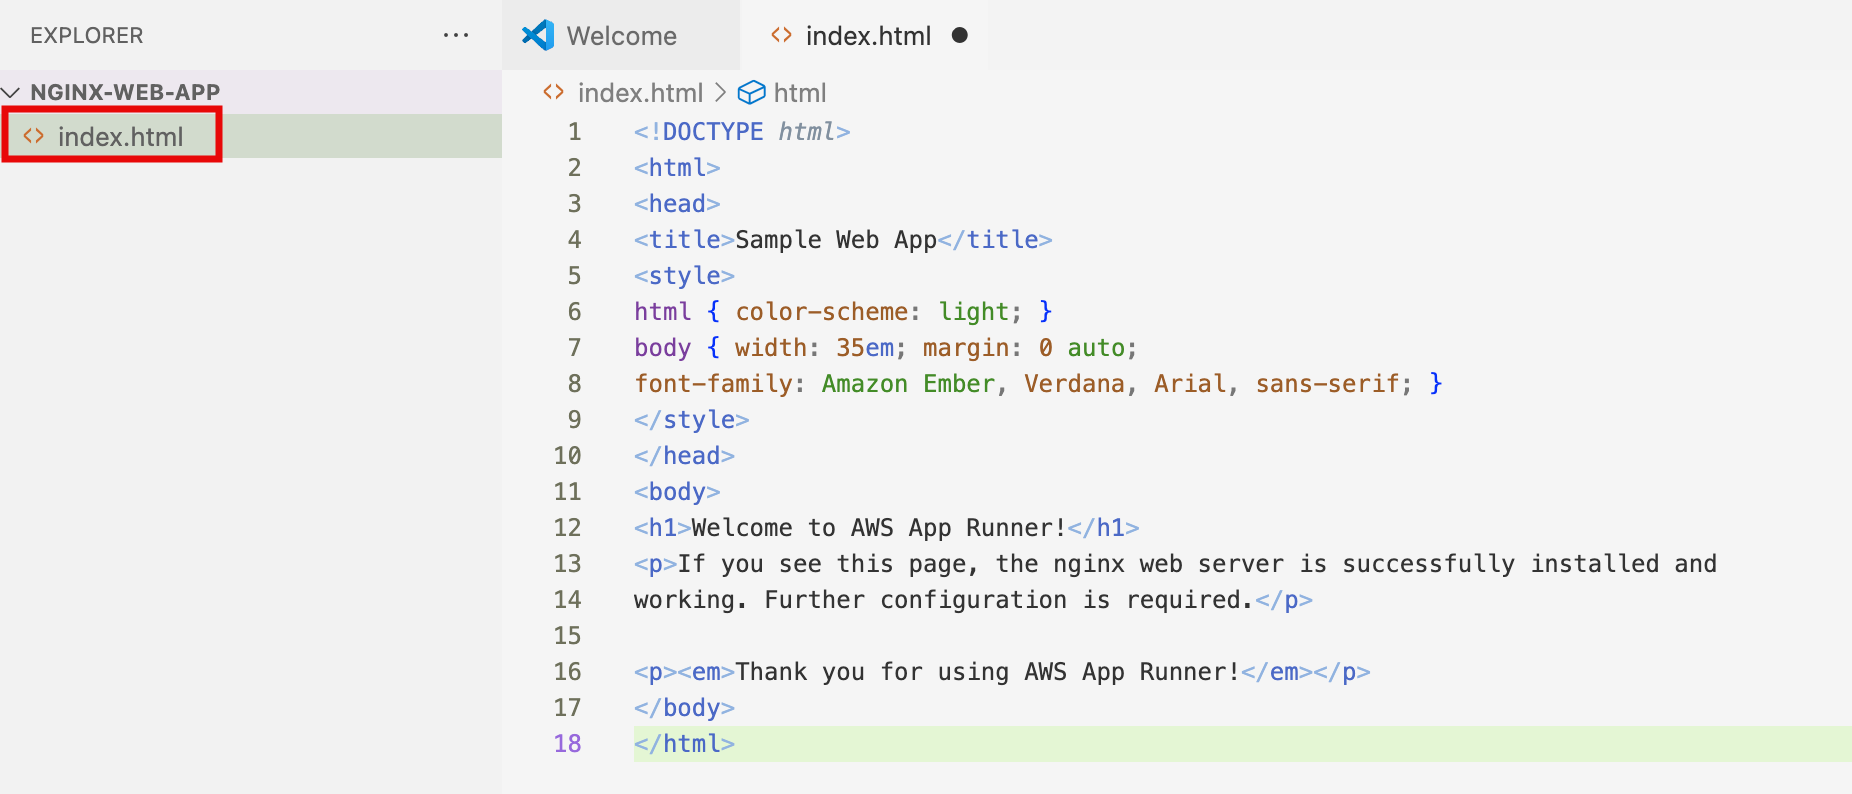
1.3 Create a Dockerfile
Create another file named Dockerfile in the same folder and add the following content:
FROM --platform=linux/amd64 nginx:latest

WORKDIR /usr/share/nginx/html

COPY index.html index.html

1.4 Build the Container Image
Run the following command in the terminal to build the Docker image:
docker build -t nginx-web-app .

Step 2: Push Container Image to Amazon ECR
2.1 Create a Repository
- Sign in to the Amazon ECR Console.

- Click Create Repository.

- Enter
nginx-web-appas the repository name and leave the defaults. Click Create Repository.

2.2 Push the Image to ECR

- Select the newly created repository and click View push commands.
Follow the push commands provided, which typically include:
- Authenticating Docker with ECR:
aws ecr get-login-password --region <region> | docker login --username AWS --password-stdin <account_id>.dkr.ecr.<region>.amazonaws.com
- Authenticating Docker with ECR:
Tagging the image:
docker tag nginx-web-app:latest <account_id>.dkr.ecr.<region>.amazonaws.com/nginx-web-app
Pushing the image:
docker push <account_id>.dkr.ecr.<region>.amazonaws.com/nginx-web-app
Step 3: Create an AWS App Runner Service
- Open the AWS App Runner Console.

- Click Create an App Runner service.

- In the Source and Deployment section:
- Select Amazon ECR as the source.
- Click Browse and select the
nginx-web-apprepository.

- In Deployment Settings, select Create new service role and click Next.

- On the Configure Service page:
- Enter
nginx-web-app-serviceas the Service Name. - Set the Port to
80. - Click Next.
- Enter

- Review the configuration on the next page and click Create & Deploy.

- Wait for the service to deploy. Once the status changes to Running, click the default domain name to view your web app.

- Once the status updates to Running, choose the default domain name URL to view the web app.

- The Welcome page and confirmation message should look like the image on the right.

Step 4: Clean Up Resources
To avoid additional charges, delete the resources you created:
- In the AWS App Runner Console:
- Navigate to your service.
- Click Actions > Delete.

- In the Amazon ECR Console:
- Select the
nginx-web-apprepository. - Click Delete.
- Select the

Conclusion
Congratulations! You have successfully deployed a containerized Nginx web application using AWS App Runner. This guide introduced you to building container images, using Amazon ECR, and the power of AWS App Runner for seamless deployment.
Feel free to experiment further and explore advanced features like custom domains or continuous deployment pipelines. For more resources, check out the AWS App Runner documentation.
Happy coding! 🎉
SOCIAL SHARE CARD GENERATOR