
Table of Contents
- Introduction
- Prerequisites
- Installing and Configuring Terraform
- Setting Up Your Terraform Project in VS Code
- Writing the Terraform Configuration
- Initializing and Applying the Terraform Configuration
- Retrieving the VM's Public IP and Connecting via SSH
- Destroying the VM
- Conclusion
Introduction
This guide walks you through the step-by-step process of provisioning Azure resources using Terraform, deploying a virtual machine, retrieving its IP, connecting via SSH, and finally destroying the VM. We'll use VS Code to edit our Terraform scripts for a smooth development experience.
Prerequisites
Before we begin, ensure you have the following installed on your machine:
Terraform (Download here)
Azure CLI (Download here)
VS Code (Download here)- An active Azure subscription
Installing and Configuring Terraform
First, verify that Terraform is installed by running:
terraform -v
If Terraform is not installed, download and install it from Terraform's official site.
Log in to Azure with:
az login
Set your default subscription (replace your-sub-id with your actual subscription ID):
az account set --subscription your-sub-id
Setting Up Your Terraform Project in VS Code
- Open VS Code
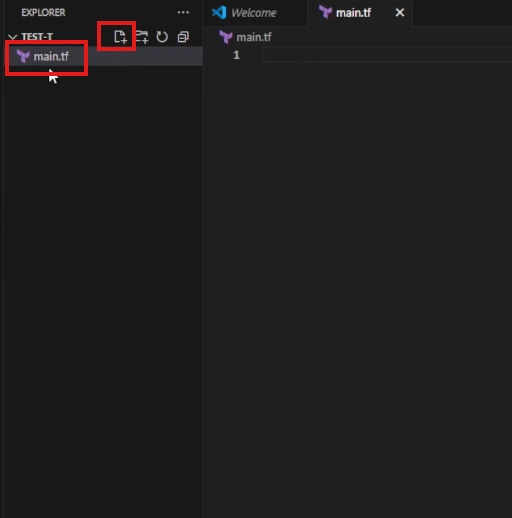
Create a new folder (e.g.,azure-terraform-vm)- Open the folder in VS Code
Create a new file namedmain.tf
Writing the Terraform Configuration
Copy the following Terraform code into main.tf. Replace your-VM-name, your-Vnet-name, etc., with meaningful names of your choice. Don't forget to replace the username and password as well, that's what you will use to SSH into your VM
terraform {

  required_providers {

    azurerm = {

      source  = "hashicorp/azurerm"

      version = "4.3.0"

    }

  }

}


provider "azurerm" {

  features {}

  subscription_id = "your-sub-id"

}


resource "azurerm_resource_group" "your-rg-name" {

  name     = "your-rg-name"

  location = "East US"

}


resource "azurerm_virtual_network" "your-Vnet-name" {

  name                = "your-Vnet-name"

  address_space       = ["10.0.0.0/16"]

  location            = azurerm_resource_group.your-rg-name.location

  resource_group_name = azurerm_resource_group.your-rg-name.name

}


resource "azurerm_subnet" "your-Subnet-name" {

  name                 = "your-Subnet-name"

  resource_group_name  = azurerm_resource_group.your-rg-name.name

  virtual_network_name = azurerm_virtual_network.your-Vnet-name.name

  address_prefixes     = ["10.0.1.0/24"]

}


resource "azurerm_public_ip" "your-ip-name" {

  name                = "your-ip-name"

  location            = azurerm_resource_group.your-rg-name.location

  resource_group_name = azurerm_resource_group.your-rg-name.name

  allocation_method   = "Static"

}


resource "azurerm_network_interface" "your-NIC-name" {

  name                = "your-NIC-name"

  location            = azurerm_resource_group.your-rg-name.location

  resource_group_name = azurerm_resource_group.your-rg-name.name


  ip_configuration {

    name                          = "internal"

    subnet_id                     = azurerm_subnet.your-Subnet-name.id

    private_ip_address_allocation = "Static"

    private_ip_address            = "10.0.1.4"

    public_ip_address_id          = azurerm_public_ip.your-ip-name.id

  }

}


resource "azurerm_linux_virtual_machine" "your-VM-name" {

  name                  = "your-VM-name"

  location              = azurerm_resource_group.your-rg-name.location

  resource_group_name   = azurerm_resource_group.your-rg-name.name

  size                  = "Standard_B2ms"

  admin_username        = "your-admin-username"

  admin_password        = "YourSecurePassword!"

  network_interface_ids = [azurerm_network_interface.your-NIC-name.id]

  disable_password_authentication = false


  os_disk {

    name              = "your-OsDisk-name"

    caching           = "ReadWrite"

    storage_account_type = "Standard_LRS"

  }


  source_image_reference {

    publisher = "Canonical"

    offer     = "0001-com-ubuntu-server-jammy"

    sku       = "22_04-lts-gen2"

    version   = "latest"

  }

}


output "public_ip_address" {

  description = "The public IP address of the virtual machine"

  value       = azurerm_public_ip.your-ip-name.ip_address

}
Initializing and Applying the Terraform Configuration
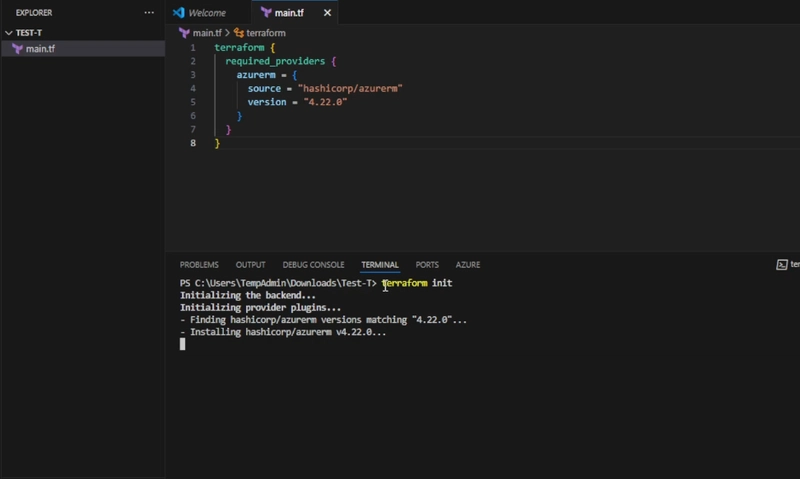
Run the following commands in the terminal inside VS Code:
terraform init
terraform plan

terraform apply -auto-approve

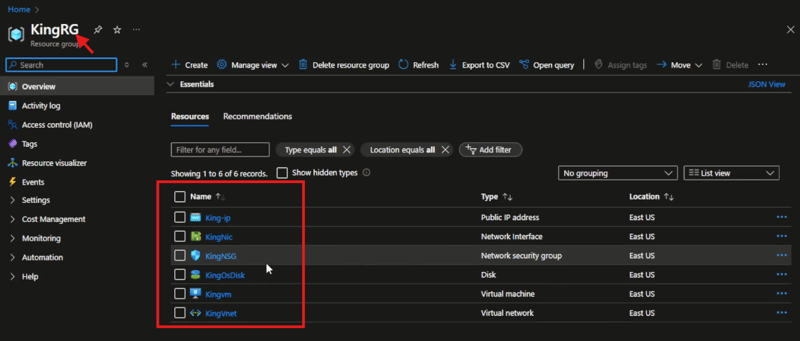
Terraform will create all the specified resources in Azure.
Retrieving the VM's Public IP and Connecting via SSH
Get the public IP:
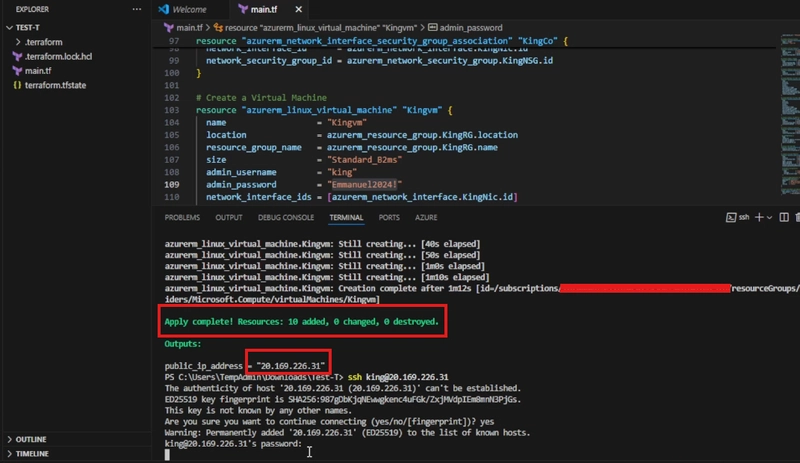
echo $(terraform output -raw public_ip_address)
Use SSH to connect to the VM:
ssh your-admin-username@your-vm-public-ip
Destroying the VM
Once you're done, destroy the VM to avoid unnecessary charges:
terraform destroy -auto-approve

Conclusion
Congratulations! 🎉 You've successfully:
- Provisioned Azure resources using Terraform
- Deployed a Virtual Machine
- Retrieved its IP and connected via SSH
- Cleaned up resources by destroying the VM
This is just the beginning of your Terraform journey in Azure! 🚀 Stay tuned for more DevOps guides.