



This article is written by Alvaro, a member of the Zuplo community and > longtime API builder. You can check out more of his work > here. All opinions expressed are his own.
A while back, I wrote a blog post on building an API using Ruby and Sinatra, which you can check out here. This time, I’m not just switching frameworks (or microframeworks) but also languages—so let’s talk about Python and Flask. 🤓
In the Ruby post, I had some fun weaving in quotes from Dune, but for this one, I’m keeping things simple and focusing more on the API management side of things.
We’ll build a straightforward Blog Post CRUD API, handling everything from creating and reading posts to updating and deleting them. Let’s get started!
What are we going to do today?
- Creating the project
- Adding the required packages
- Creating the API
- Testing our API
- Hosting our API for the world to see
- Creating a project on Zuplo
- Adding a Rate Limit
- Setting API Key Authentication
- Developer Documentation Portal
- Wrapping Up
Creating the project
First, create a folder called SimpleBlogAPI and add a file named app.py inside it. Since this is a simple project, we’ll keep all the source code in a single file to keep things lightweight and easy to follow.
$ mkdir SimpleBlogAPI && cd SimpleBlogAPI

$ nano app.py
Adding the required packages
For this project, we’ll use Flask and Flask-RESTX.
Create a file named requirements.txt and type the following:
Flask==3.1.0

flask_restx==1.3.0

Gunicorn==23.0.0

uvicorn==0.34.0
To install all the dependencies, run the following command:
pip3 install -r requirements.txt
Creating the API
Since we're using Flask-RESTX, the structure will be a bit different and slightly more complex. But trust me, this extra structure will pay off—it'll help us generate the OpenAPI Spec, which we'll need later 😌:
from flask import Flask

from flask_restx import Api, Resource, fields, reqparse

from dataclasses import dataclass


app = Flask(__name__)


@dataclass

class Post:

    id: int

    title: str

    description: str


post_array = []

next_id = 1


@app.route("/")

def root_home():

    return "Welcome to the Simple Blog API!"


api = Api(

    app,

    version="1.0",

    title="Simple Blog API",

    description="An API to control a micro blog",

    doc="/swagger",

)


ns = api.namespace("posts", description="Blog posts")


post_parser = reqparse.RequestParser()

post_parser.add_argument("title", type=str, required=True, help="Post title")

post_parser.add_argument("description", type=str, required=True, help="Post content")


model = api.model("BlogModel", {

    "id": fields.Integer(readOnly=True, description="Post identifier"),

    "title": fields.String(required=True, description="Post title"),

    "description": fields.String(required=True, description="Post content"),

})


@ns.route("/")

class BlogResource(Resource):

    @ns.doc("get_posts")

    @ns.marshal_list_with(model)

    def get(self):

        return post_array


    @ns.doc("add_post")

    @ns.expect(post_parser)

    @ns.marshal_with(model, code=201)

    def post(self):

        global next_id

        args = post_parser.parse_args()

        post = Post(id=next_id, title=args["title"], description=args["description"])

        post_array.append(post)

        next_id += 1

        return post, 201


@ns.route("/<int:id>")

@ns.response(404, "Post not found")

@ns.param("id", "The post identifier")

class PostResource(Resource):

    @ns.doc("get_post")

    @ns.marshal_with(model)

    def get(self, id):

        post = next((post for post in post_array if post.id == id), None)

        if post is None:

            api.abort(404, "Post not found")

        return post


    @ns.doc("update_post")

    @ns.expect(post_parser)

    @ns.marshal_with(model)

    def put(self, id):

        post = next((post for post in post_array if post.id == id), None)

        if post is None:

            api.abort(404, "Post not found")

        args = post_parser.parse_args()

        post.title = args["title"]

        post.description = args["description"]

        return post


    @ns.doc("delete_post")

    @ns.marshal_with(model)

    def delete(self, id):

        global post_array

        post = next((post for post in post_array if post.id == id), None)

        if post is None:

            api.abort(404, "Post not found")

        post_array = [post for post in post_array if post.id != id]

        return "", 204


if __name__ == "__main__":

    app.run(debug=True)
Testing our API
Now that we have data to work with, let’s start our server and test the API.
python3 app.py
Open your favorite web browser and navigate to http://127.0.0.1:5000/:

Success! It’s working as expected, although we have only tested the presentation endpoint 😅 Let's add some entries:
curl -X POST "http://127.0.0.1:5000/posts/" \

-H "Content-Type: application/json" \

-d '{"title": "Hello World", "description": "The first post of the blog"}'
curl -X POST "http://127.0.0.1:5000/posts/" \

-H "Content-Type: application/json" \

-d '{"title": "Coding on Python", "description": "Doing some Python coding"}'
curl -X POST "http://127.0.0.1:5000/posts/" \

-H "Content-Type: application/json" \

-d '{"title": "Python, Flask and Zuplo", "description": "Making APIs better"}'
We should have three new entries, let's check them out.
Navigate to http://127.0.0.1:5000/posts:
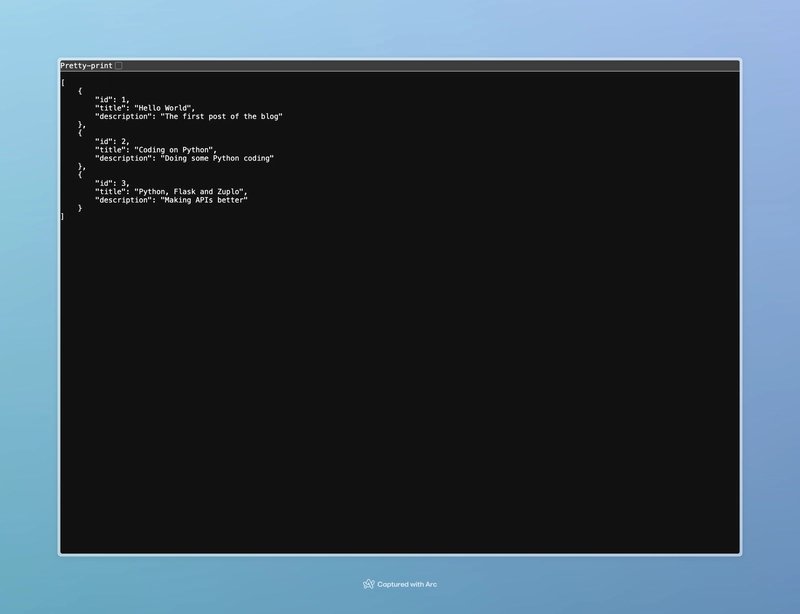
Great news! It works as expected, but only on our local machine. Wouldn’t it be amazing to share it with the world?
First, we need to upload our project to GitHub.
Hosting our API for the world to see
When it comes to hosting an API, there are plenty of options available. For this particular API, we’ll use Render.
We need to create a new web service and select the repository we want to use—in this case, SimpleBlogAPI.
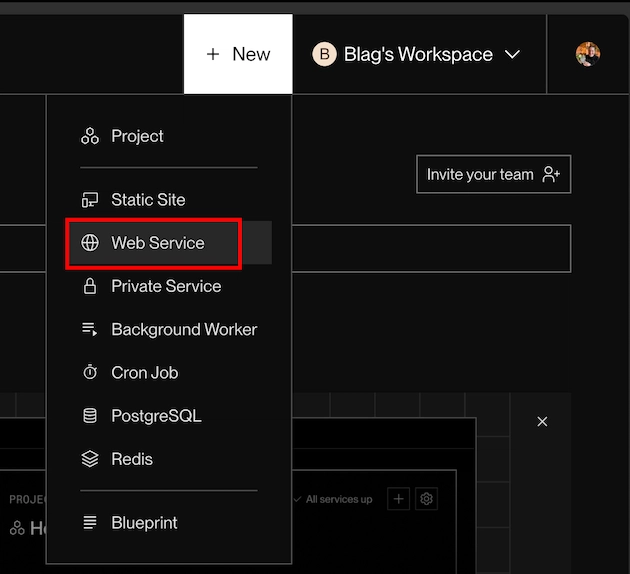
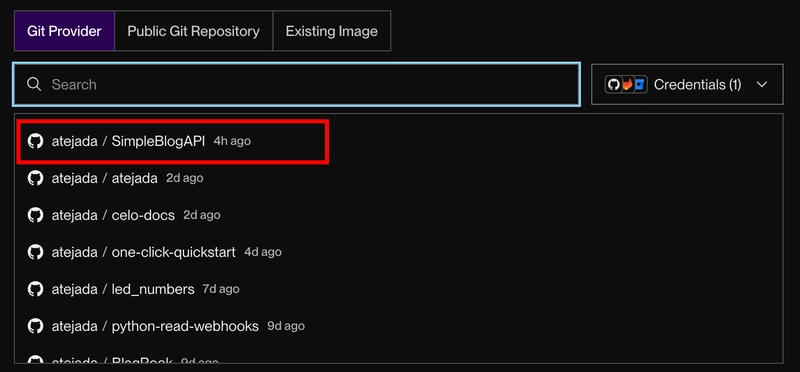
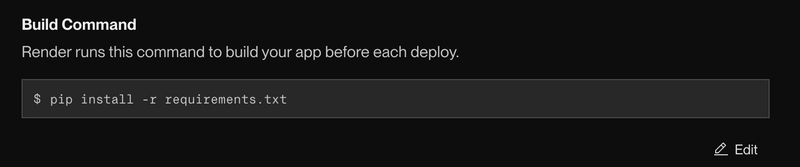
Don’t forget to update the start command to correctly call our app.py file:
Once Render finishes deploying our API, we’ll be able to access the main entry point using:
https://simpleblogapi.onrender.com/
As we just uploaded our API, it's going to be empty and without records, so we need to create some.
Keep in mind that we don't have any kind of authorization in place yet.
As we have created our API with Swagger UI, we can take advantage of it 😎
In our browser, we need to navigate to:
https://simpleblogapi.onrender.com/swagger
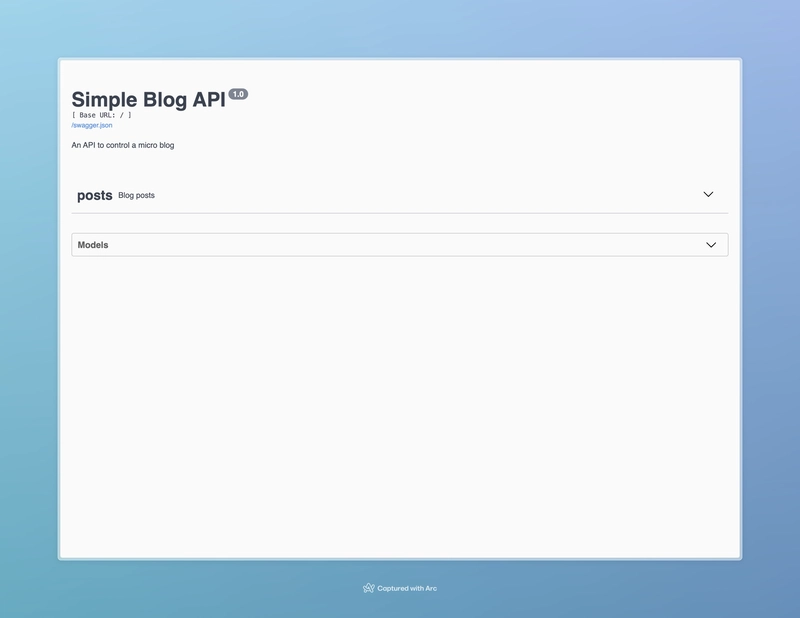
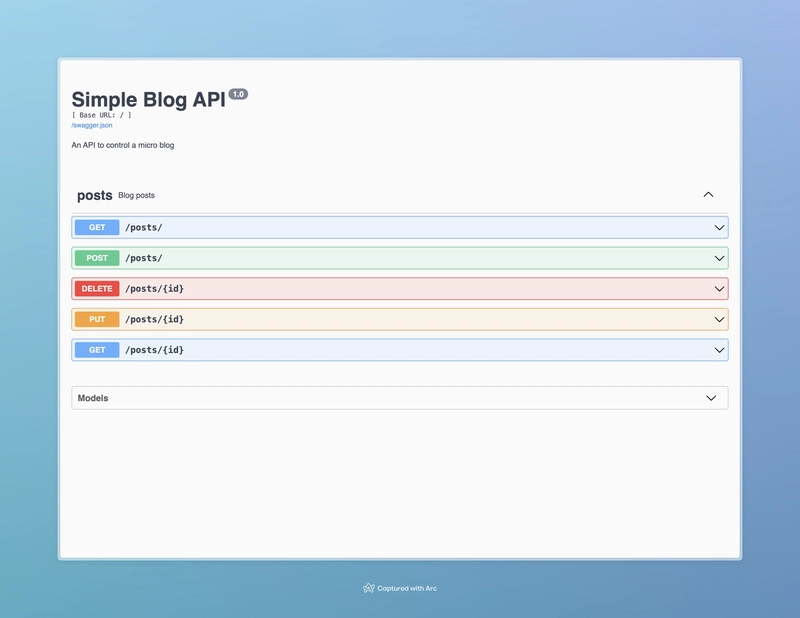
It might not look like much right now, but if you click on the arrow on the right-hand side, you can expand the endpoints and see everything in action.
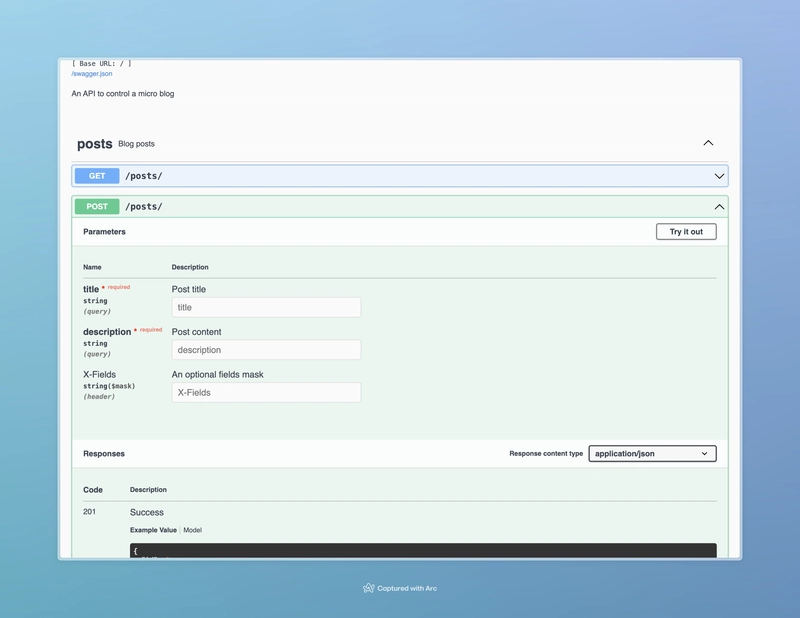
Now, if you expand the POST endpoint and click on the Try it out button, you'll be able to test the API directly from the documentation:
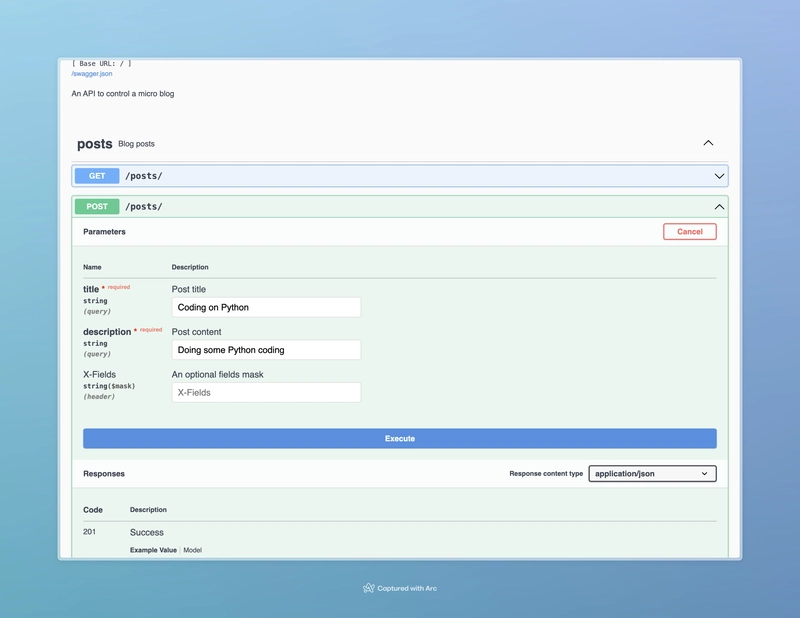
Once you hit the Execute button, you'll be able to add some entries (I've already added the first one). Finally, just press Execute, and the request will be sent! 🚀
When we finished, we can check that the entries had been entered correctly:
https://simpleblogapi.onrender.com/posts
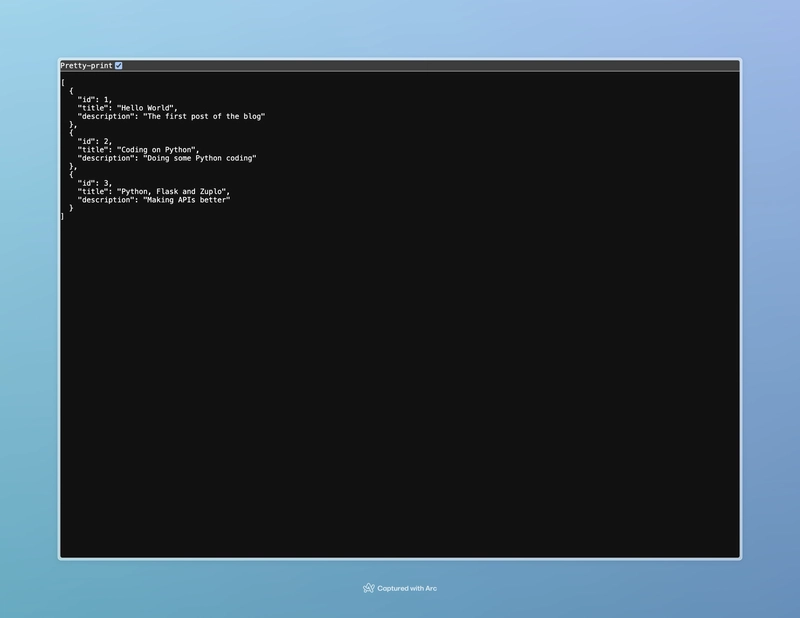
Are we done yet? Yes and no. If we’re happy with it as is—simple, unsecured, and, well, a bit amateurish—then we’re good. But if we want to make it cooler without too much effort, we can start using Zuplo and level up the experience.
Creating a project on Zuplo
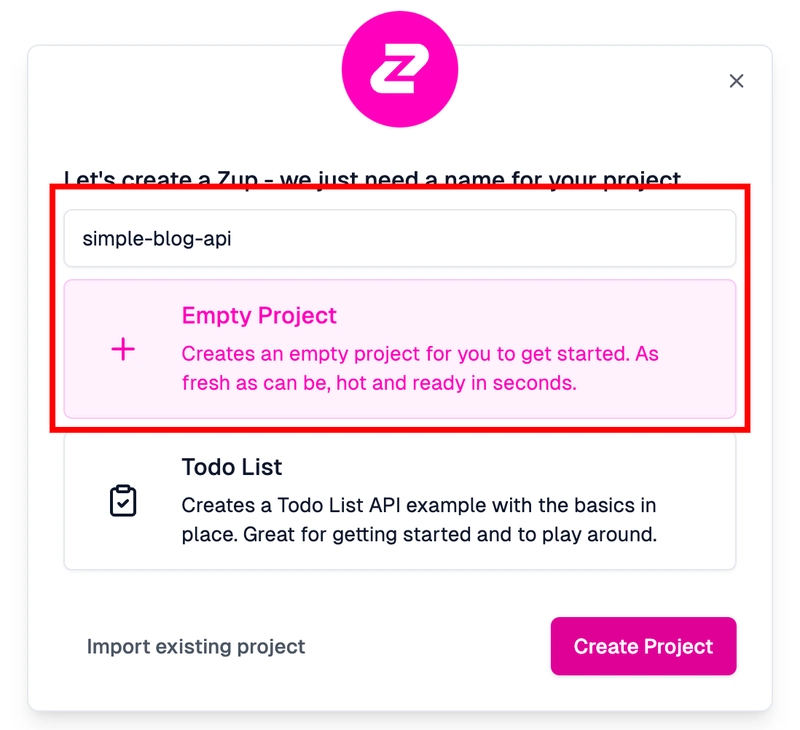
After creating a Zuplo account, we’ll need to set up a new project. We’ll name it simple-blog-api, select an empty project, and then create it. Wondering why Zuplo? Imagine having to build rate limits, authentication, monetization, and other features entirely on your own. That’s a lot of work and hassle. Zuplo simplifies all of that, making it a breeze.
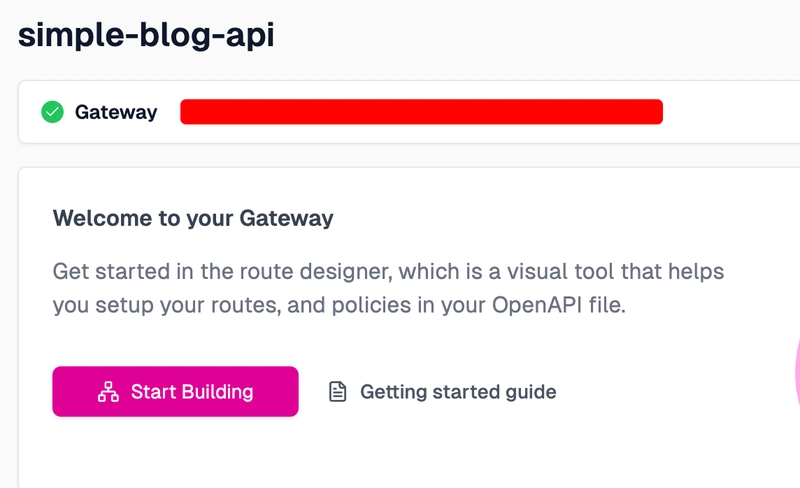
Once the project is created, we’ll be greeted with this screen. From here, simply press Start Building:
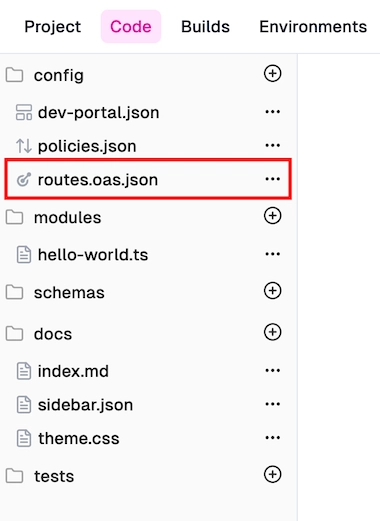
To start enhancing our API, click on routes.oas.json:
Next, we need to add a route, which Zuplo will manage:
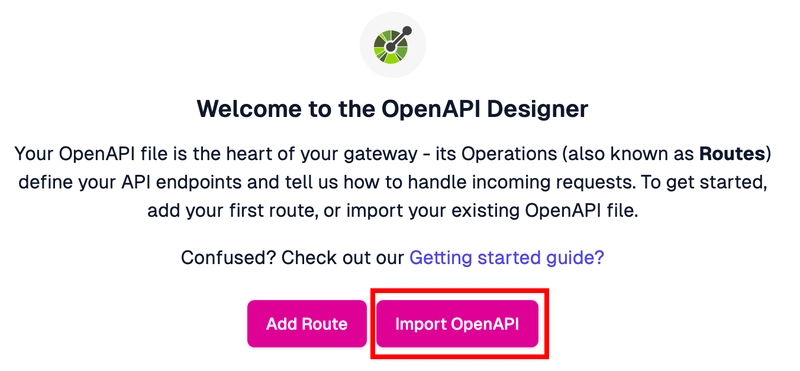
In the Ruby post, we went with Add Route, but this time, we’ll select Import OpenAPI instead. Now, you might be wondering—how exactly do we do that? No worries, it’s easier than you think. 🤓
On the browser we just need to call
https://simpleblogapi.onrender.com/swagger.json
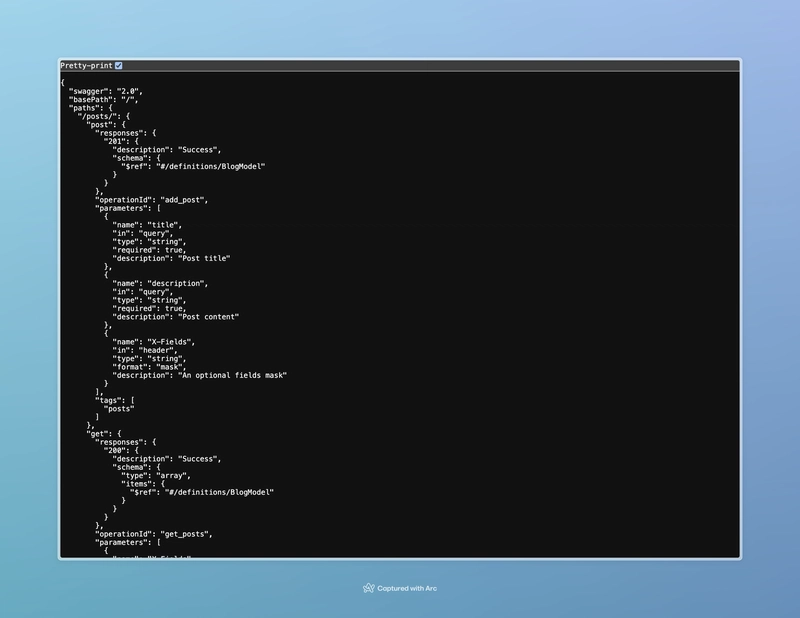
And download it as swagger.json or any other name that we prefer.
Now, we can go back to Zuplo and upload the file.
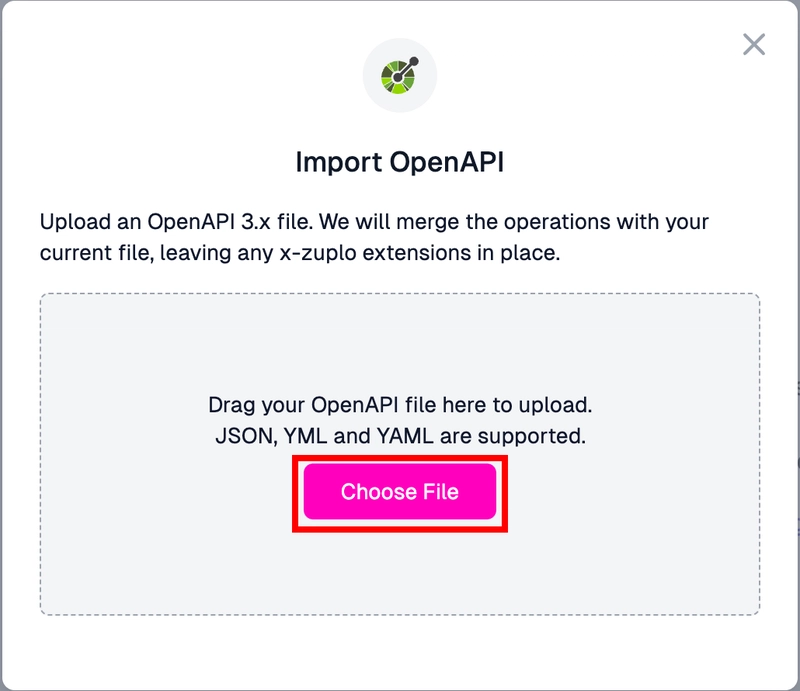
All of our endpoints will be imported automagically 🤩
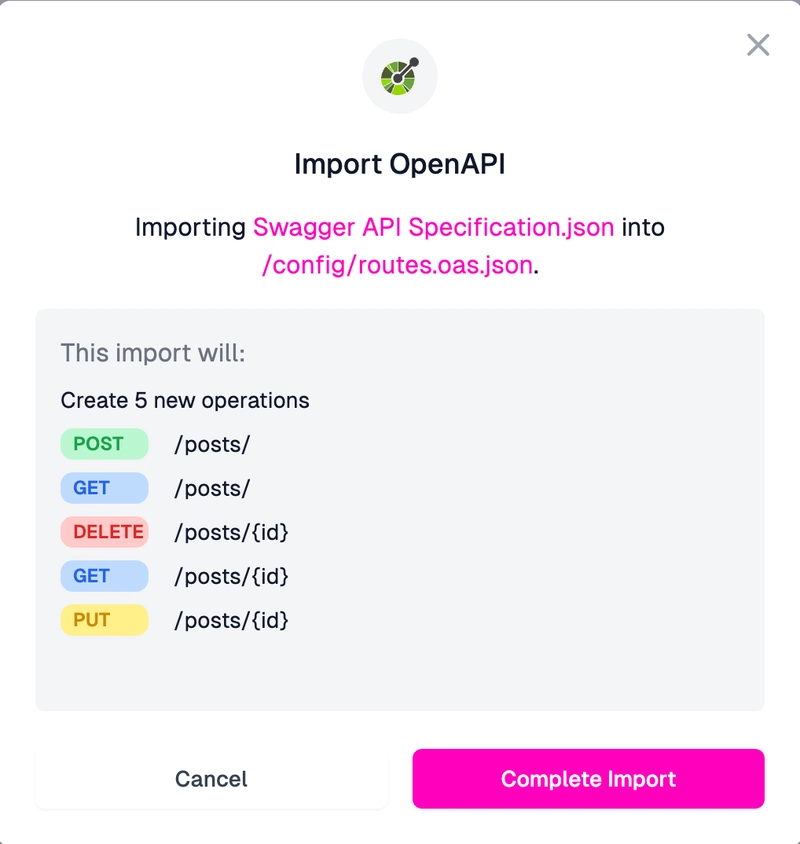
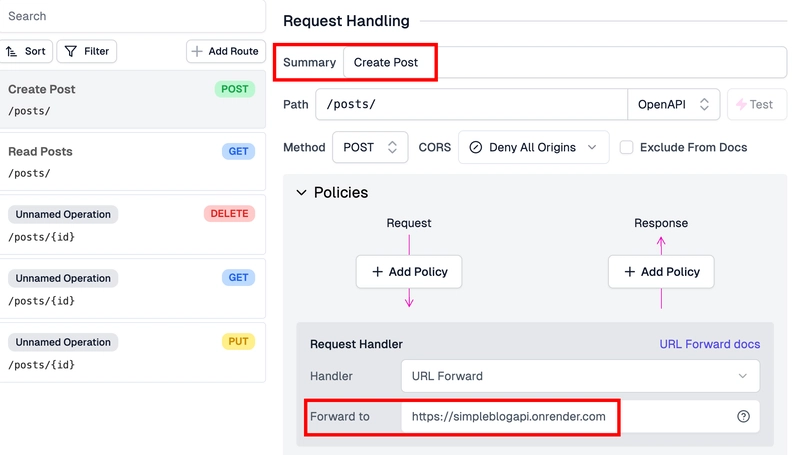
Here, we just need to add a Summary (a brief description of our endpoint) and replace the default Forward to value with our URL from Render. Simple as that!
After configuring the routes, we need to save them. The save button is located at the bottom, or we can press [Command + S] on a Mac.

The build process is blazing fast. Clicking the Test button allows us to, no pun intended, test our API integration.
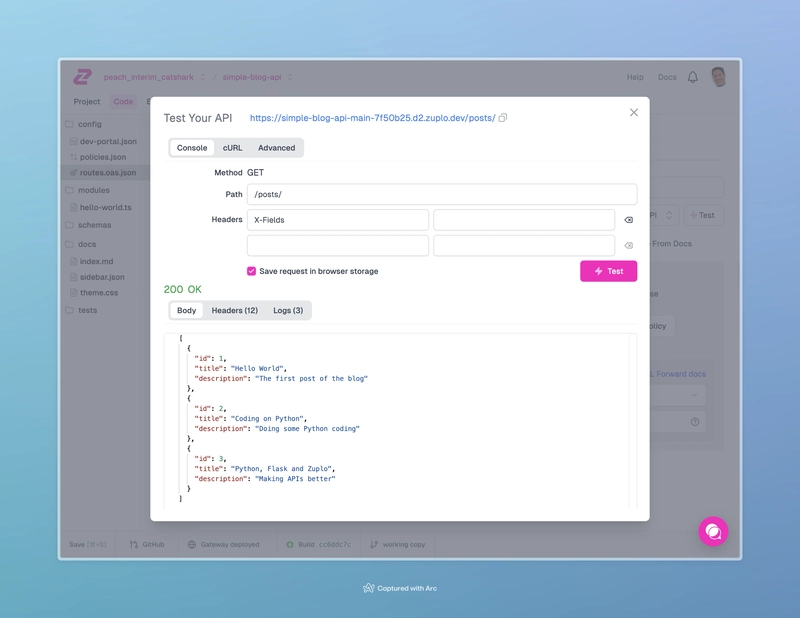
Success! 🥳🥳🥳 Our Zuplo integration is working perfectly!
Adding a Rate Limit
Most likely, we don’t want people abusing our API or attempting to take down our server with DDoS attacks. While coding a rate limit policy isn’t difficult, there are many factors to consider—so why bother? Let’s have Zuplo manage that for us.
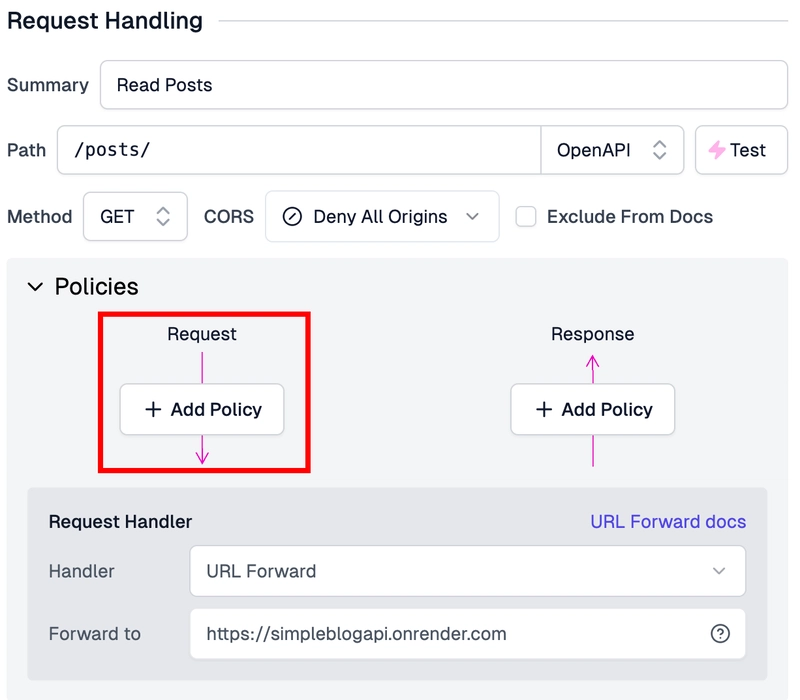
We need to add a new policy on the request side. Since we’ll be dealing with many policies, simply type rate and select Rate Limiting:
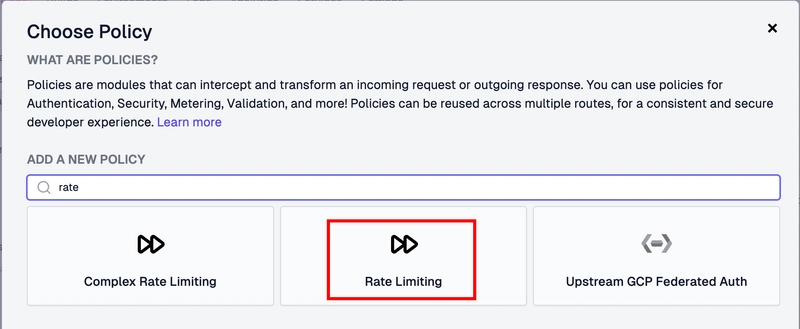
All we need to do here is press Ok. Easy, right?
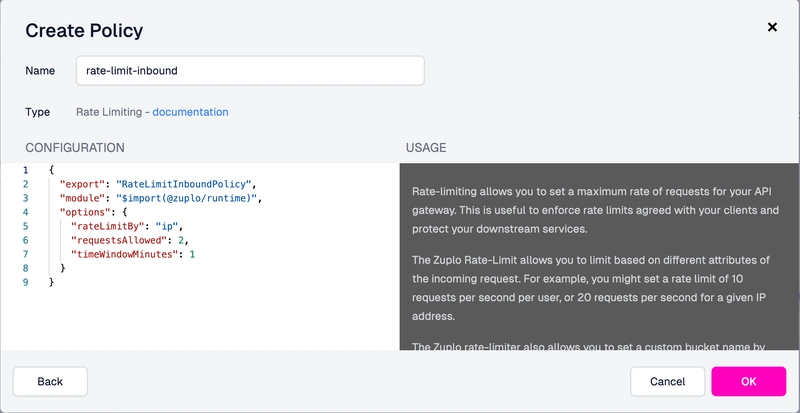
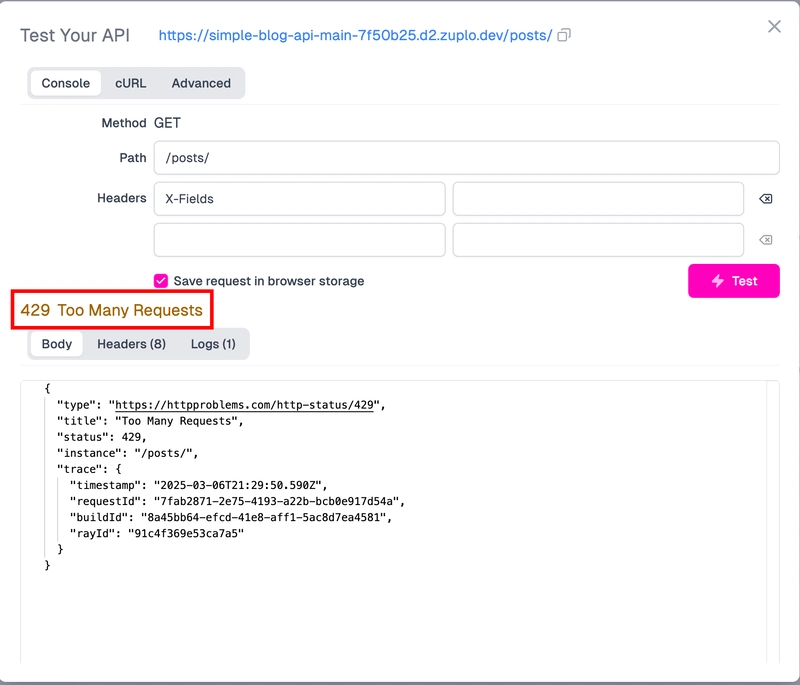
Our rate limit has been added. Now, we just need to save and run the test three times. On the third attempt, we’ll hit the rate limit. Of course, we can adjust this in the policy, as shown in the image above, where requestsAllowed is set to 2.
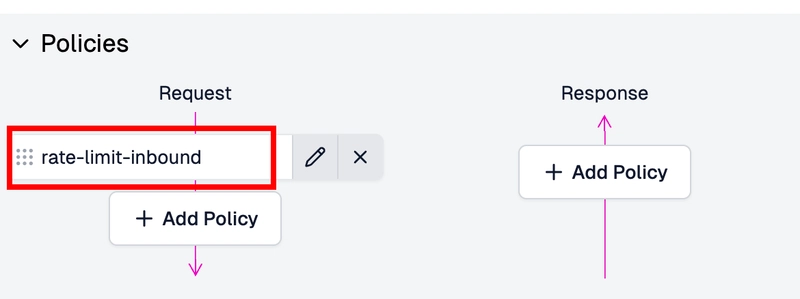
We can do that for all the other endpoints if we want to.
Exceeding the request limit will temporarily block further data requests. We’ll need to wait a minute before trying again.
So far, so good—but what if we want to prevent unauthorized access to our API? We’ll need to implement some sort of authentication. While it’s not overly difficult to build, it involves multiple steps, configurations, and testing. Wouldn’t it be great to let Zuplo handle those details for us? That way, we can focus solely on our API.
Setting API Key Authentication
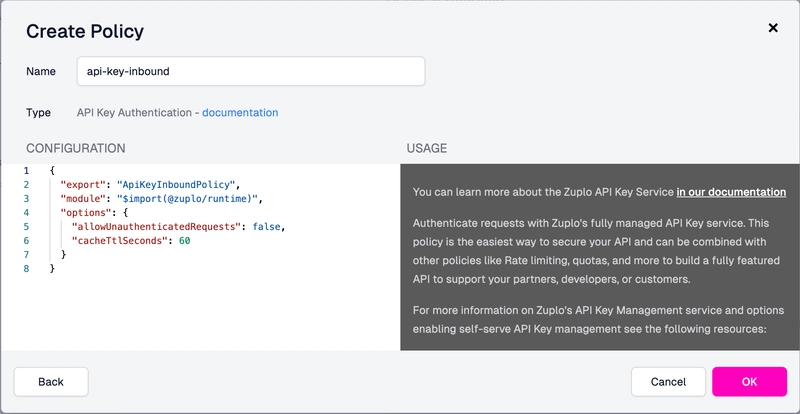
We need to navigate back to the Policies section and add a new policy—this time, API Key Authentication:
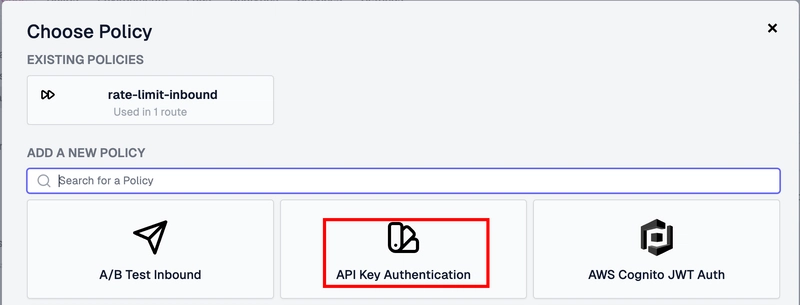
There’s not much to do here—just press OK.
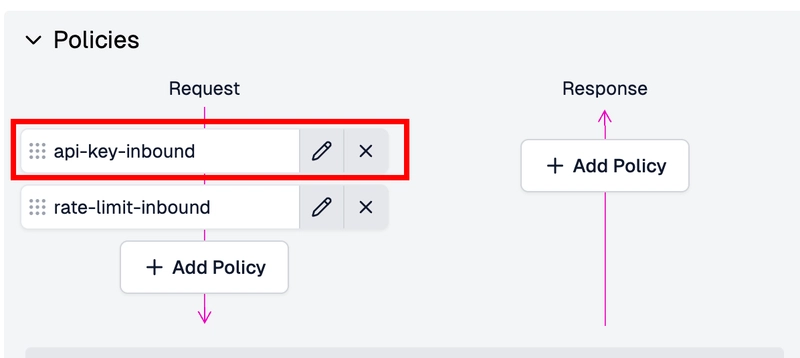
It’s important to move the api-key-inbound policy to the top:
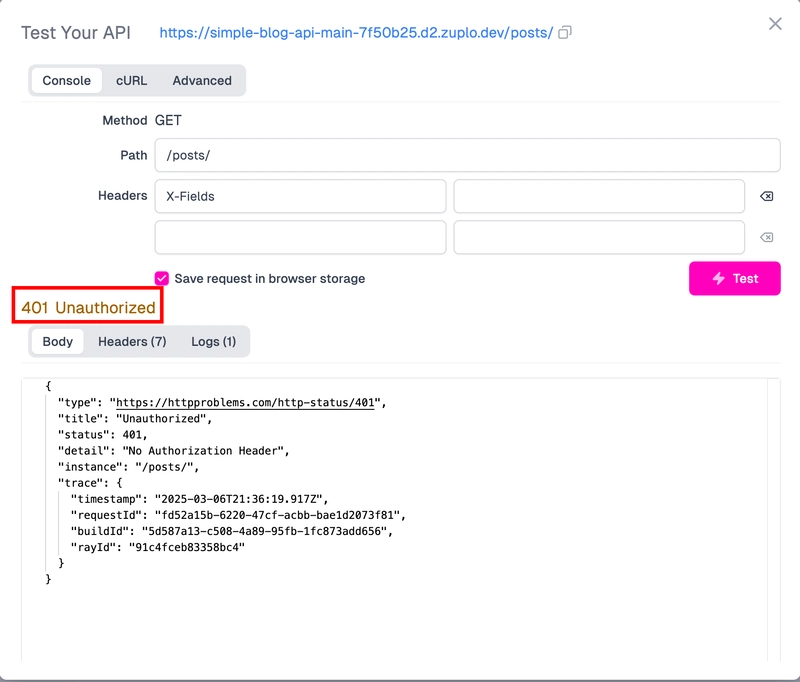
If we save it and try testing the API, access will be denied:
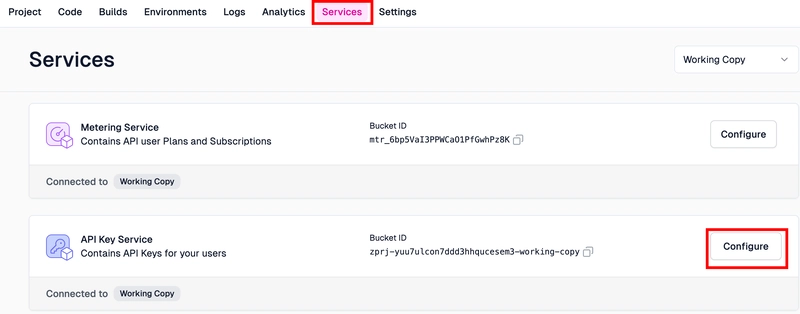
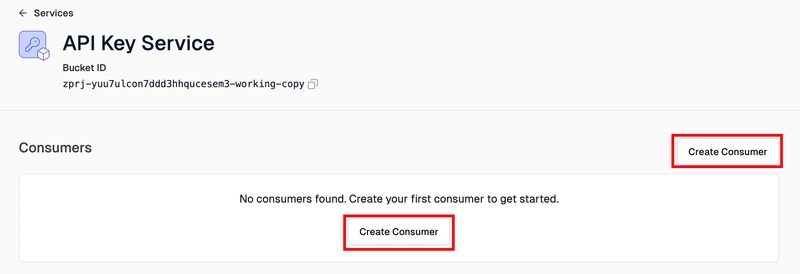
At the top of the screen, click Services, then select Configure under API Key Service:
We need to create a consumer, which will function as a token:
We need to set a name for the subject and specify the email or emails associated with the key:
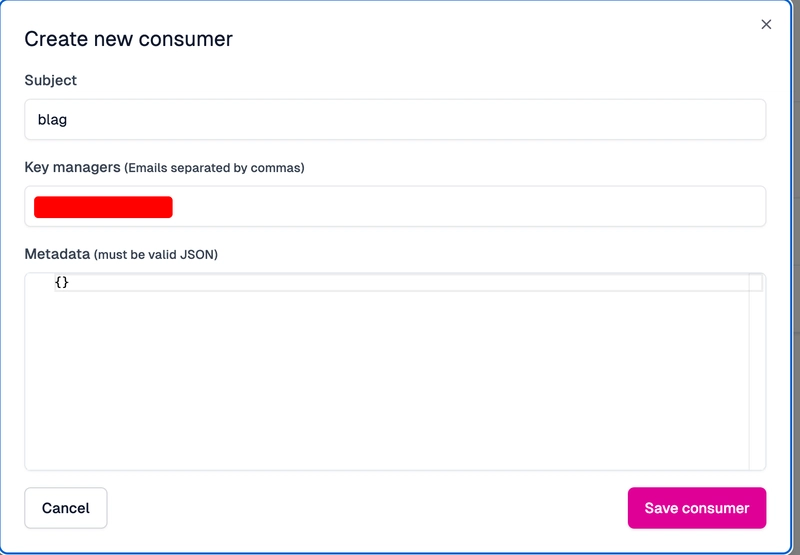
Once we click Save consumer, an API key will be generated. We can either view it or copy it:

Now, we can go back to Code → routes.oas.json to test our API. Here, we need to add the authorization header and pass the Bearer token along with the API key:
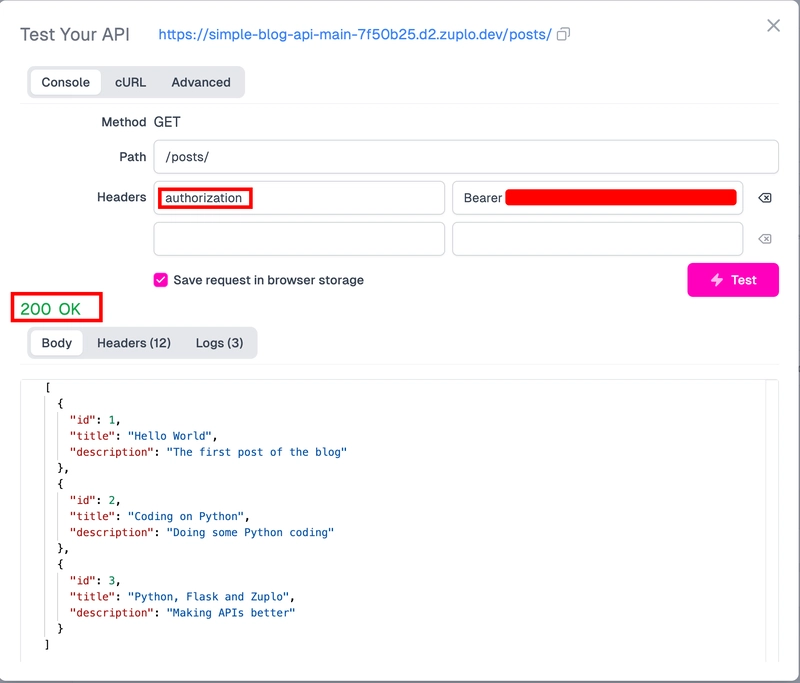
Success once again! It’s working as expected! 🥳🥳🥳
If you think that doing this manually is not for you, read this:

And that’s how you enhance your API with Zuplo 😎 But wait, there’s more! As always, we have a cherry on top.
Developer Documentation Portal
If we click on Gateway at the bottom of the screen, we’ll see a link to the Developer Portal:
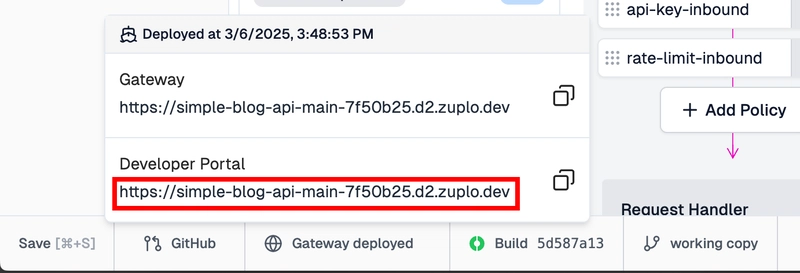
Copy it and add /docs to the very end:
https://simple-blog-api-main-7f50b25.d2.zuplo.dev/docs
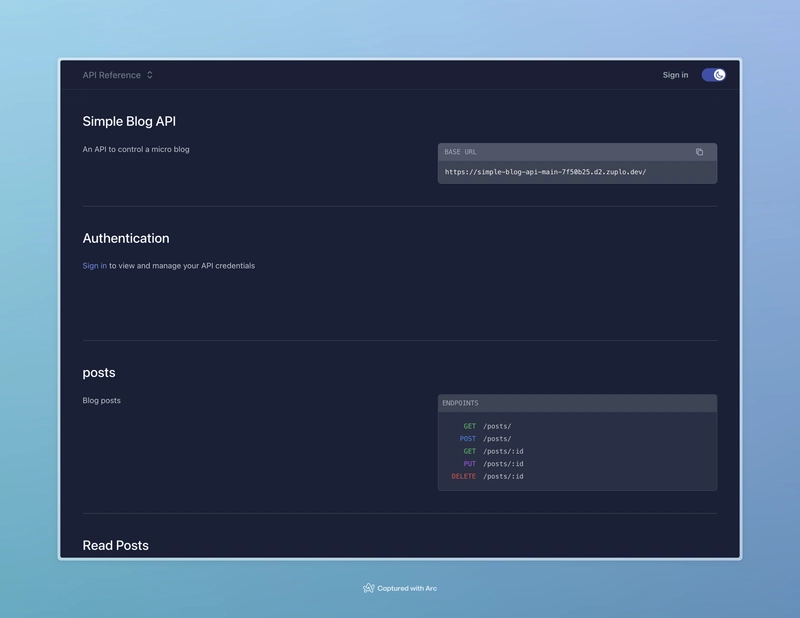
Here, we can see that every route we create will be added to the Stripe-style Developer Portal:
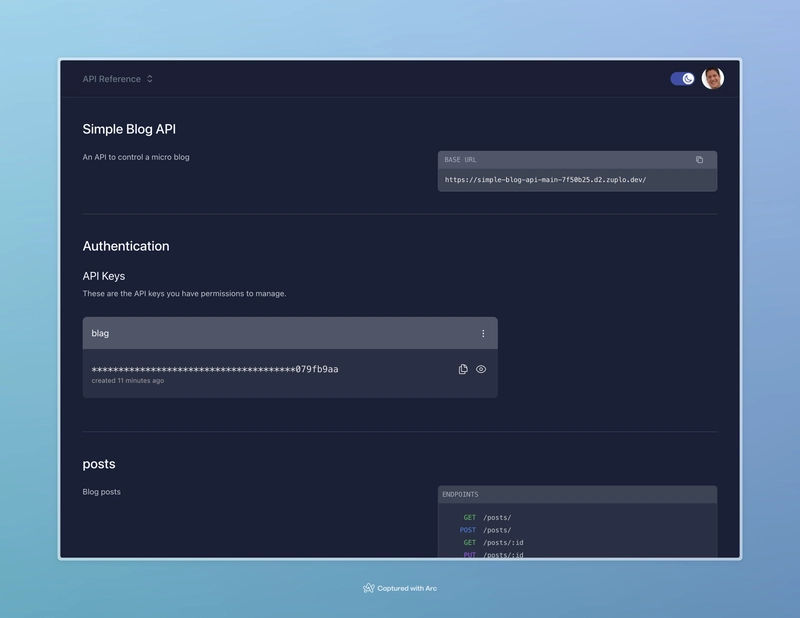
If we log in, we can see our API keys:
Wrapping Up
If you’d like to check out the source code for the API, you can see it on my Github repo SimpleBlogAPI.
If you want to learn more about the tools I used - here are some quick documentation links:
Now, what kind of API will you build with Flask? 😎