



If you’ve been following the rapid evolution of multimodal AI, then you might have heard about the latest trending Gen AI model, that is, ByteDance’s BAGEL. It is one of its kind omni vision language model, designed for everything from image generation, editing, to understanding, with just 7B parameters. Bagel gives tough competition to its top-tier rivals and open-source VLMs like Qwen2.5-VL, DeepSeek's Janus Pro and FLUX-1-dev. It also delivers image generation quality on par with specialist models like SD3. Just give one prompt in natural language, like "add sunglasses to my picture" or "replace the background with sunset view" and it'll do that for you in seconds. For enthusiasts looking to generate visuals from text, editing an image with high precision, or reasoning across multimodal sequences, BAGEL brings state-of-the-art results and unprecedented flexibility in one unified model.
In this guide, we'll walk you through a straightforward, no-fluff, step-by-step process to install and run the model locally or on GPU based setups.
Prerequisites
The minimum system requirements for this use case are:
GPUs: 1x RTXA6000 or 1x H100
Disk Space: 50 GB
RAM: At least 32 GB.
Note: The prerequisites for this are highly variable across use cases. A high-end configuration could be used for a large-scale deployment.
Step-by-step process to install and run Bagel
For the purpose of this tutorial, we’ll use a GPU-powered Virtual Machine by NodeShift since it provides high compute Virtual Machines at a very affordable cost on a scale that meets GDPR, SOC2, and ISO27001 requirements. Also, it offers an intuitive and user-friendly interface, making it easier for beginners to get started with Cloud deployments. However, feel free to use any cloud provider of your choice and follow the same steps for the rest of the tutorial.
Step 1: Setting up a NodeShift Account
Visit app.nodeshift.com and create an account by filling in basic details, or continue signing up with your Google/GitHub account.
If you already have an account, login straight to your dashboard.

Step 2: Create a GPU Node
After accessing your account, you should see a dashboard (see image), now:
1) Navigate to the menu on the left side.
2) Click on the GPU Nodes option.

3) Click on Start to start creating your very first GPU node.
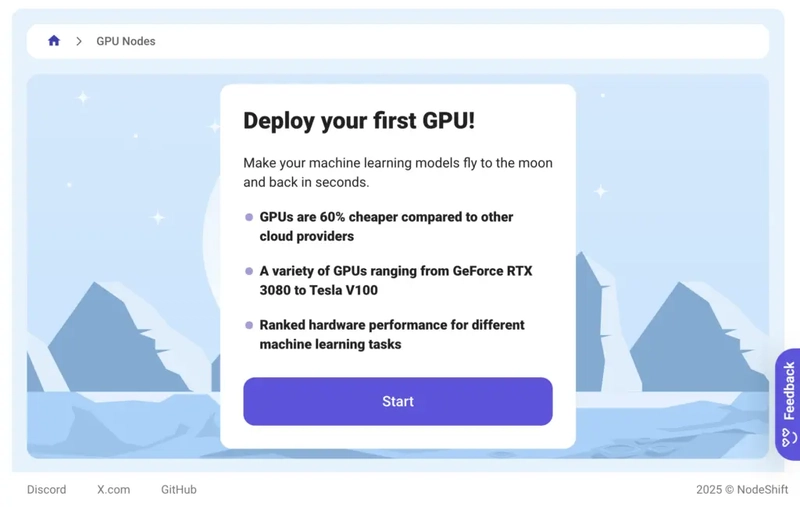
These GPU nodes are GPU-powered virtual machines by NodeShift. These nodes are highly customizable and let you control different environmental configurations for GPUs ranging from H100s to A100s, CPUs, RAM, and storage, according to your needs.
Step 3: Selecting configuration for GPU (model, region, storage)
1) For this tutorial, we’ll be using the H100 GPU; however, you can choose any GPU of your choice based on your needs.
2) Similarly, we’ll opt for 100GB storage by sliding the bar. You can also select the region where you want your GPU to reside from the available ones.

Step 4: Choose GPU Configuration and Authentication method
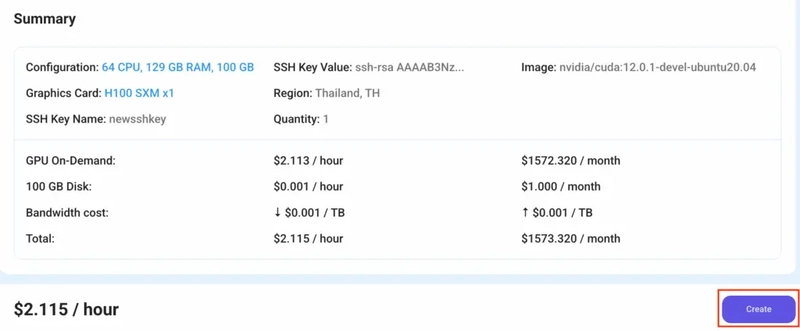
1) After selecting your required configuration options, you'll see the available GPU nodes in your region and according to (or very close to) your configuration. In our case, we'll choose a 1x H100 80GB GPU node with 64vCPUs/126GB RAM/100GB SSD.

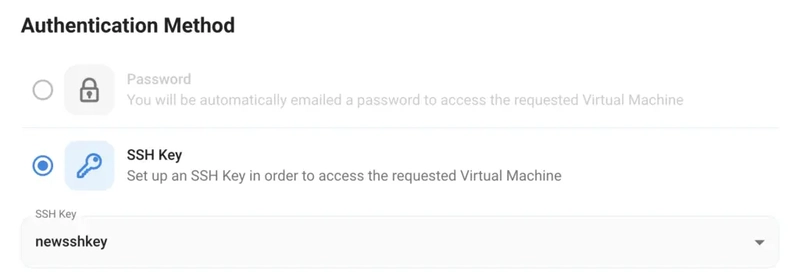
2) Next, you'll need to select an authentication method. Two methods are available: Password and SSH Key. We recommend using SSH keys, as they are a more secure option. To create one, head over to our official documentation.
Step 5: Choose an Image
The final step would be to choose an image for the VM, which in our case is Nvidia Cuda, where we’ll deploy and run the inference of our model.

That's it! You are now ready to deploy the node. Finalize the configuration summary, and if it looks good, click Create to deploy the node.

Step 6: Connect to active Compute Node using SSH
1) As soon as you create the node, it will be deployed in a few seconds or a minute. Once deployed, you will see a status Running in green, meaning that our Compute node is ready to use!
2) Once your GPU shows this status, navigate to the three dots on the right and click on Connect with SSH. This will open a pop-up box with the Host details. Copy and paste that in your local terminal to connect to the remote server via SSH.

As you copy the details, follow the below steps to connect to the running GPU VM via SSH:
1) Open your terminal, paste the SSH command, and run it.
2) In some cases, your terminal may take your consent before connecting. Enter ‘yes’.
3) A prompt will request a password. Type the SSH password, and you should be connected.
Output:

Next, If you want to check the GPU details, run the following command in the terminal:
!nvidia-smi
Step 7: Set up the project environment with dependencies
1) Create a virtual environment using Anaconda.
conda create -n bagel python=3.10 && conda activate bagel
Output:

2) Clone the official repository of Bytedance/Bagel.
git clone https://github.com/ByteDance-Seed/Bagel.git
Output:

3) Move inside the project directory and install PyTorch dependencies.
pip install torch torchvision torchaudio --index-url https://download.pytorch.org/whl/cu121
Output:

4) Install flash_attn.
pip install flash-attn --no-build-isolation
Output:

5) Before installing dependencies mentioned in the requirements.txt file, we'll edit the contents of the file to remove the packages that we've already installed above (with latest versions).
For this, if you're using a remote server (e.g. NodeShift GPU), you'll first need to connect your local VS Code editor to your remote server via SSH with the following steps:
a) Install the “Remote-SSH” Extension by Microsoft on VS Code.
b) Type “Remote-SSH: Connect to Host” on the Command Palette.
c) Enter the host details, such as username and SSH password, and you should be connected.
Once you're inside the VS Code editor (from ssh), open the Bagel project directory. Then replace the contents of the requirements.txt with the following:
decord==0.6.0

einops==0.8.1

huggingface_hub==0.29.1

matplotlib==3.7.0

numpy==1.24.4

opencv_python==4.7.0.72

pyarrow==11.0.0

PyYAML==6.0.2

Requests==2.32.3

safetensors==0.4.5

scipy==1.10.1

sentencepiece==0.1.99

transformers==4.49.0

accelerate>=0.34.0

wandb
6) Come back to terminal and run the following commands to install all the updated dependencies required to run the model.
pip install - r requirements.txt

pip install gradio

apt update && apt install -y libgl1
Output:

7) Login to Hugging Face CLI with HF access token.
(Enter your HF READ token when prompted.)
huggingface-cli login
Output:

Step 8: Download and Run the Model
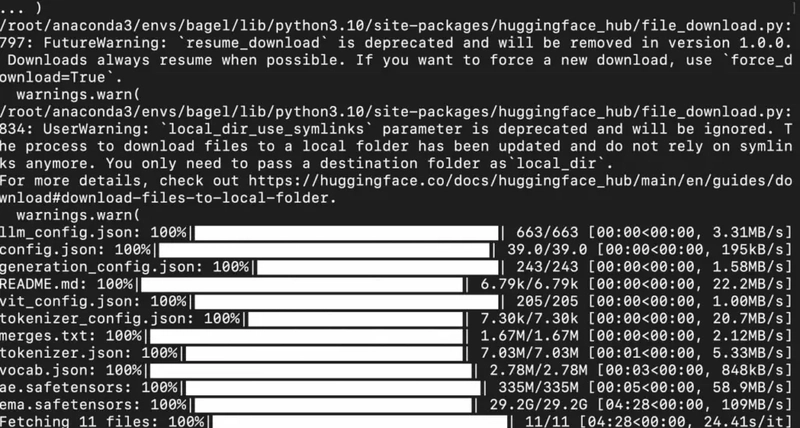
1) Move inside Python console by running python3 and download model checkpoints by entering the following script in the console.
(Replace "/path/to/save/BAGEL-7B-MoT" with the appropriate path where you want to save the model checkpoints. E.g., "/root/Bagel/models/BAGEL-7B-MoT")
from huggingface_hub import snapshot_download


save_dir = "/path/to/save/BAGEL-7B-MoT"

repo_id = "ByteDance-Seed/BAGEL-7B-MoT"

cache_dir = save_dir + "/cache"


snapshot_download(cache_dir=cache_dir,

  local_dir=save_dir,

  repo_id=repo_id,

  local_dir_use_symlinks=False,

  resume_download=True,

  allow_patterns=["*.json", "*.safetensors", "*.bin", "*.py", "*.md", "*.txt"],

)
Output:
2) After the model is downloaded successfully, we'll run it using Gradio. Before running, make sure to replace the model_path placeholder in app.py with the actual path to the saved model checkpoints.
The actual path should be the same that was used while downloading the model in the previous step.

3) Launch the Gradio app with --share argument to get the public live URL of the app.
python app.py --share
Output:

Once app is up and running, you'll see a public URL where you can access the app.
4) If you do not want to create a public URL and instead want to access the app with local URL, you can access it by visiting http://127.0.0.1:7860.
However, if you're on a remote machine (e.g., NodeShift GPU), you'll need to do SSH port forwarding in order to access the local Gradio URL session on your local browser.
Run the following command in your local terminal after replacing:
<YOUR_SERVER_PORT> with the PORT allotted to your remote server (For the NodeShift server - you can find it in the deployed GPU details on the dashboard).
<PATH_TO_SSH_KEY> with the path to the location where your SSH key is stored.
<YOUR_SERVER_IP> with the IP address of your remote server.
ssh -L 7860:localhost:7860 -p <YOUR_SERVER_PORT> -i <PATH_TO_SSH_KEY> root@<YOUR_SERVER_IP>
Once you're connected, you'll be able to access the app on local browser at this URL: http://127.0.0.1:7860
Step 9: Run the Model for Inference
Finally, we'll all the three features of this model, i.e.,
Text to Image
Image Edit
Image Understanding
with some sample images.
Text to Image
Prompt:

Thinking Process:

Result:

Image Edit
Prompt: "add sunglasses to the image"
Thinking Process:

Result:

Image Understanding
Prompt: "Extract the written text from this image."
Result:

Conclusion
To wrap up, now, we've already experienced that BAGEL isn’t just another image generation model, it’s a powerful, unified system capable of high-quality image editing, multimodal understanding, and even complex visual reasoning tasks like 3D manipulation and future frame prediction. With its Mixture-of-Experts architecture and training on trillions of multimodal tokens, it sets a new bar for open-source visual language models. And when paired with NodeShift cloud setup, deploying and running BAGEL becomes seamless, whether you're experimenting with text-to-image prompts or building production-grade Gen AI applications. NodeShift’s GPU-powered environment removes the usual friction of setup and compatibility, allowing you to focus entirely on unlocking BAGEL’s full creative and technical potential.
For more information about NodeShift:
SOCIAL SHARE CARD GENERATOR